Even the most notorious motorcycle gang has a set of core values that is hung on the wall near their club house entrance, for all to see and follow. The same applies to the Unit One work space.
Mission Statement
By appointment to the citizens of Ginnunga Gap, the Unit One work space is a supplier of a work area equipped with tools and machines, and helpful people with insight, skill and knowledge, all organized to transform individual and collective visions into practical products that make the world a better place.
Core Values
Work at Unit One is comprehensive. It involves using one’s brain, as well as one’s body. Creativity finds expression through mental and physical work processes.
In terms of health, safety and the environment, the work space is equipped with fire fighting and first aid equipment, bright lighting and air purification equipment. Workers are expected to use protective equipment including, but not restricted to, ear plugs, gloves, respirators, safety glasses, safety shoes and comfortable workwear.
Researching and developing useful and environmentally friendly products and services is an essential part of the work space experience.
Training is an ongoing activity. Almost all tools require a safety checkout or training to ensure that all users have the necessary skills.
Products and services require documentation. These may take the form of technical drawings, written notes as well as videos. Everything made in the workshop shall be open source design.
Power to the workshop is provided by renewable energy.
Material used in the workshop are organically or technically recyclable, using cradle to cradle principles.
Socially useful products and services are to be made in the workshop.
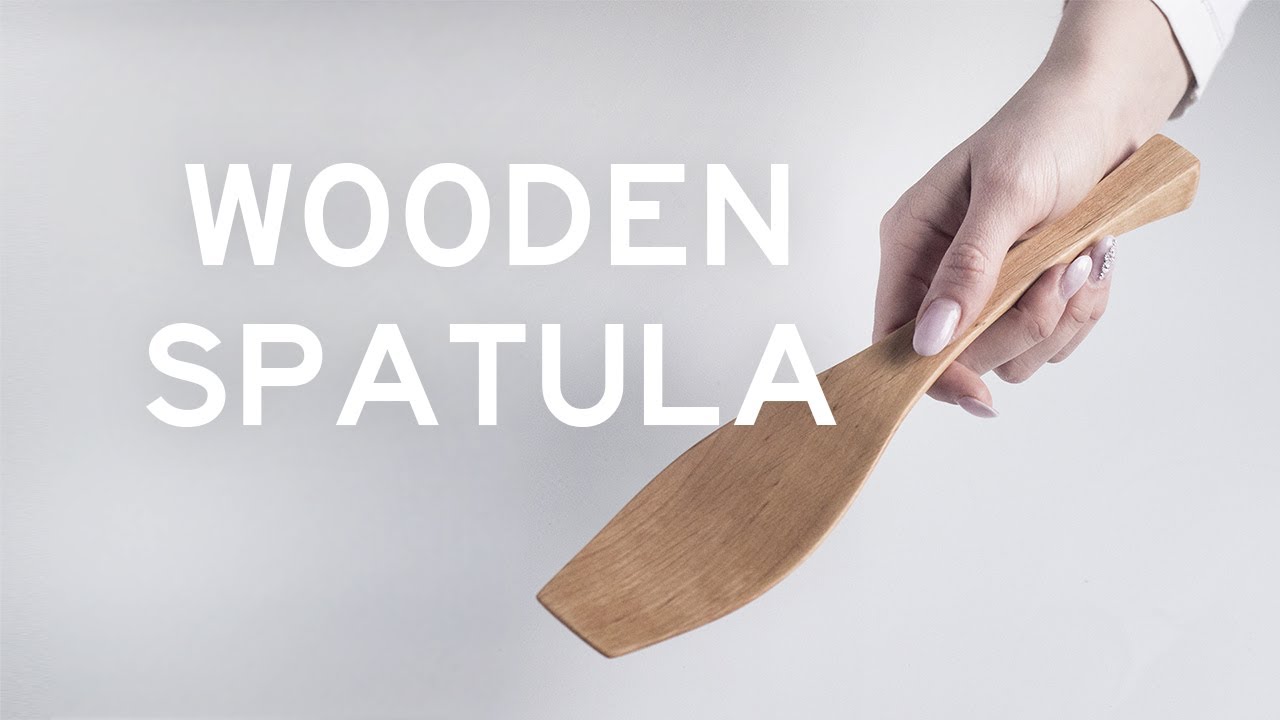
This post is especially for three ladies who have been subjected to lofty ideas about making geodesic dome greenhouses, when all they really wanted was to learn how to make a wooden spatula.
Minni, the minimalist maker from Finland, shows them how to do it in a three minute video: https://www.youtube.com/watch?v=sZZtGSctCUw
TOOLS: Pen, spatula template, band saw, belt sander, sandpaper
USEFUL TIPS: After sanding, wet the spatula to raise the wood grain. Let dry, and sand again. This makes the surface very smooth.
SAFETY NOTES: Safety first! Always be careful with dangerous tools and make sure you know how to use them correctly.
MUSIC BY Henbrix
Here is the spatula template from her website: https://theminimalistmaker.com/shop/7k7o6c3lkngpjisbi7cyc0e41xg9vt
The Unit One work space has a band saw as well as a belt sander. There is an alder tree on the property, but it is too young and small to be used to make spatulas.
In this Workshop Layout series, I will periodically look at the various machines at the Unit One workshop at Ginnunga Gap, and commenting on some of their features, the challenges of using them, in terms of workshop location. In this first post, attention will be focused on the placement of a rip saw (aka table saw), as its position affects almost everything else.
Being a workshop owner is much like being a kennel owner. The first question begging to be answered is, Who is the owner? Is it a person? Or is it the dogs/ machines? Today, the dogs/ machines may lack legal ownership, but they seem in control. The reason for this is the lack of workshop space to handle materials exceeding about 2 400 mm in length.
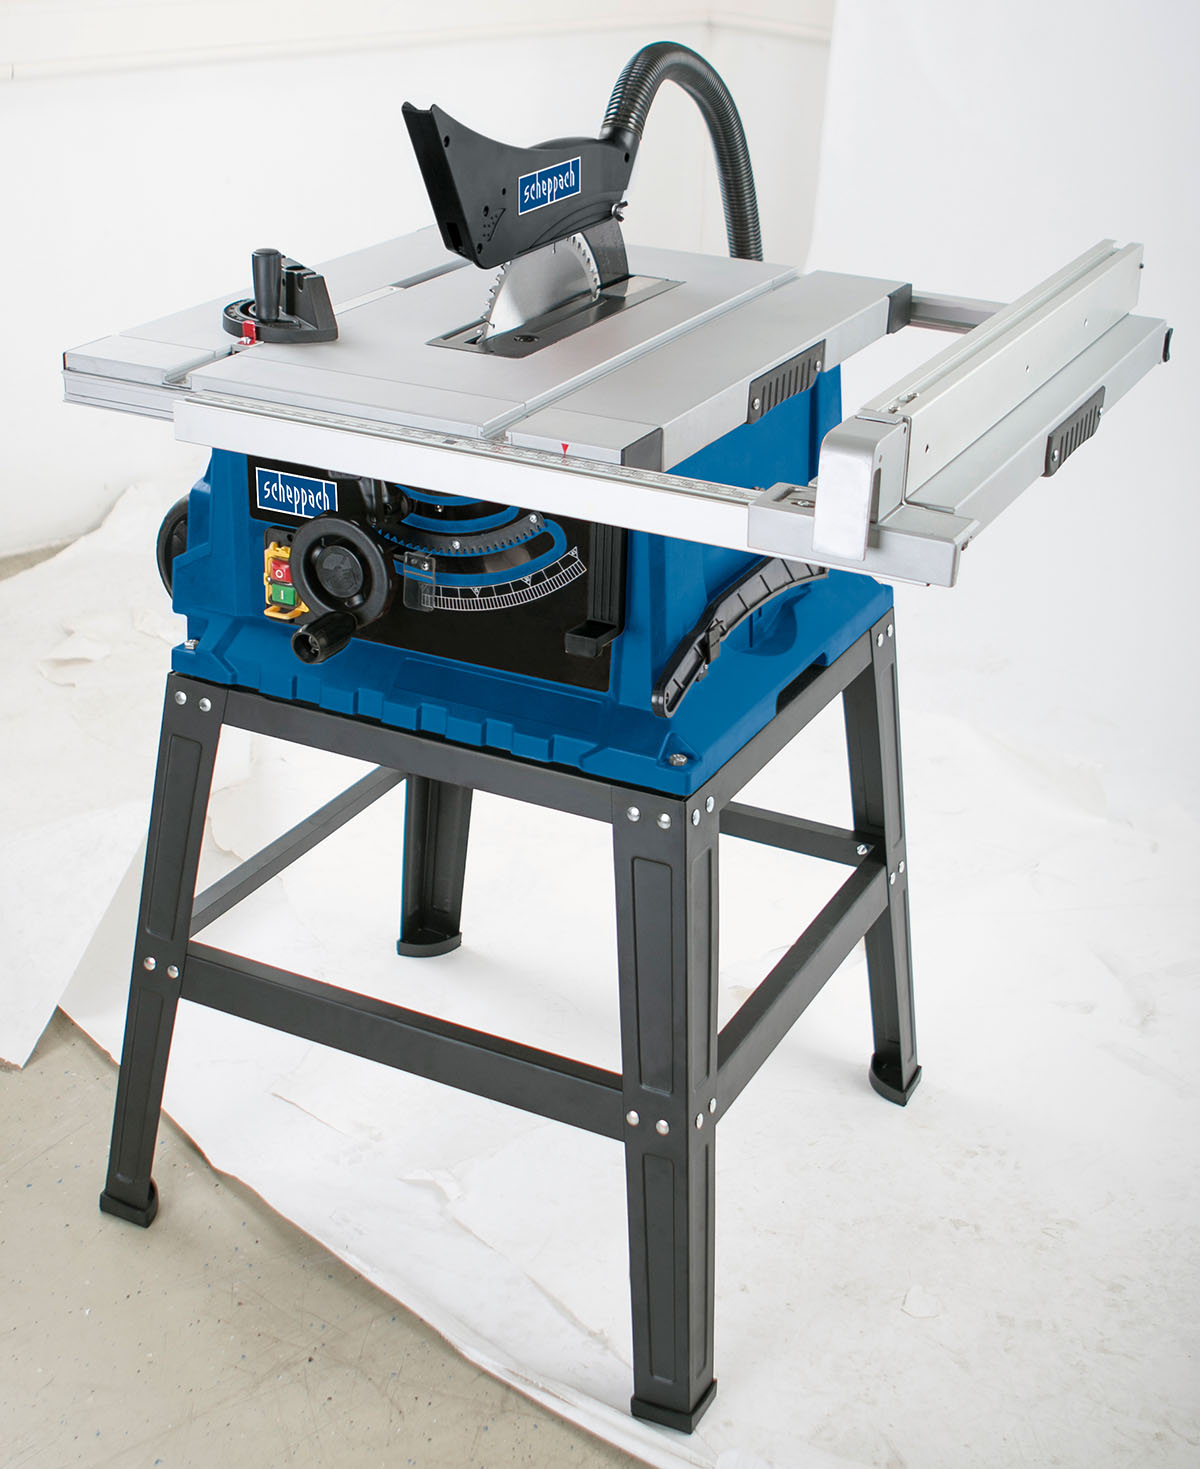
Scheppach HS105 rip saw (table saw), in the same orientation as visitors will see it entering the Unit One workshop at Ginnunga Gap.
There have been four variations of a single workshop design made for Unit One, with machines along one wall, Machine Alley. These are Workshop 1.0, 1.1, 1.2 and 1.3. In all of these versions, the rip saw’s arbor is positioned at the halfway point of the length of the workshop. The workshop is slightly over 6 meters in length. With the arbor half-way, sheet goods, typically 2.4 meters long, can be positioned on the in-feed table, then fed through the saw to the out-feed table, without having to move machinery.
The basic design of Workshop 1.0 and 1.1 were identical, but with two pieces of equipment changing places. At this stage of development, every piece of equipment was assigned a width of 600 mm, with the exception of the rip-saw (previously referred to as the table saw), which was given 1 200 mm. The basic design was made without any equipment having been purchased. Feed direction was ambiguous in the first design.
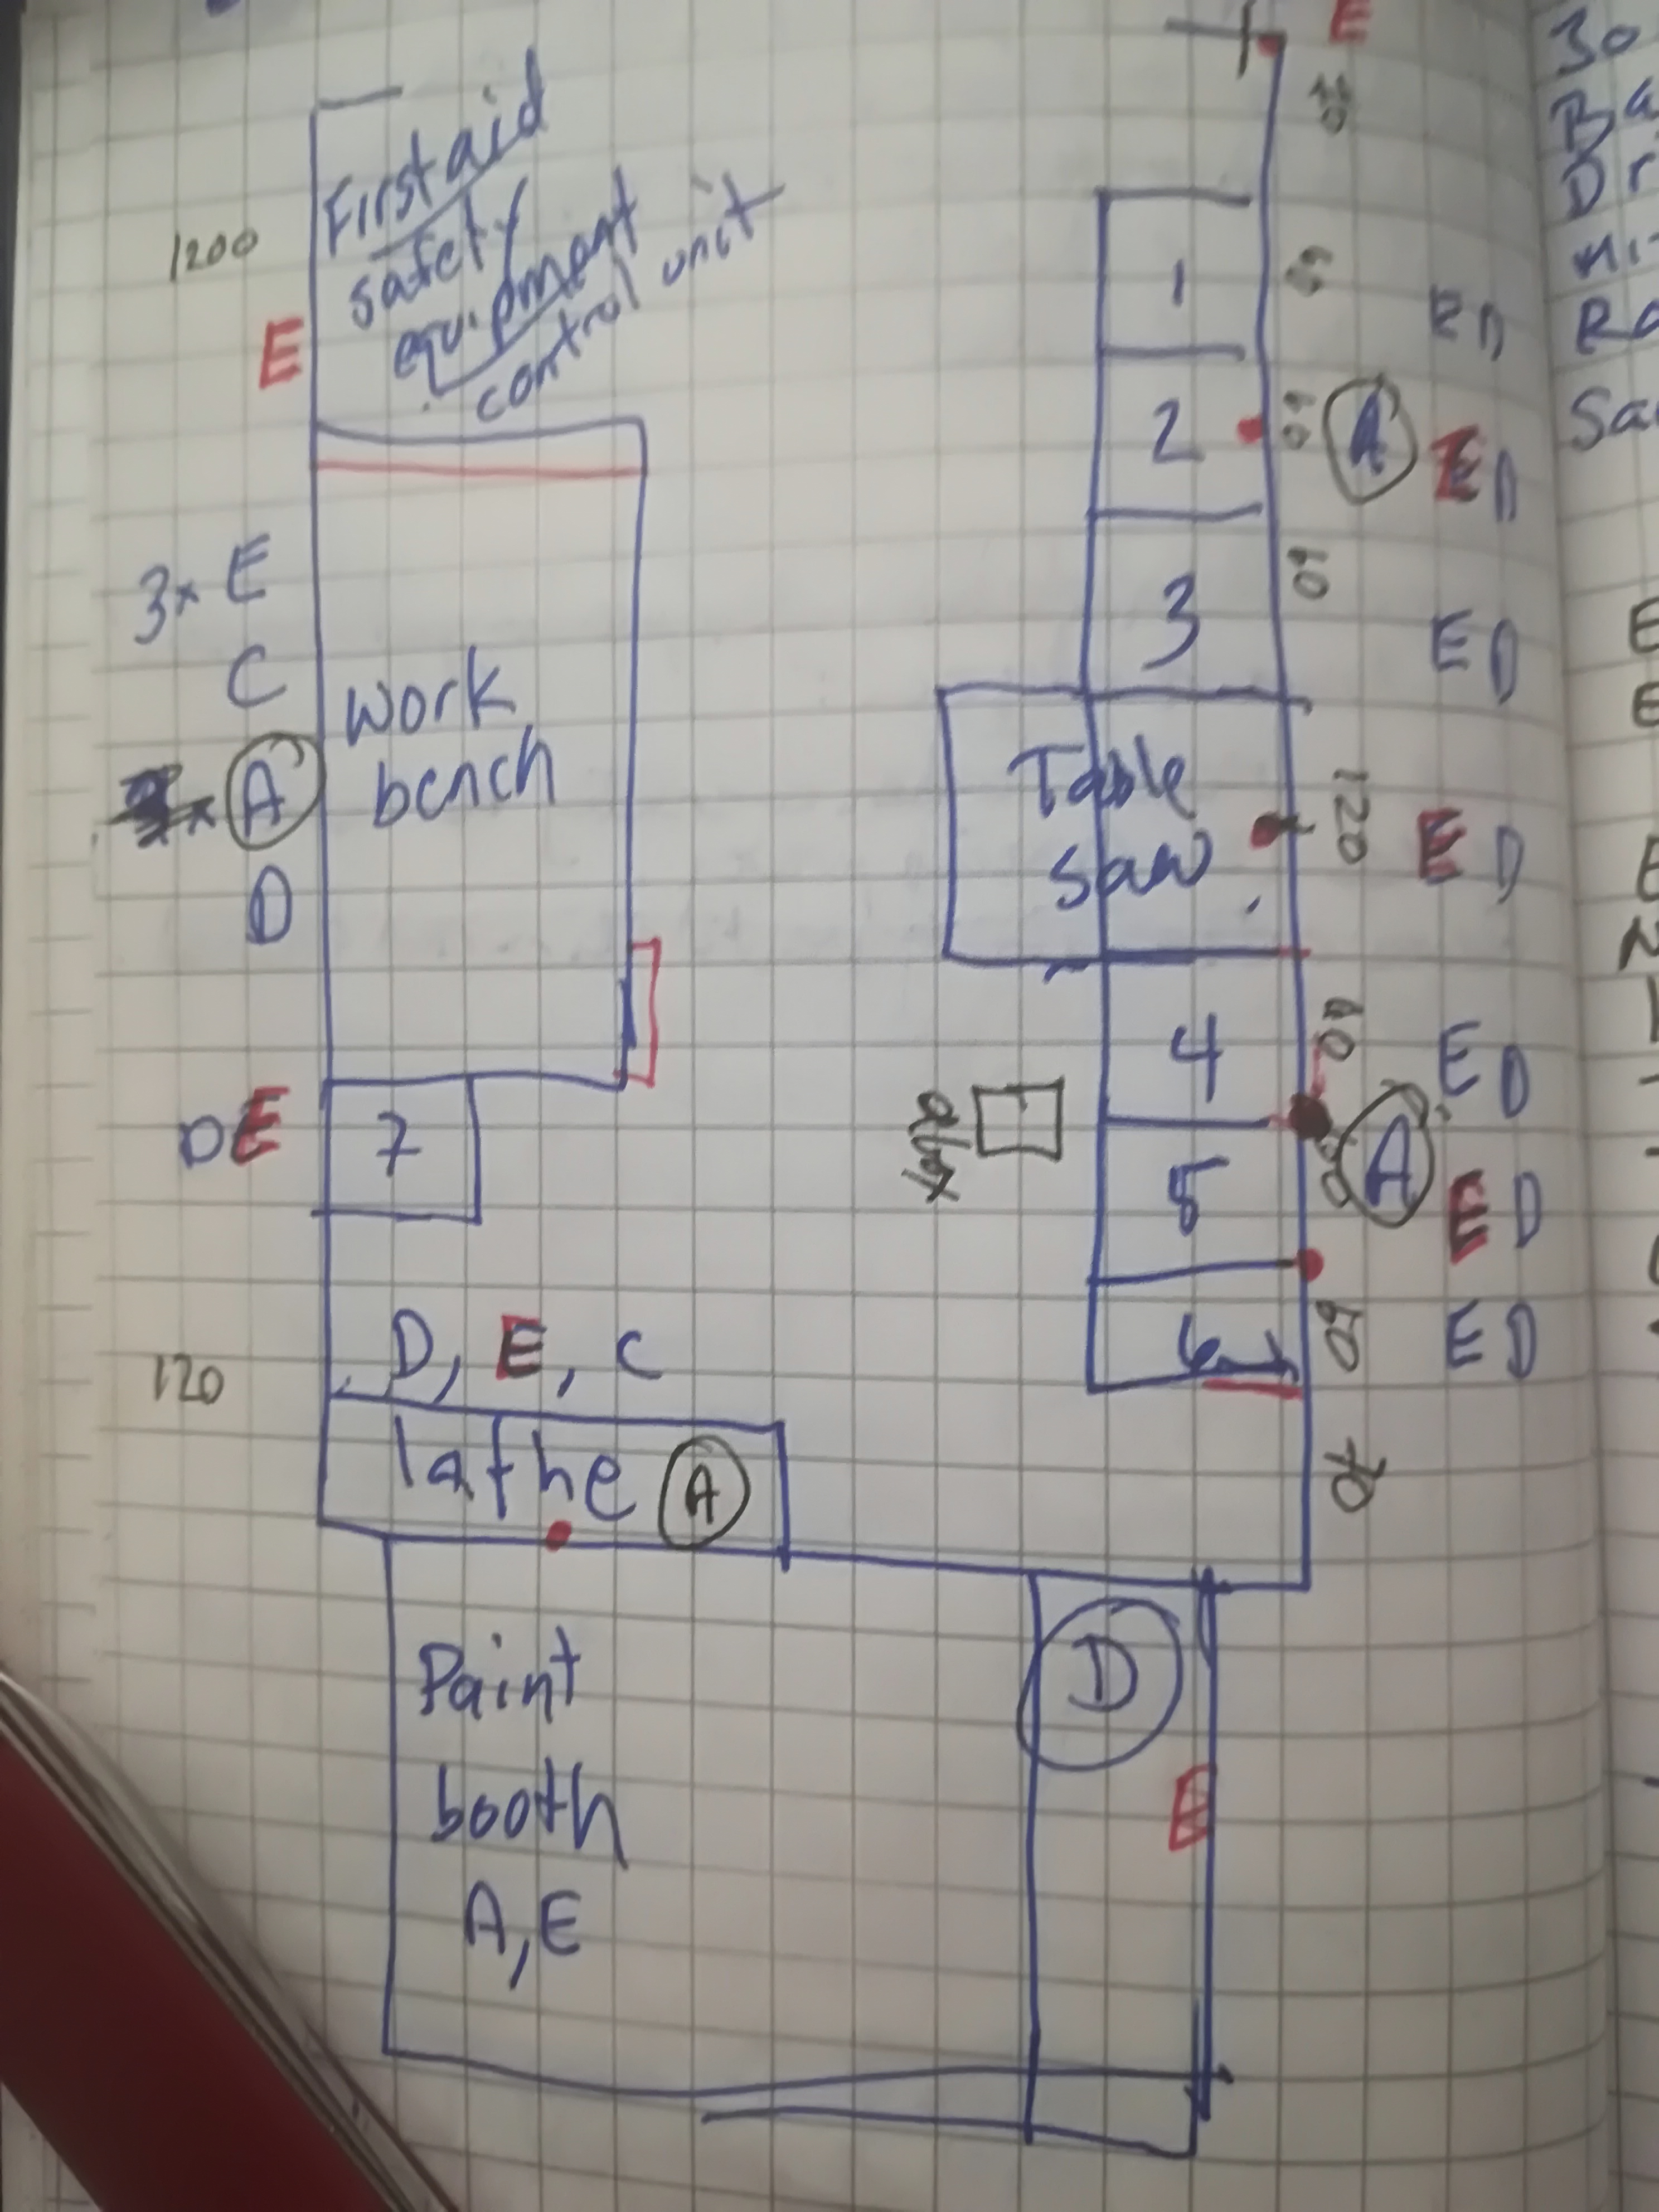
Workshop versions 1.0 & 1.1. The only differences are related to which tools are assigned to which slots. The other major decision is to have the workbench against the window wall. There is no indication of rip saw feed in the drawing.
Equipment placement in version 1.1 and 1.2 (in parenthesis where it differs from 1.1): 1 = band saw; 2 = router table; 3 = cross-cut saw, previously referred to as a mitre saw; 4 = planer (drill stand); 5 = jointer; 6 = drill stand (planer); 7 = sander.
With version 1.2 the jointer was removed from the workshop, because it was decided that its work (edge planing) could be performed with a router table, provided that router table was made or purchased with separately adjustable split fences. The main reason why both the joiner and the planer were initially placed in the back half of the workshop was because that made them closer to the dust extractor. With rip saw in-feed at the back of the workshop, the rip saw fence would have been positioned along the wall of machine alley.
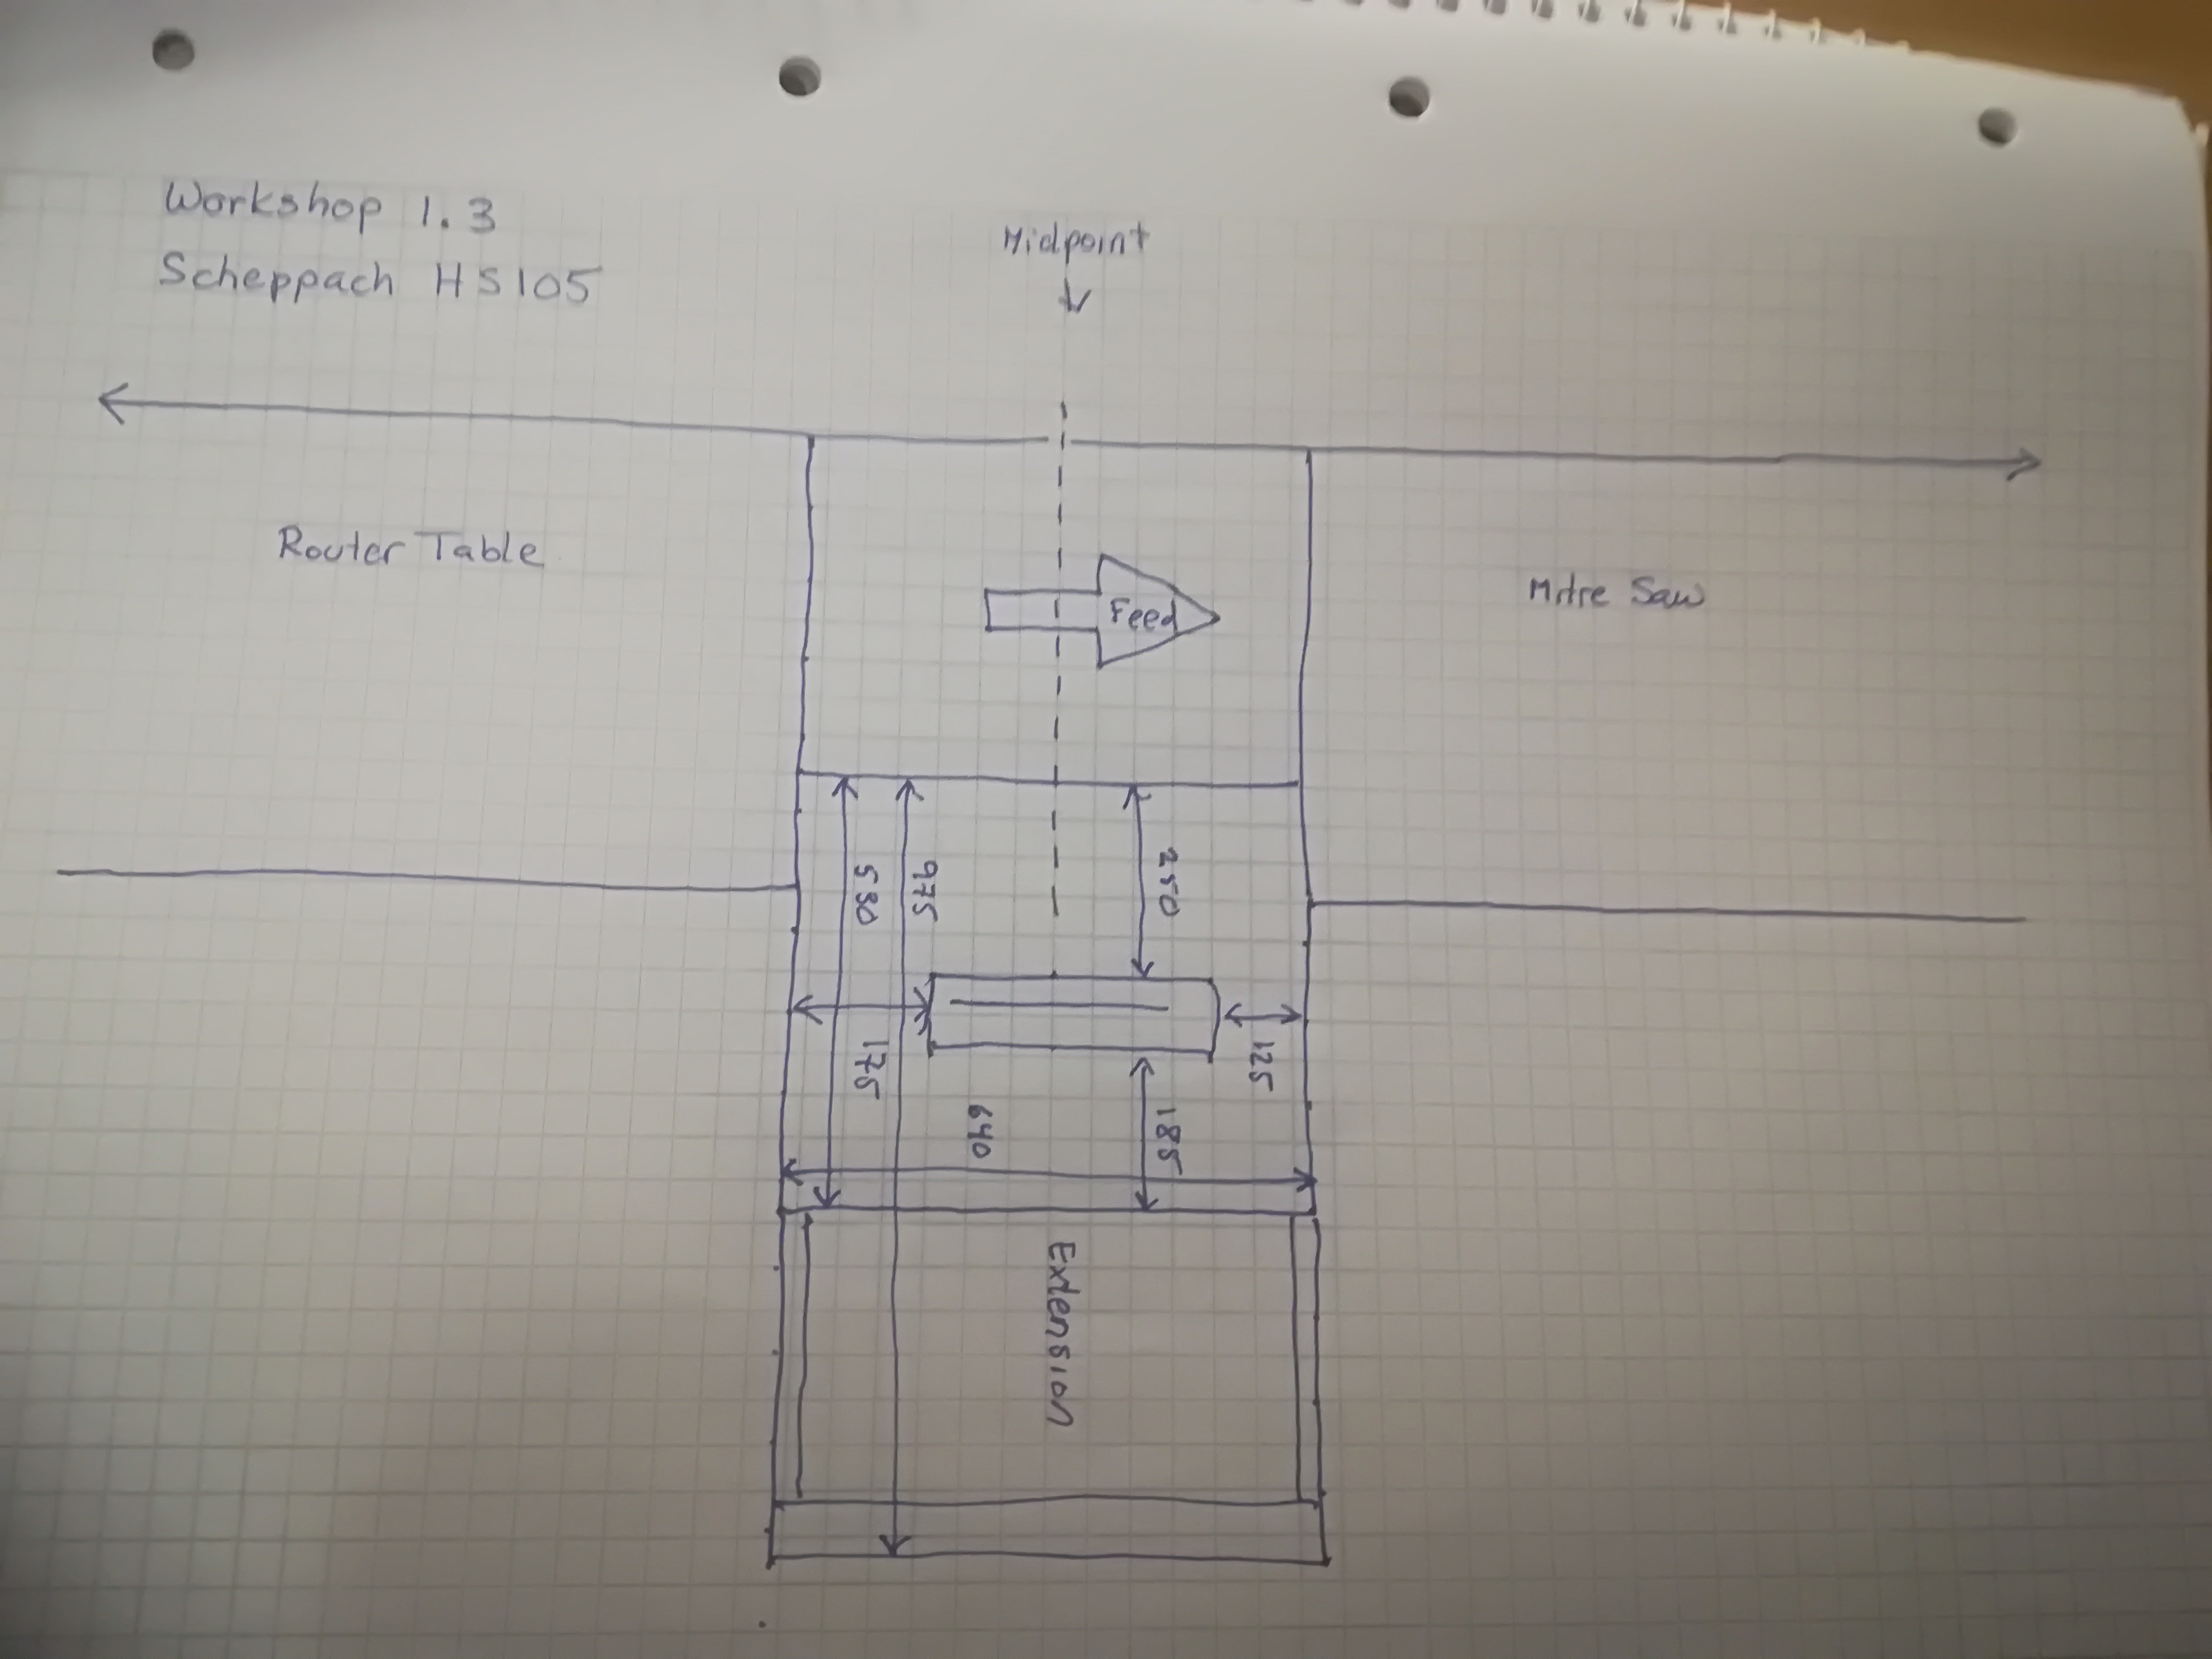
Workshop design 1.2 made after a Scheppach HS105 rip saw was purchased. The main deviation with respect to earlier versions is the width assigned to the rip saw, which is 900 mm. With Machine Alley at the top of the drawing, work flow is from right to left, as indicated by the arrow.
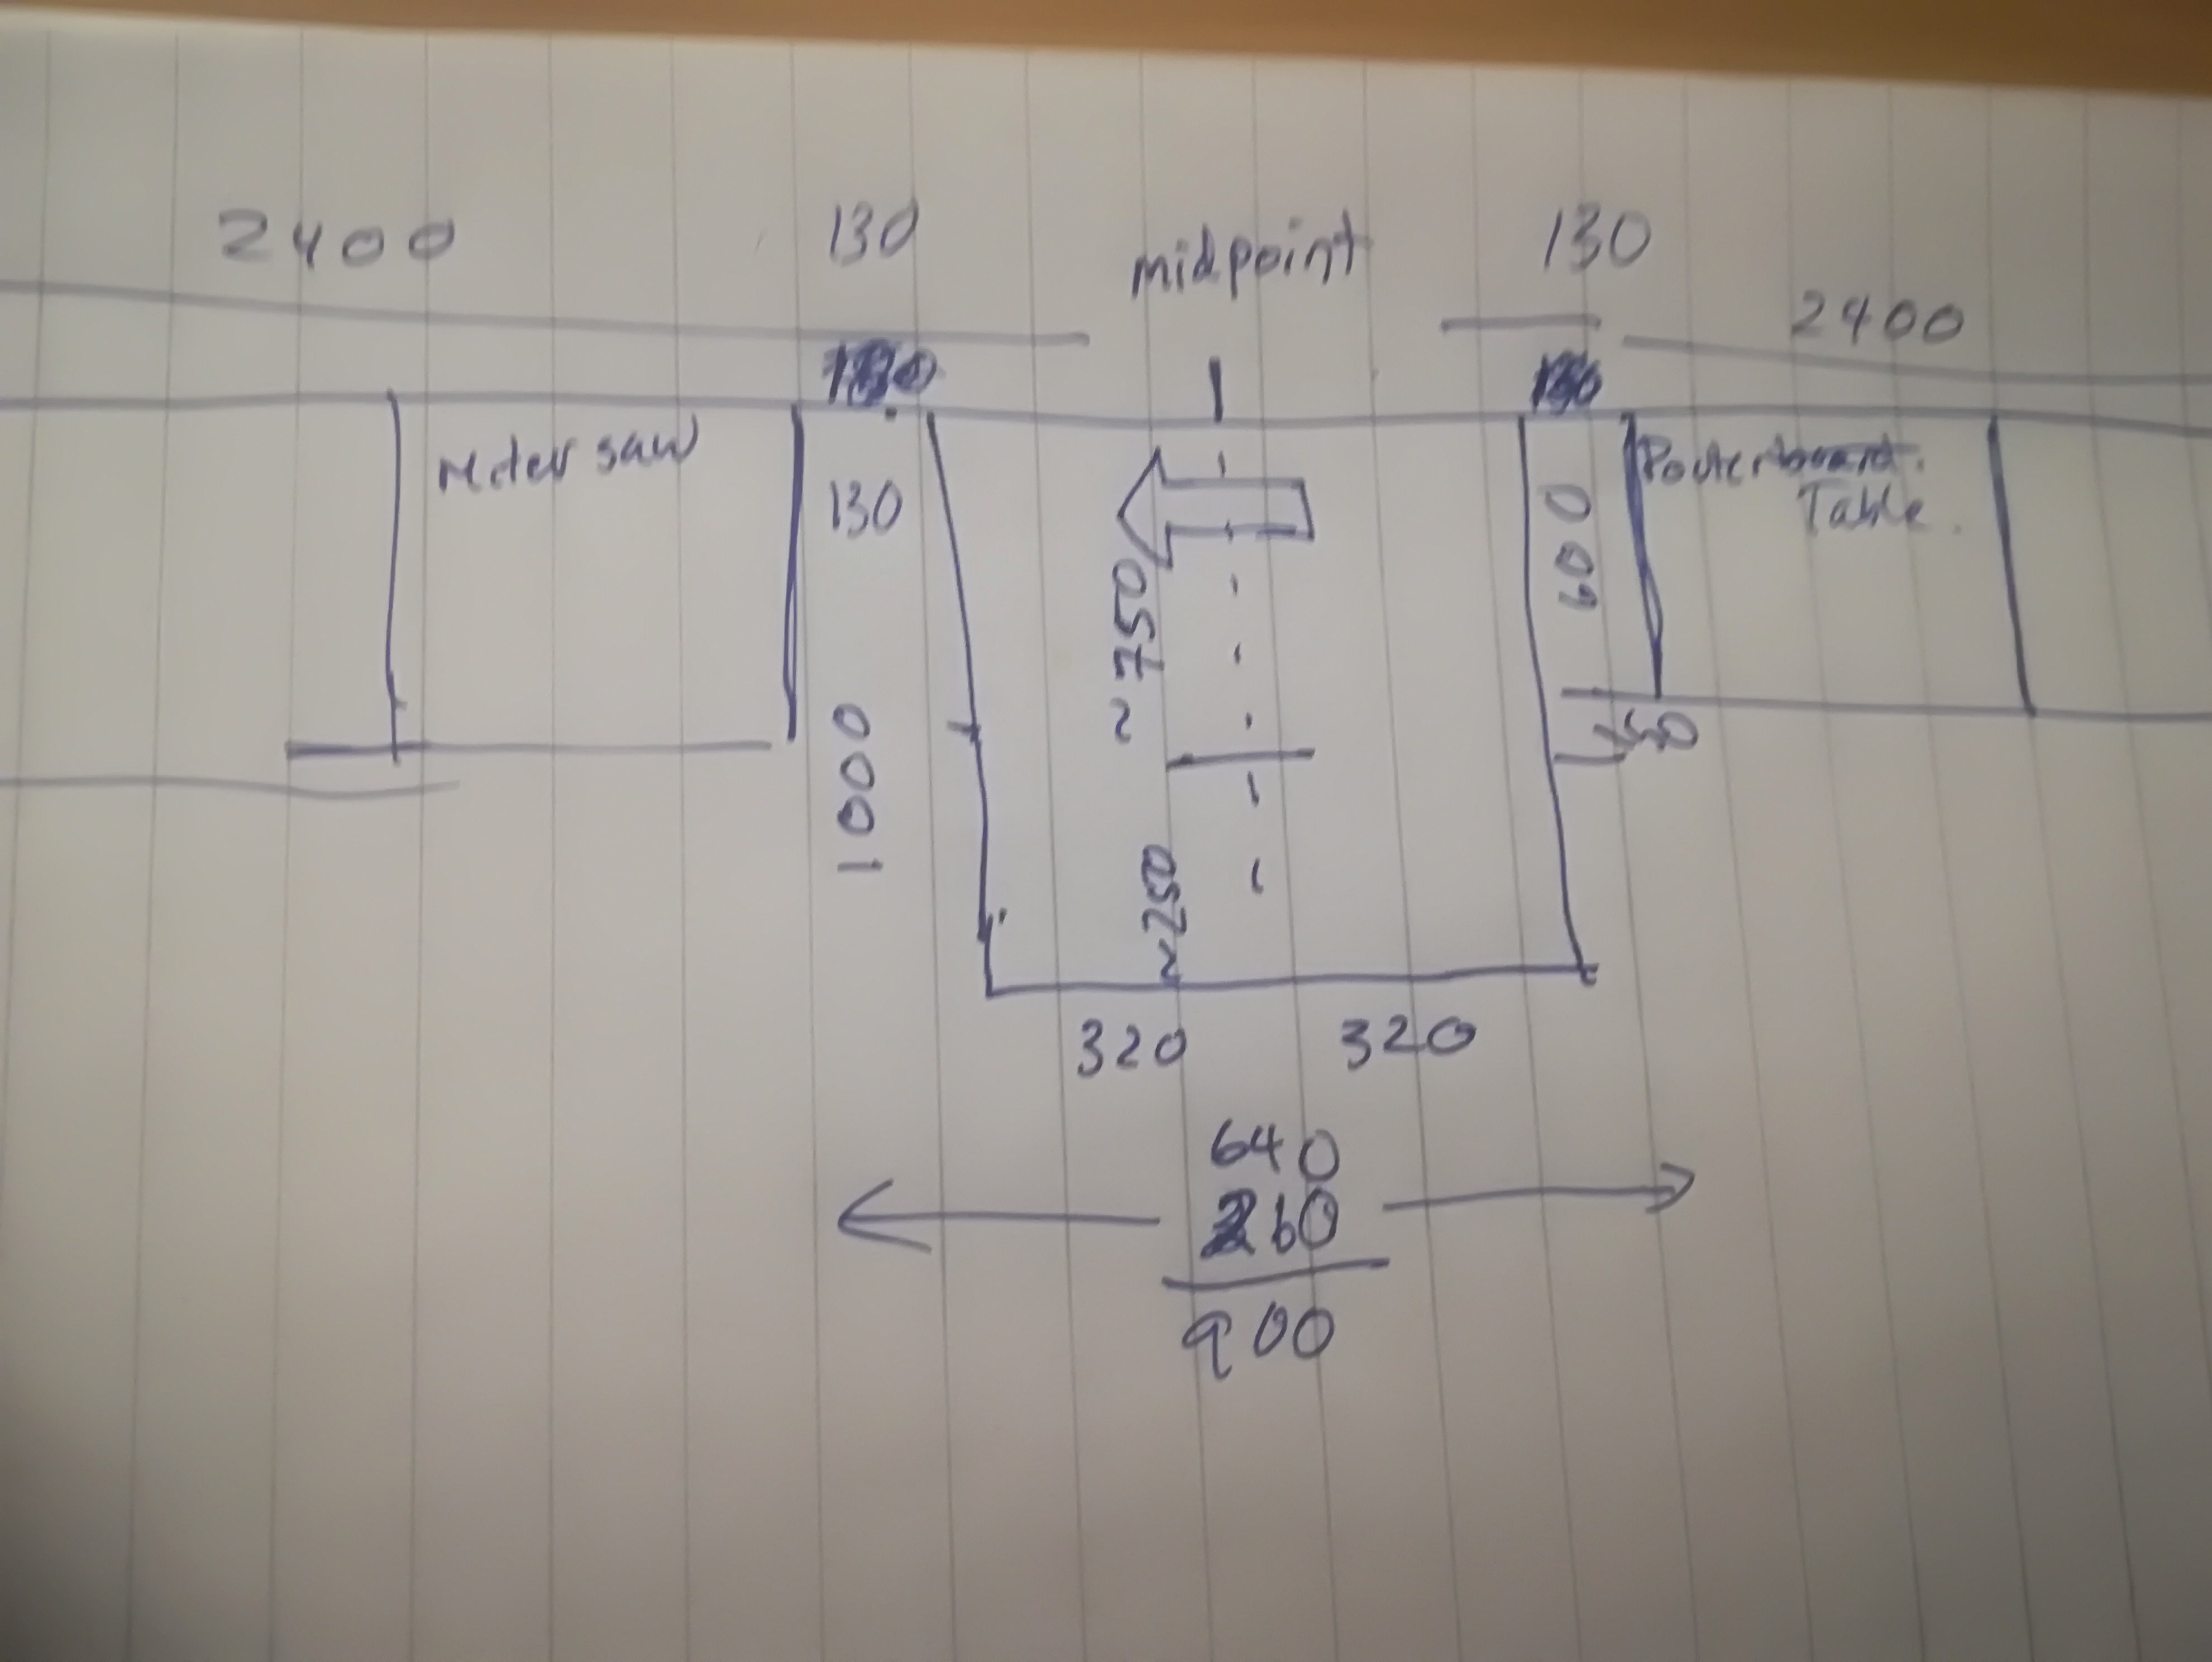
Currently, workshop design 1.3 is used for operational decisions. This changes the direction of feed, and changes the position of the rip saw fence to the middle of the workshop. In-feed is improved when the router table, aka shaper or spindle molder is co-located with the in-feed, and more poorly served when a cross-cut saw (aka chop saw, or sliding compound mitre saw) is on the in-feed side. Working sheet materials around a cross-cut saw is much more difficult than having to deal with a router table.
Machine Alley now has the band saw moved adjacent to the entry doors, then comes about 1150 mm of space that can be used for hand tools, portable electric tools and air tools. This is followed by the router table, rip saw and cross-cut saw, previously discussed. Another 1480 long space follows, part of the out-feed area that can be used for sub-component and smaller project assembly. At a future date, this area can be re-purposed to serve as a location for a wood lathe, removing it from its previous proposed location along the back wall. The drill press is located at the far end of the wall.
The planer, previously given a permanent position, is now regarded as a machine that only requires temporary placement.
Conclusions
While I would have liked to have had the dust extraction system, air lines and even workbenches to be in place, I am very happy that the three first iterations were not implemented. Procrastination has its benefits. The failure to implement the initial design has saved me from having to rip out components and start over, or to accept an inferior design.
All cutting machines, stationary as well as portable, are now all placed on Machine Alley. This simplifies dust extraction.
Norway is not known for its DIY culture. Because of this, a major obstacle is obtaining hardwoods suitable for making furniture. As far as I am aware, my closest lumber yard offering hardwoods is located 120 km away in Trondheim: Nilsson Trelast. The selection of hardwoods available there is limited to ash, birch and oak.
An alternative approach is to use oak material made especially for shelving and kitchen counters, and to cut this into suitable strips. Shelving is typically 18 mm thick and in a variety of widths including 200 and 300 mm. These are available in 800, 1200 and sometimes up to 2100 mm lengths. Kitchen counters are 25 mm thick 600 mm wide and 2400 mm long. These materials are available from Biltema: http://www.biltema.no/no/ and Clas Ohlson https://www.clasohlson.com
A third source of materials is to re-purpose existing furniture. Yesterday, we visited four used stores in Levanger. There I found in total one oak table that could have been re-purposed.
If I could select any type of hardwood for my current furniture projects, I would choose beech. My second choice would be birch. At the present time, I cannot find these materials in suitable dimensions. Thus, I am reduced to using either oak, pine or spruce.
Pine has two major problems associated with it. First, pine scratches and dents easily. It is extremely soft, even writing on a pine surface can leave imprints on the wood below. Second, it darkens with exposure to sunlight. This means that what you see, is not what you get, at least over time. Related to this is a problem with knots. These need to be specially treated before use.
Spruce is a better product than pine, but is still not suited for the furniture projects I am interested in doing.
I am using oak as a default material. My hope is to locate sources of beech and birch. In North America, one of the most commonly available hardwoods is Maple. Yet, this is not available in Norway, despite growing here in copious quantities.
The following list of traits of hardwoods and softwoods expresses generalities. There are many exceptions.
Hardwood
Softwood
Source
Deciduous trees
Coniferous trees
Main use
Furniture and detailing, including doors and floors.
Construction including studs, joists, rafters (building framework) and paneling and siding.
Cost
Relatively more expensive than softwoods.
Relatively less expensive than hardwoods.
Density
Higher density than softwoods.
Lower density than hardwoods.
Areas found
Found almost everywhere.
Temperate northern hemisphere.
Growth Rate
Slow.
Fast.
Other properties
Harder and more dense (with exceptions such as Balsa). Greater durability.
Softer and less dense. Lower durability. More knotty.
This weblog post was updated 2021/12/21. to eliminate Weeds from the title. This post formed part of a Needs, Seeds and Weeds website that belonged to my daughter, Shelagh. In addition, other things are also out of date, or my opinions have changed. Apart from the title, updating the text to a block format and other minor formatting changes, the text above this paragraph remains as it was before. Any significant content changes are found below this paragraph.
Woodworkers regularly need to confirm that their saw blades are set to the correct angle when making a cut. Most cuts are square, with the blade perpendicular to the base the workpiece sits on. Almost any try-square can be used to test the blade position, and either confirm or deny that the blade is square. The disadvantage of this method, is that one never really knows how much deviance is encountered when the blade isn’t square.
When cutting a bevel, most woodworkers just rely on the scale on the saw. If they suspect that something is wrong, they can make measurement with tape measures, and calculate the angle encountered. This, of course, takes time. Which means that it is not done very often, if ever.
There is another approach, that is equally fast to using a square with perpendicular saw cuts, and orders of magnitude faster with bevel cuts. The device is a mini digital protractor that can be used to determine blade cutting angles with stationary electric rip-cut saws, cross-cut saws, and many other tools including band saws and plunge saws (aka track saws).
I am now the owner of one of these devices, a Tacklife MDP01 mini digital protractor (MDP), thanks to the kindness of my daughter, Shelagh. This week I have tested it out on a Scheppach HS 105 rip-cut saw.
To begin, I placed the MDP on the saw table. It was at this very point that I learned that the table was made of a non-magnetic substance, undoubtedly aluminum. I then pressed the ON/OFF button, waited a few seconds and noted the value shown on the display. It showed 0.30° which seemed an acceptable figure. I then pressed the CALIBRATE button, and the MDP changed to 0.10°. I tried several times, and finally it returned a value of 0.00°, as shown below.
After the CALIBRATE button of a MDP is pressed the surface being measured is reset to 0.00.
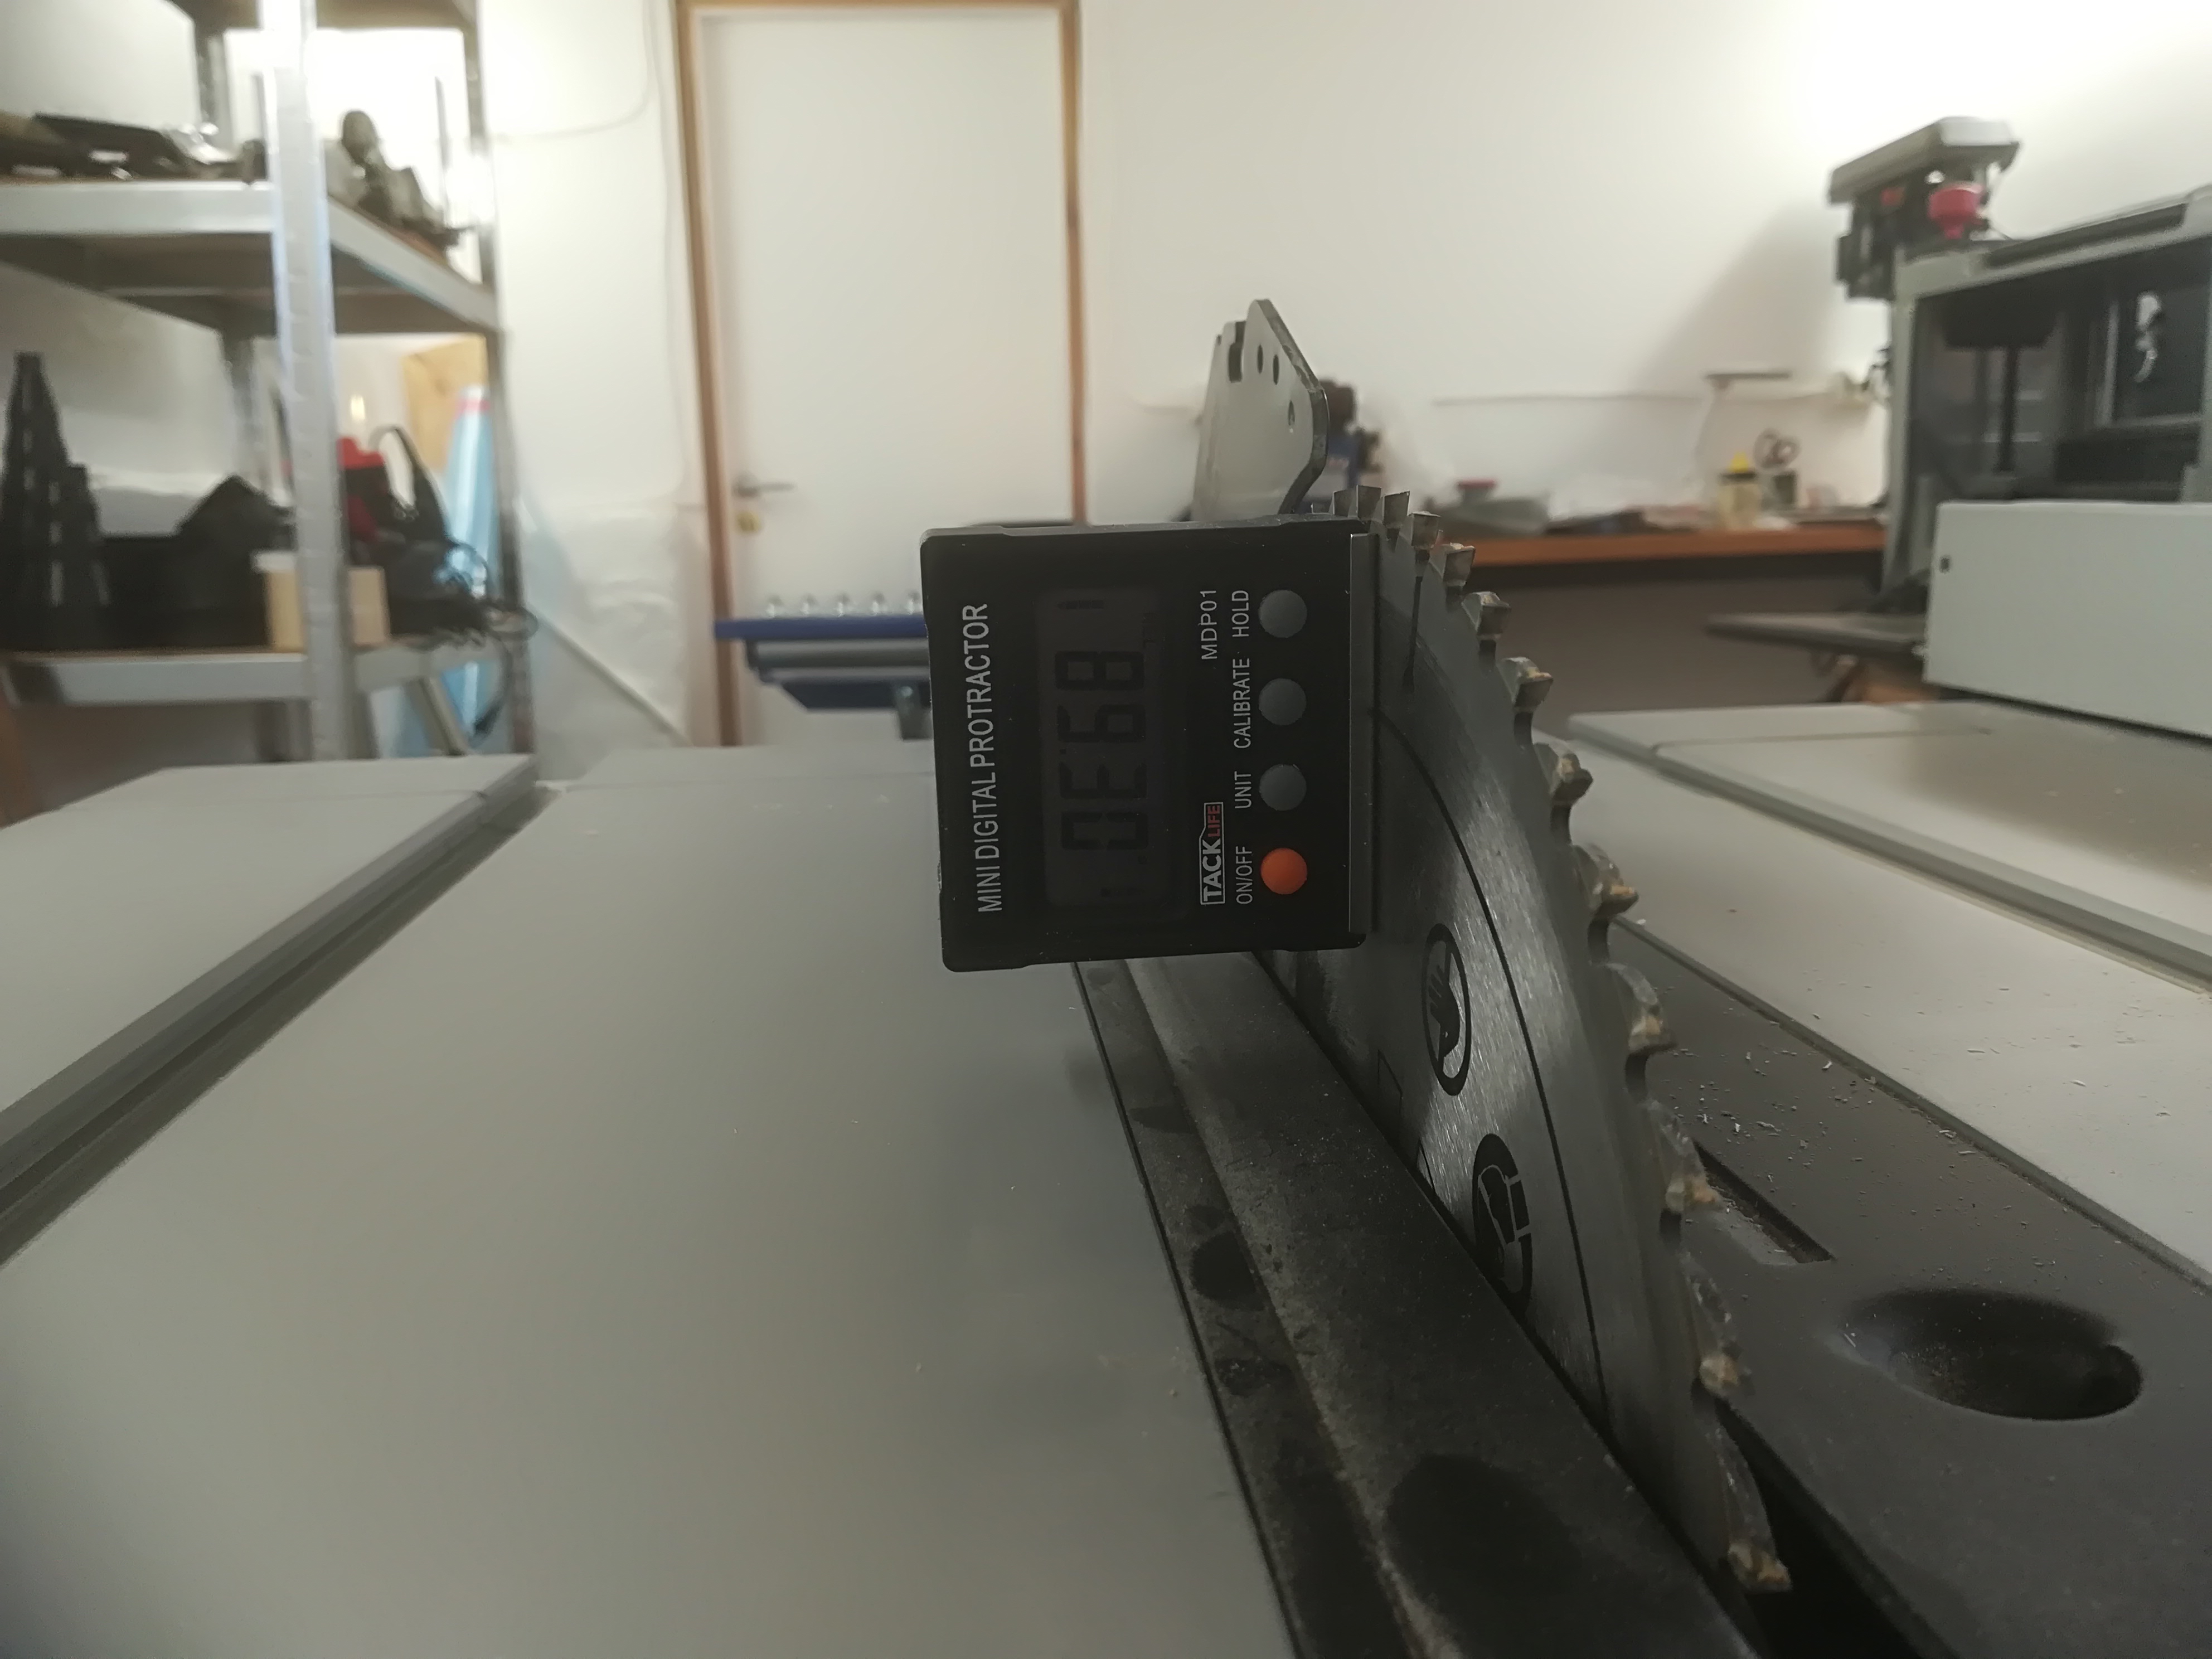
The MDP was then placed on the saw blade, as shown in the photograph below. It showed 89.3°. This is 0.7 degrees off the expected value of 90°, and more than the 0.5° deviation that is generally tolerated. It means that I will have to spend some time finding out what I can do about this, and then doing it or, learning to live with imperfection.
If the HOLD button is pressed, the value on the display will be maintained even if the unit is removed from the blade and put on the table.
The MDP showing an almost acceptable value for square cuts.
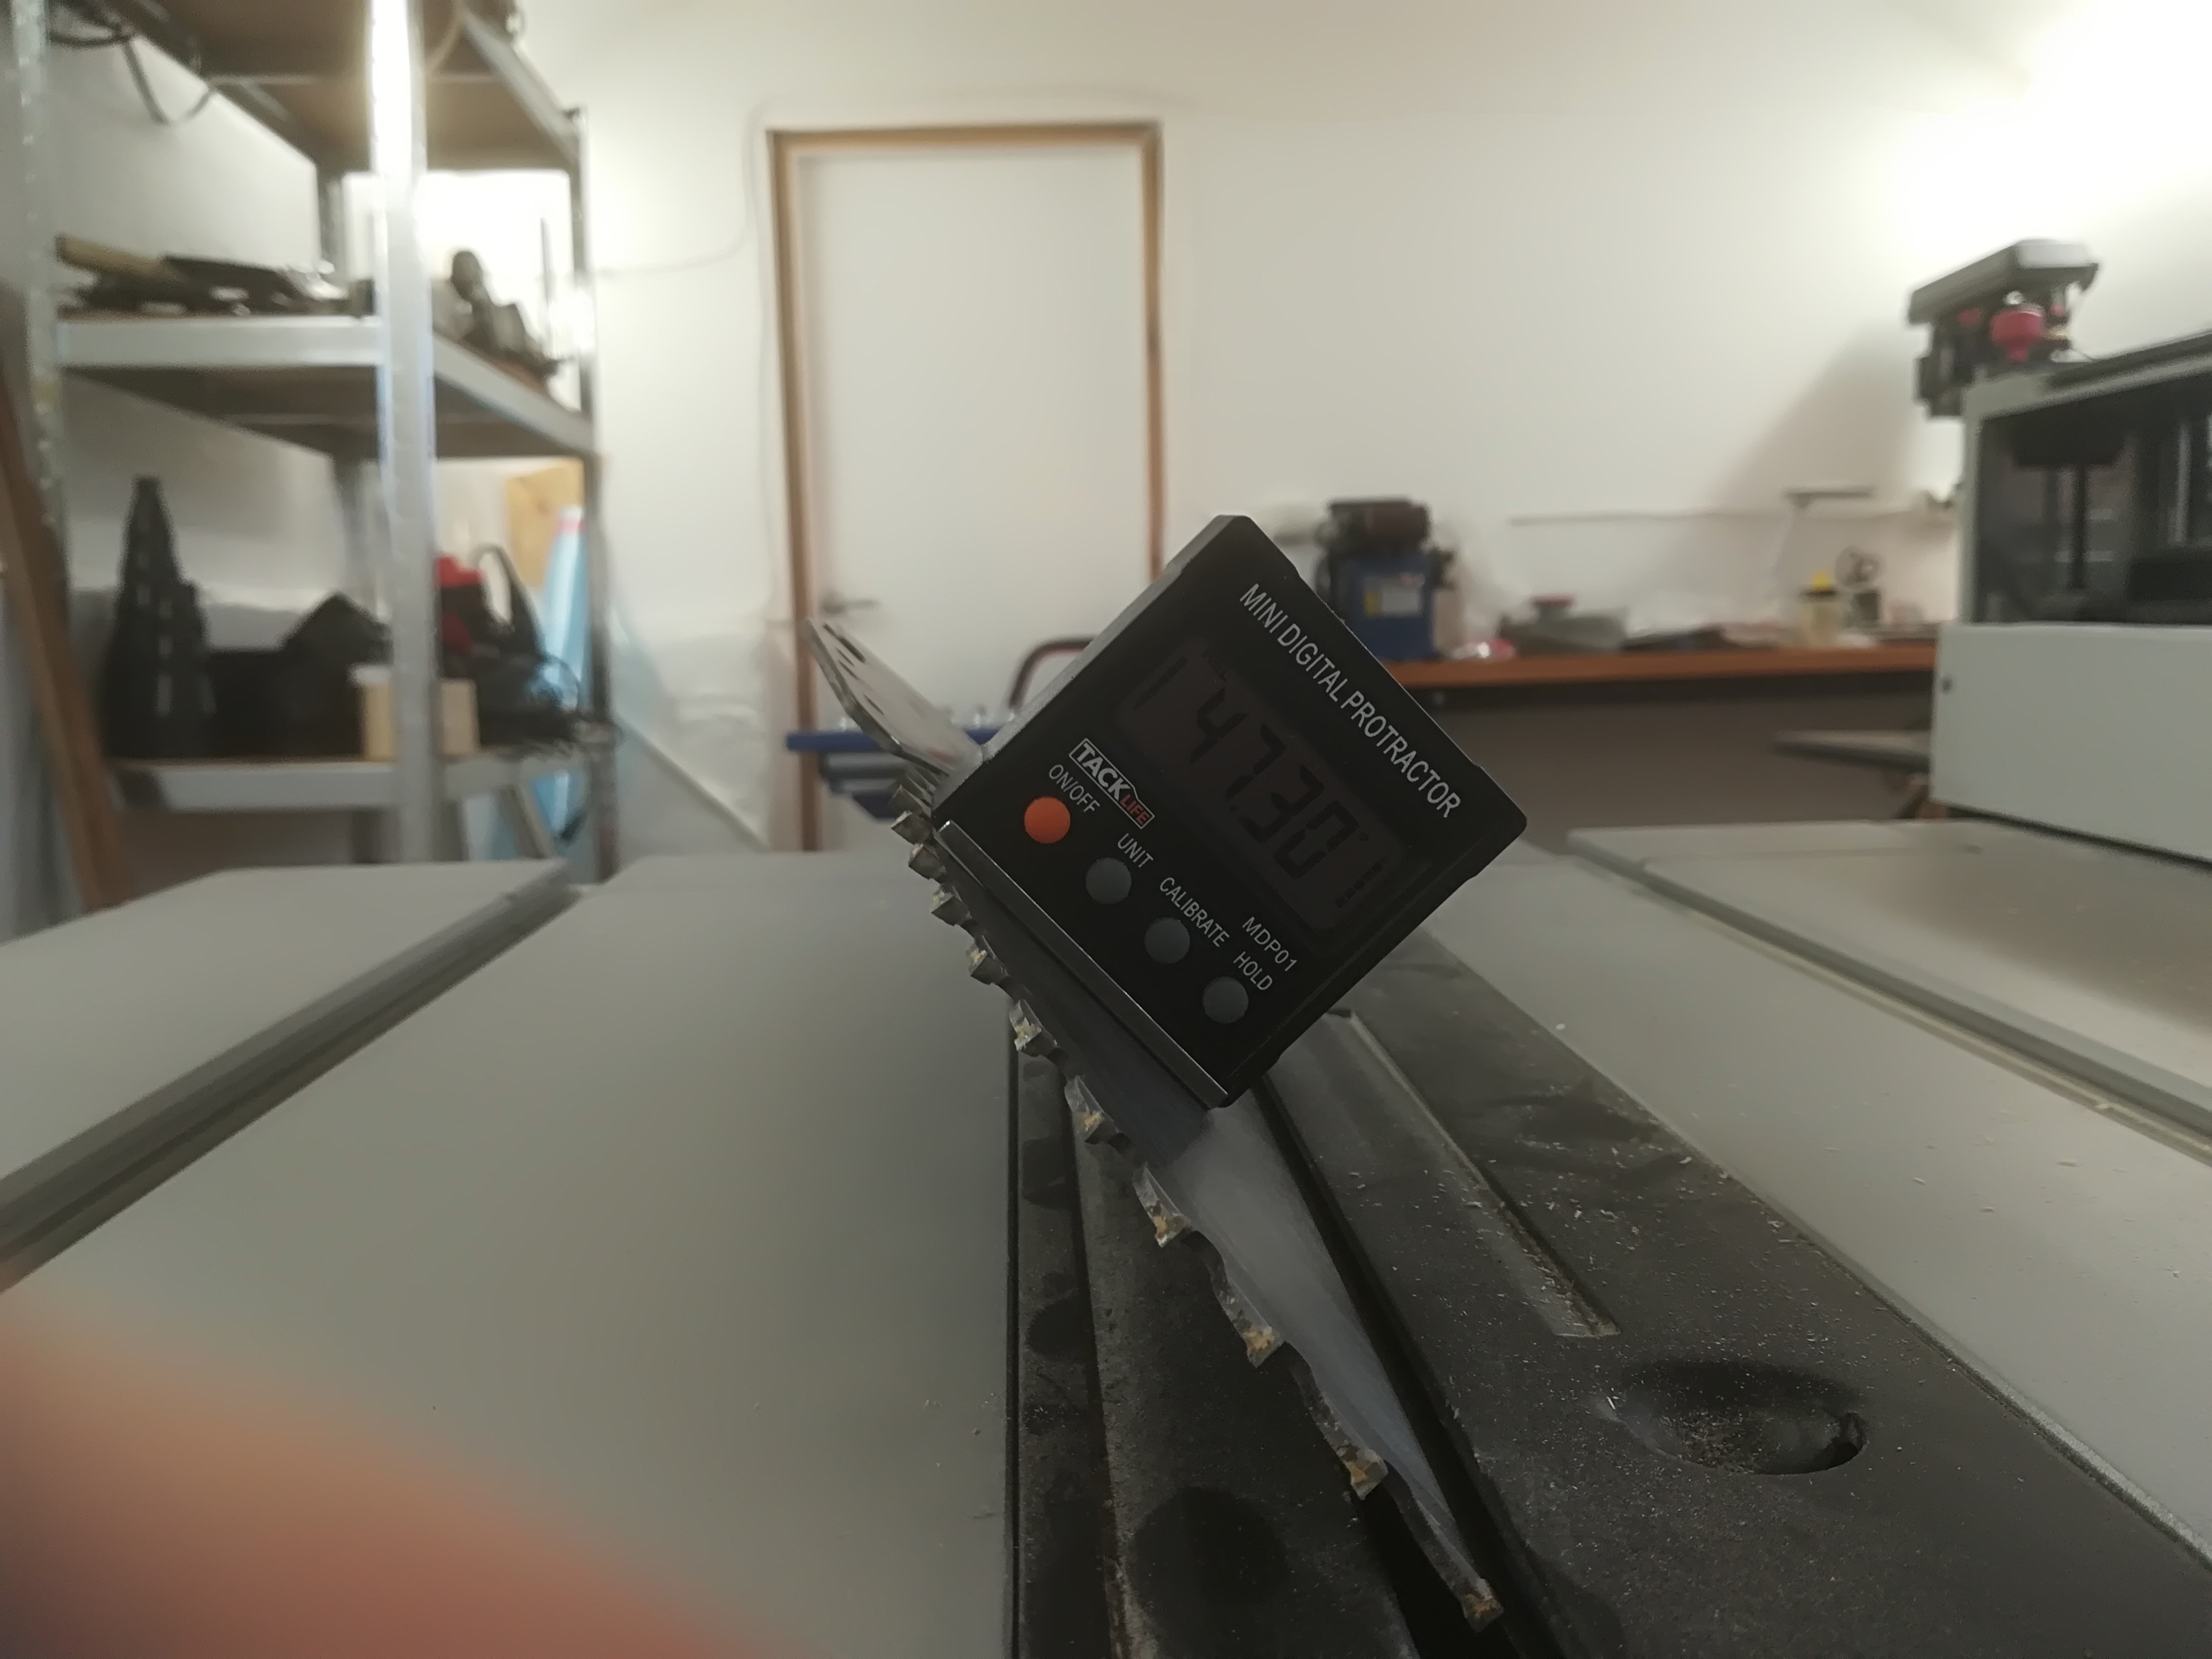
The most common bevel cut requires a saw to be set at 45°. This saw refused to allow the blade to move that far. The MDP shows 47.3° which is over 2° off, and not acceptable for fine woodworking. Close up of photographer’s finger is provided at no extra charge.
I cranked the blade to maximum bevel, which should have been 45°. There are many situations where wood has to be cut at this angle. Unfortunately, this saw would not allow the blade to move that far. The MDP showed 47.3° which is over 2° off. This means that I will have to find a solution to this challenge in the coming days and weeks.
Even though I was disappointed with the measurement, I was not disappointed with the speed at which this angle was calculated. It was available in a matter of seconds.
The UNIT button allows people to shift between degrees and angle percentages. Since I will be working exclusively in degrees, this button will only be used if it somehow gets onto the wrong form of measurement.
The device comes in an attractive, but plain, cardboard box, just slightly larger than the device itself. It also comes with an instruction booklet that measures 50 mm x 50 mm. Instructions are provided in English, German, French, Spanish, Italian and, presumably, Chinese. The text size is at the limit of what older people can read, and I was very happy that my workshop contains a lamp with built-in magnifying glass.
An aside: It is important to read specifications. I had always assumed that the table with the Scheppach HS105 was some type of steel. Perhaps it was just wishful thinking, because I had considered buying a magnetic feather board that could sit on the table and ensure that workpieces are tightly held against the fence while being cut. I have just saved someone the expense of importing one of these devices. Instead, I will be making my own feather board out of wood, on the band saw.
An acknowledgement: I would like to thank Shelagh McLellan for providing this Tacklife MDP01 Mini Digital Protractor.
This weblog post was updated 2021/12/21. to eliminate Needs from the title. This post formed part of a Needs, Seeds and Weeds website that belonged to my daughter, Shelagh. In addition, other things are also out of date, or my opinions have changed. Apart from the title, updating the text to a block format and other minor formatting changes, the text above this paragraph remains as it was before. Any significant content changes are found below this paragraph.
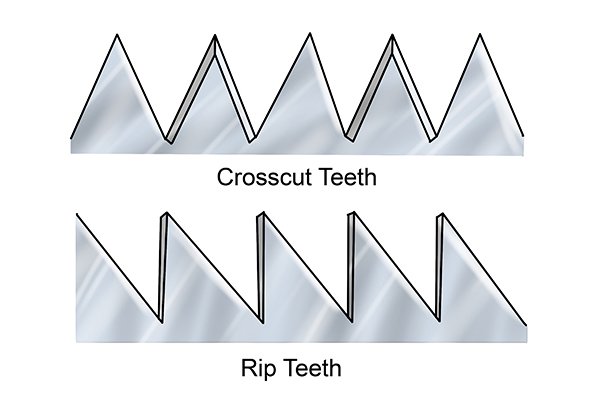
There are two fundamentally different ways to cut wood, with or across the grain. Wood grain is important because it affects the shape of saw teeth. A rip-cut comes from rip: to split or saw timber in the direction of the grain, and cut: to divide with a sharp-edged instrument. It needs a saw with a blade that chisels the wood. In contrast, a cross-cut, splits or saws the wood perpendicular to the grain, it needs a blade that shears the wood fibers. Blades that rip-cut well do not cross-cut well.
Most woodworkers use one type of electric saw to rip-cut and a different type of electric saw to cross-cut. While cross-cutting with a blade designed for rip-cutting, is not energy efficient it is not dangerous, rip-cutting with a saw designed for cross-cutting is worse, because it can be very dangerous. Circular saw blades designed for rip-cutting have a smaller number of larger teeth than similar blades designed for cross-cutting.
These two different saws are referred to as table saws (for rip-cutting) and mitre saws (for cross-cutting). Other names for these saws are used. The problem with the name table saw, is that it is a descriptive name, rather than a functional name. Yes, it is a saw with a blade that emerges from a table. A functional name, would be to refer to it as a rip saw, perhaps even a stationary electric rip saw. This name focuses on the primary task of the saw, which is to make rip-cuts.
Scheppach HS 105 stationary electric rip-saw (Photo: Scheppach)
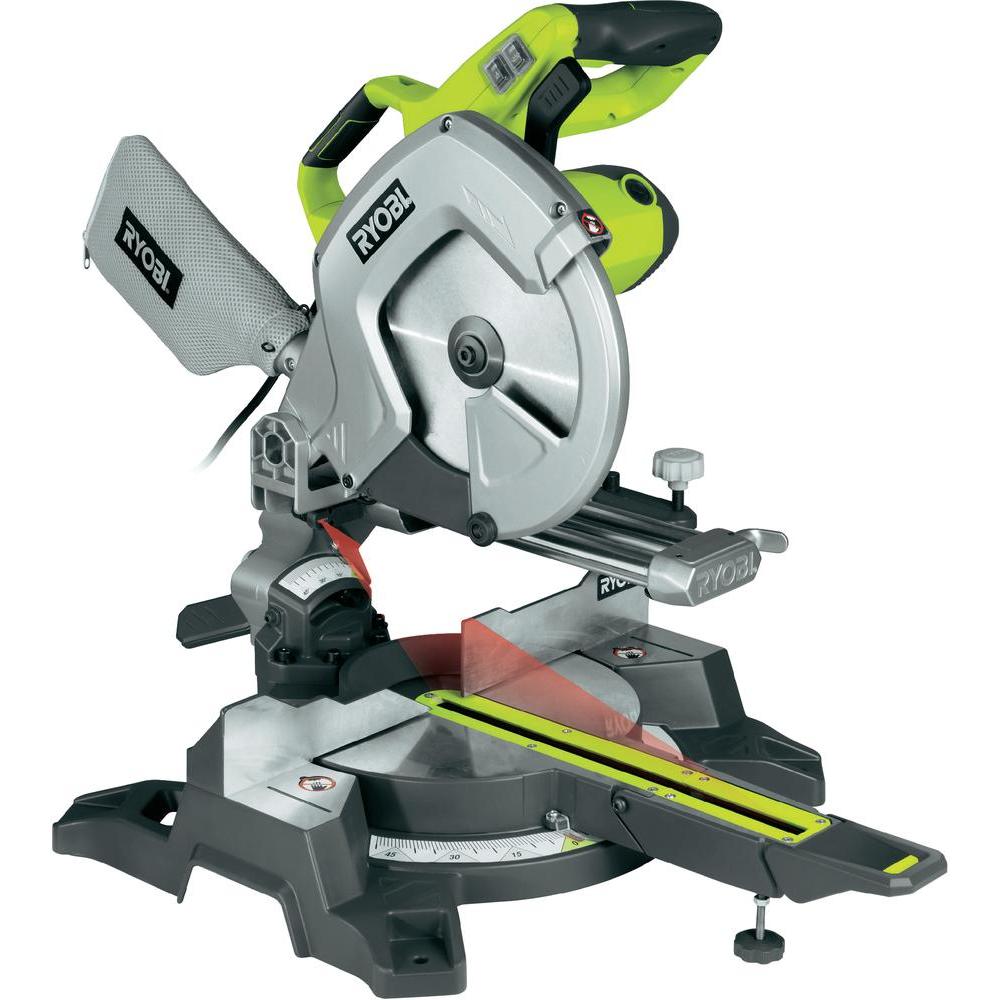
The name mitre saw has even more problems associated with it. However, the term chop saw (which is also used) at least provides it with a functional name. What we referred to as a table saw in the previous paragraph, also makes mitre cuts. Indeed it almost always comes with a mitre gauge to facilitate these cuts. However, given a choice, it is more efficient to use a saw referred to as a mitre saw. Both types of saws also make bevel cuts, which require the saw blade to change its angle with respect to a base, or table. A functional name, would be to refer to it as a cross-cut saw, perhaps even a stationary electric cross-cut saw. This name focuses on the primary task of the saw, which is to make cross-cuts. Even using the name chop saw would be better than mitre saw.
Ryobi EMS 254 L stationary electric cross-cut saw (photo: Ryobi)
The most important reason for opting to use a functional tool name is safety. While most professional woodworkers are informed about the differences between rip-cut and cross-cut saws, and the hazards of using cross-cut saws to make rip-cuts, this will not be reinforced if this function is missing from the tool name.
At the Unit One workshop, we now have a (stationary electric) rip-cut saw and a (stationary electric) cross-cut saw. In the future, tool names will be reviewed to ensure that functional rather than descriptive names are used. It is a safety issue.
Update: The illustration below shows the difference between saw teeth used for ripping, and those used for crosscutting.
This weblog post was updated 2021/12/21. to eliminate Seeds from the title. This post formed part of a Needs, Seeds and Weeds website that belonged to my daughter, Shelagh. In addition, other things are also out of date, or my opinions have changed. Apart from the title, updating the text to a block format and other minor formatting changes, the text above this paragraph remains as it was before. Any significant content changes are found below this paragraph.
This post is being written as I contemplate the upcoming meeting of the Inderøy Friends of the Earth annual meeting. This reflection is necessary since I am the group’s chairperson. I have this role due to one, and only one, attribute – an inability to say, “no!”
Attendance at the annual meeting will be low. Of the 65 members, five will probably attend. The other sixty live in fear that if they show up they will be pressed into becoming a member of the board. The five that do show up are rewarded with free coffee and cake.
The Friends of the Earth regard themselves as an environmental organization. Unfortunately, I’m not quite sure what this actually means. Regardless, here is what Wikipedia has to say:
“Friends of the Earth considers environmental issues in their social, political and human rights contexts. Their campaigns stretch beyond the traditional arena of the conservation movement and seek to address the economic and development aspects of sustainability. Originally based largely in North America and Europe, its membership is now heavily weighted toward groups in the developing world.The current campaign priorities of Friends of the Earth internationally are:
economic justice and resisting neoliberalism
forests and biodiversity
food sovereignty
climate justice and energy (Including releasing the song “Love Song To the Earth”)
…
The Friends of the Earth in each country are themselves many-tiered networks reaching from individual activists up to the national pressure group which campaigns for environmentally progressive and sustainable policies. The groups and activists at all levels also carry out educational and research activities.
Friends of the Earth groups are required to act independently of party political, religious or other influences; be open, democratic and non-discriminatory in their internal structures; and be willing to cooperate with other organizations who are working for the same goals.” https://en.wikipedia.org/wiki/Friends_of_the_Earth
Part of the challenge of working with this organization is its cumbersome and somewhat dated name: The Norwegian Society for the Conservation of Nature (or in Norwegian: Norges Naturvernforbund). Started in 1914 and then formally organized in 1916 as The National Association for Natural Conservation (Landsforeningen for Naturfredning), the first Chairman was Hjalmar Broch. The society added in Norway to its name in 1936, changed it again in 1951, before its current name was selected in 1962.
Apprentice activist Magnus Strømseth (19) and retired activist Per Flatberg (77) with experience from the Alta dam protest in 1981. (Photo: Unacknowledged photographer, appeared in Putsj 2015)
Per Flatberg was for many years chairperson of the Inderøy local group, and much of the population of Inderøy have expectations that the local organization will follow in his footsteps, with regular well organized protest marches and people shackling themselves to the closest bulldozer. Where alternative views are permitted, the activist is either retrieving plastic from an isolated beach, or is busy destroying invasive species being cultivated in local gardens.
Personally, I have no need for greater intimacy with any form of heavy construction equipment, have enough plastic at home, and do not dare remove any invasive sycamore maple trees (Acer pseudoplatanus) that I know personally, but are considered a threat to the local Norway maple (Acer platanoides). Interestingly, Norway maple is considered an invasive species in 20 North American states and provinces, because of its threat to the sugar maple (Acer saccharum).
At the annual meeting, the five attendees will not only be expecting coffee and cake, but also entertainment. In the past, various approaches have been used to stimulate environmental engagement. Last year, I managed to avoid the meeting by spending four weeks on Madeira. Two years ago there was a video link to speaker at another local group talking about the different types of plastic found on beaches in different localities.
To save money or, more correctly, to divert money to areas I find more interesting, I offered to speak. Another reason for offering to talk, is that it is much easier than having to listen. Originally, I was scheduled to speak about small, quiet, vertical windmills. This does not present any difficulties, except for the fact that I know almost nothing about the subject. So, I decided to expand the topic to include many of the areas I find interesting. To provide greater degrees of freedom, it was retitled, “Workshop Activism”.
To understand what activism involves, I have to resort to using Wikipedia once again: “Activism consists of efforts to promote, impede, or direct social, political, economic, or environmental reform or stasis with the desire to make improvements in society. Forms of activism range from writing letters to newspapers or to politicians, political campaigning, economic activism such as boycotts or preferentially patronizing businesses, rallies, street marches, strikes, sit-ins, and hunger strikes.
One can also express activism through different forms of art (artivism). Daily acts of protest such as not buying clothes from a certain clothing company because they exploit workers is another form of activism. Research has begun to explore how activist groups use social media to facilitate civic engagement and collective action.” https://en.wikipedia.org/wiki/Activism
Workshop activism involves the construction of objects that will make the world a better place, directly or indirectly. Since my estimate is that half of the audience will fall asleep during the talk, only two will actually hear it. I estimate that I can double the number of people learning about this by writing this blog.
Having an academic hour (45 minutes) to disposition, means that I can either choose to bore people by talking about one subject, or try to keep people more or less awake by having eight topics, each lasting for about five-six minutes each. I have opted for the latter. Many are pairs of topics that are introduced together:
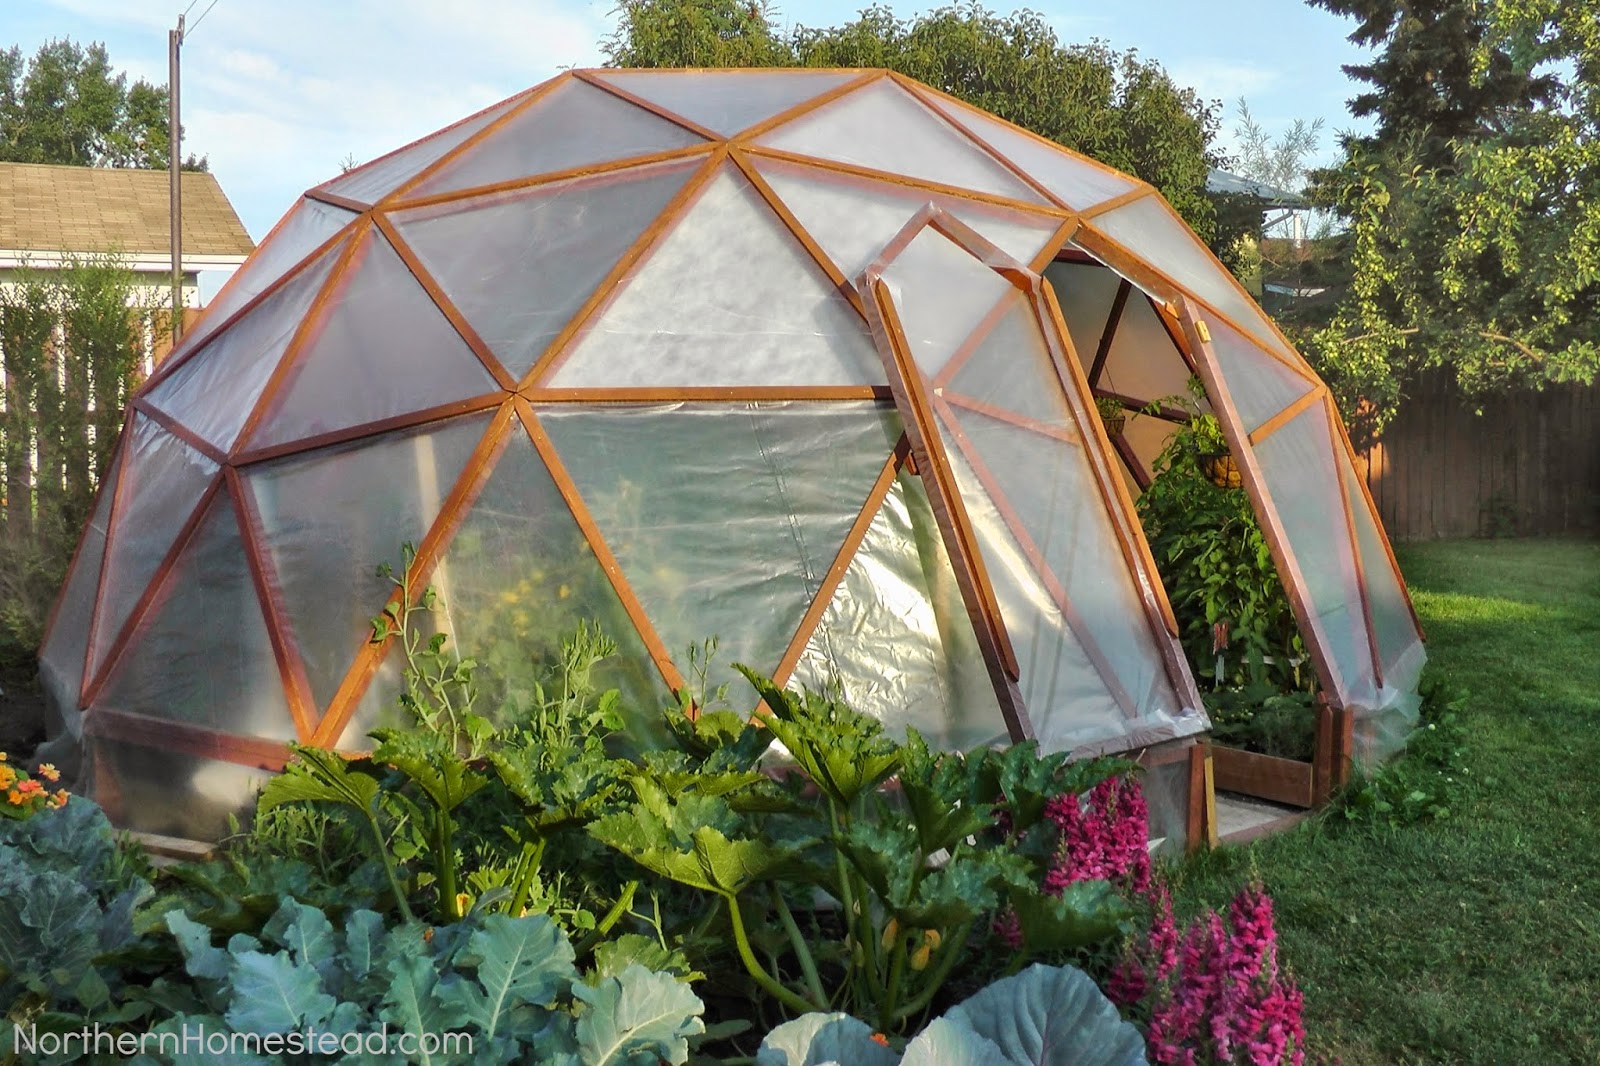
Geodesic Domes & Woodworking. Domes, like children, don’t just happen. However, unlike children, domes require forethought and planning. In my days as a prison teacher, I made numerous domes in cardboard, using this video, still one of the best: https://www.youtube.com/watch?v=vv01yWHo_1o
A Typical DIY geodesic dome (Photo: Northern Homestead)
Making a geodesic dome with a skeleton of wood is a much more difficult process than making it out of cardboard. Once again, Youtube comes to the rescue. There are a lot of different people who provide videos, but Paul Robinson actually knows what he is doing when it comes to building domes. However, his videos require some effort to understand. One of the better ones that eventually explains how to construct the timber frame is here: https://www.youtube.com/watch?v=EYJbQMi0XW0 Covering the dome with polycarbonate is explained here: https://www.youtube.com/watch?v=aM4R_PNbTEw
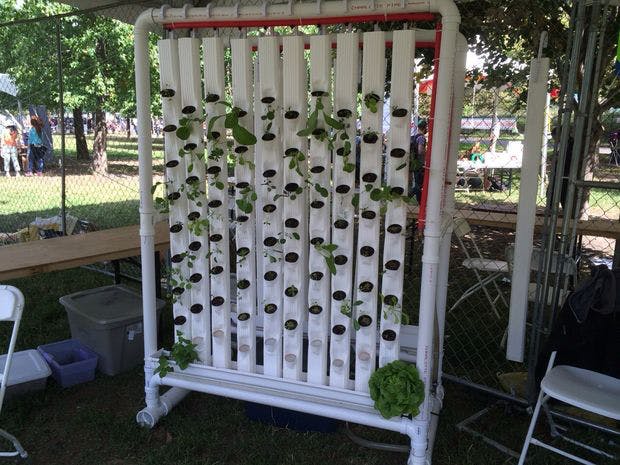
Hydroponic Gardening & Arduinos. Much of the material on hydroponic gardening comes from the video, Vertical Farms, featuring the work of Dickson Despommier. There is also a website: http://www.verticalfarm.com/ The practical aspects of this section will deal with connecting Arduinos to sensors (for example, temperature) and actuators (for example, vents). There will be, naturally, references made to real life Arduino driven vertical farms: https://create.arduino.cc/projecthub/bltrobotics/vertical-hydroponic-farm-44fef9
RUFS = Robotic Urban Farm System
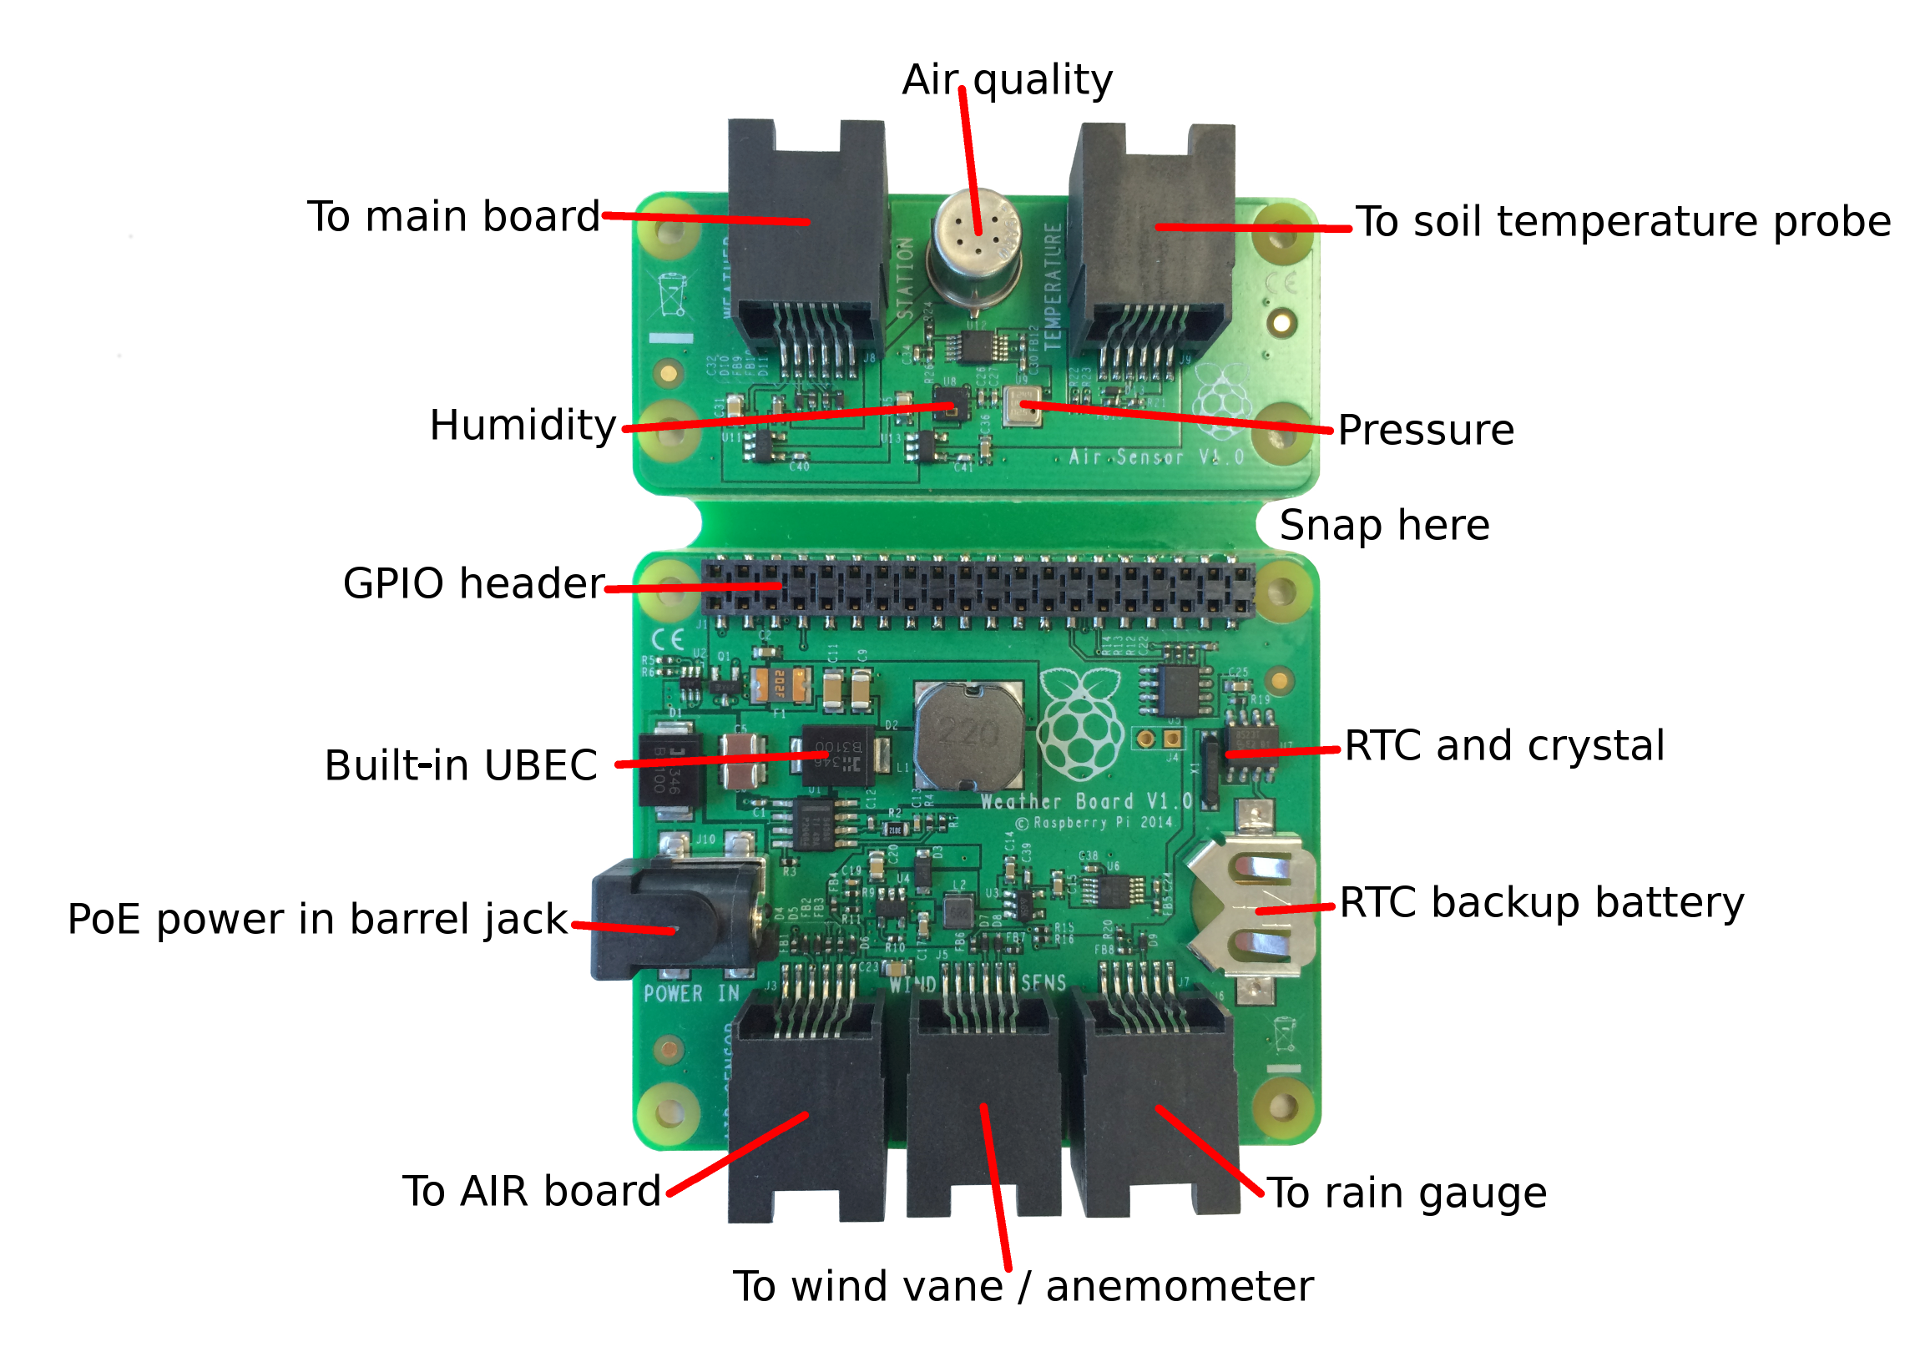
Weather Stations & Annoying Designs. There are a lot of weather stations that one can buy off the shelf. However, these may not be the best solution. My intention is to show that vendor lock-in is a deliberate policy. Here I will be using the example of Torkel Jodalen’s Norwegian weather station located at Jeløy, in Moss. His website annoyingdesigns.com comments on this class of problem, and more especially with Davis weather stations. For those unfortunate enough to have purchased one, a fix is offered in the form of a 43 page pdf document: http://annoyingdesigns.com/meteo/DavisSPI.pdf There won’t be time for any of this at the annual meeting, so I’ll just show the system design found here: http://wx.annoyingdesigns.com/
The Raspberry Pi Foundation is not open-source, and has some questionable corporate arrangements, including one with Oracle. Yes, Oracle is giving schools free weather kits, but these (and only these) are also being connected through the internet to Oracle servers. If your school is not worthy enough to receive a free weather station, then your school is not worthy enough to share data. Who decides if your school is worthy? Yes, Oracle Corporation. See: https://www.raspberrypi.org/learning/weather-station-guide/
There are other approaches, as Torkel Jodalen explains, so not all is lost.
A Raspberry Pi HAT (Hardware on Top) used to connect weather sensors. (Photo: Raspberry Pi Foundation)
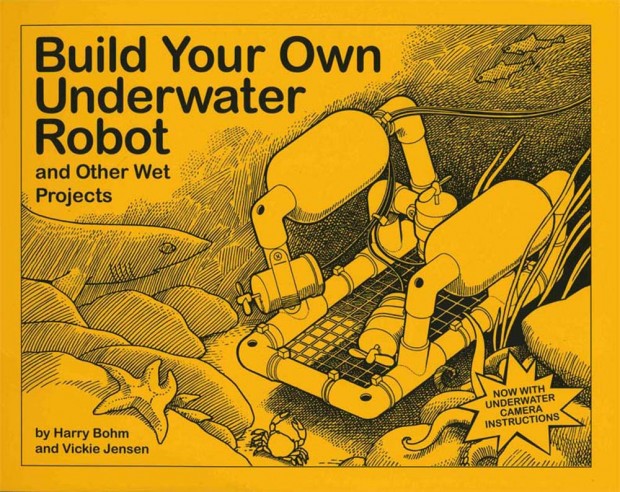
Underwater Robots & Drones. When it comes to underwater robots and drones, I will be trying to spend most of my time talking about underwater robots (which I know a something about). The main source will be Harry Bohm & Vickie Jensen, Build Your Own Underwater Robot and other Wet Projects. The book is now in its 12th edition: http://www.westcoastwords.com/build-your-own-underwater-robot.html
Hopefully by speaking enthusiastically about underwater robots, I will run out of time when it comes to drones (which I know nothing about). Just in case that approach doesn’t work, I plan on spending a few hours learning more about the use of drones to monitor the environment.
Workshop activism involves taking control of your own projects. It is finding ways to serve the environment that is independent of large corporations, and their profit-making agendas. In many ways, it is substituting time for money, but it also involves having fun and learning. The skills that are learned in a workshop won’t go wasted.
When a workshop is being designed, one of the first questions that has to be asked (and answered) is, What type of raw material is being used? While there are a lot of general workshops that can handle an assortment of raw materials, one material may distinguish it above all else. Currently, my workshop is oriented to woodworking, with an emphasis on hardwoods and furniture. Hardwood is harder and slower to cut than softwoods. So, whenever I have evaluated woodworking tools, it is to ensure that they can work with hardwoods. In many cases, it means having more electric power. For example, while many table saws and chop saws can operate using 1 200 Watts, I have selected machines that have 2 000 Watts.
The second question that has to be asked has to do with maximum dimensions. Many woodworking machines are designed for use on construction sites. In Scandinavia (not to mention USA and Canada) this means that they will be used with softwoods. The maximum sized board that has to be handled is typically 4 800 mm long, with a width of 300 mm and a thickness of 50 mm. Of course they also have to be able to handle a wide variety of sheet goods. these will typically have dimensions of 1 220 mm in width, by up to 3 000 mm in length. Thicknesses over 30 mm are extremely rare.
A furniture oriented workshop has to focus on other dimensions than those found on construction sites, although sheet goods are similar to those described above. With respect to lumber, there can be a need to work with thicker materials. At the Unit One workshop, the maximum design thickness is 75 mm. The maximum width is 300 mm and the maximum length is 2 400 mm. It should also be mentioned that boards up to 6 000 mm can be “chopped” into shorter lengths without problems. Beyond this, some doors may have to be opened. It is also possible to handle widths up to 600 mm. First position a board accurately at the chop saw using end stops. Make the first cut, flip the material, reposition, then make the second cut.
All of the woodworking equipment has been purchased with these dimensions in mind. This, in part, is why it has been so difficult to buy a chop saw, a sliding compound mitre saw, that can handle materials 300 mm in width, and 75 mm in thickness. Many chop saws are not suitable. It should also be noted, that I wanted to keep the commonality of blade size with the table saw. This meant 254mm x 30 mm. For several weeks I have tried to purchase a Scheppach HM 100 LXU. While the Scheppach is slightly over-dimensioned in terms of cutting width, it only just meets the workshop standard in terms of cutting depth. The reverse is true of the Ryobi EMS 254 L. With the workshop standard firmly in mind, I was able to substitute the Ryobi machine for the Scheppach without technical difficulty. Living with Ryobi green (or is it yellow?) instead of Scheppach blue may be another matter.
With table saws, the critical dimension is depth of cut. The Scheppach HS 105 table saw is adequately powered (2 000 Watts) and is able to cut material up to 80 mm in thickness. With planers, it is the width of material that is critical. The Meec 250-025 planer is also adequately powered (2 000 Watts) and is able to plane materials up to 330 mm wide. Combination jointer planers are often sold. The jointer on top is unnecessarily wide, while the thickness planer underneath is too narrow. My jointer needs will be met with a self-built spindle moulder capable of using a router bit 80 mm in height. This exceeds the workshop thickness standard.
One exception to the material rules of 75 x 300 x 2 400 mm maximum dimensions, has to do with lathes. Here, the maximum size is 300 mm in diameter, with a length of 1 000 mm. No lathe has been purchased yet, and this purchase will probably be delayed by up to four years because these will mainly be used in the production of dining room chairs.
This weblog post was updated 2021/12/21. to eliminate Needs from the title. This post formed part of a Needs, Seeds and Weeds website that belonged to my daughter, Shelagh. In addition, other things are also out of date, or my opinions have changed. Apart from the title, updating the text to a block format and other minor formatting changes, the text above this paragraph remains as it was before. Any significant content changes are found below this paragraph.
I am on table saw #2 at Cliff Cottage, a Bosch PTS-10 model, that works considerably better than its Scheppach predecessor. I have had even discussed replacing the Ryobi EMS 254 L mitre saw with something as simple as a Bosch PCM 800 S. Regardless of what happens, the Ryobi will not be allowed to exist as a functioning saw after the end of 2023.
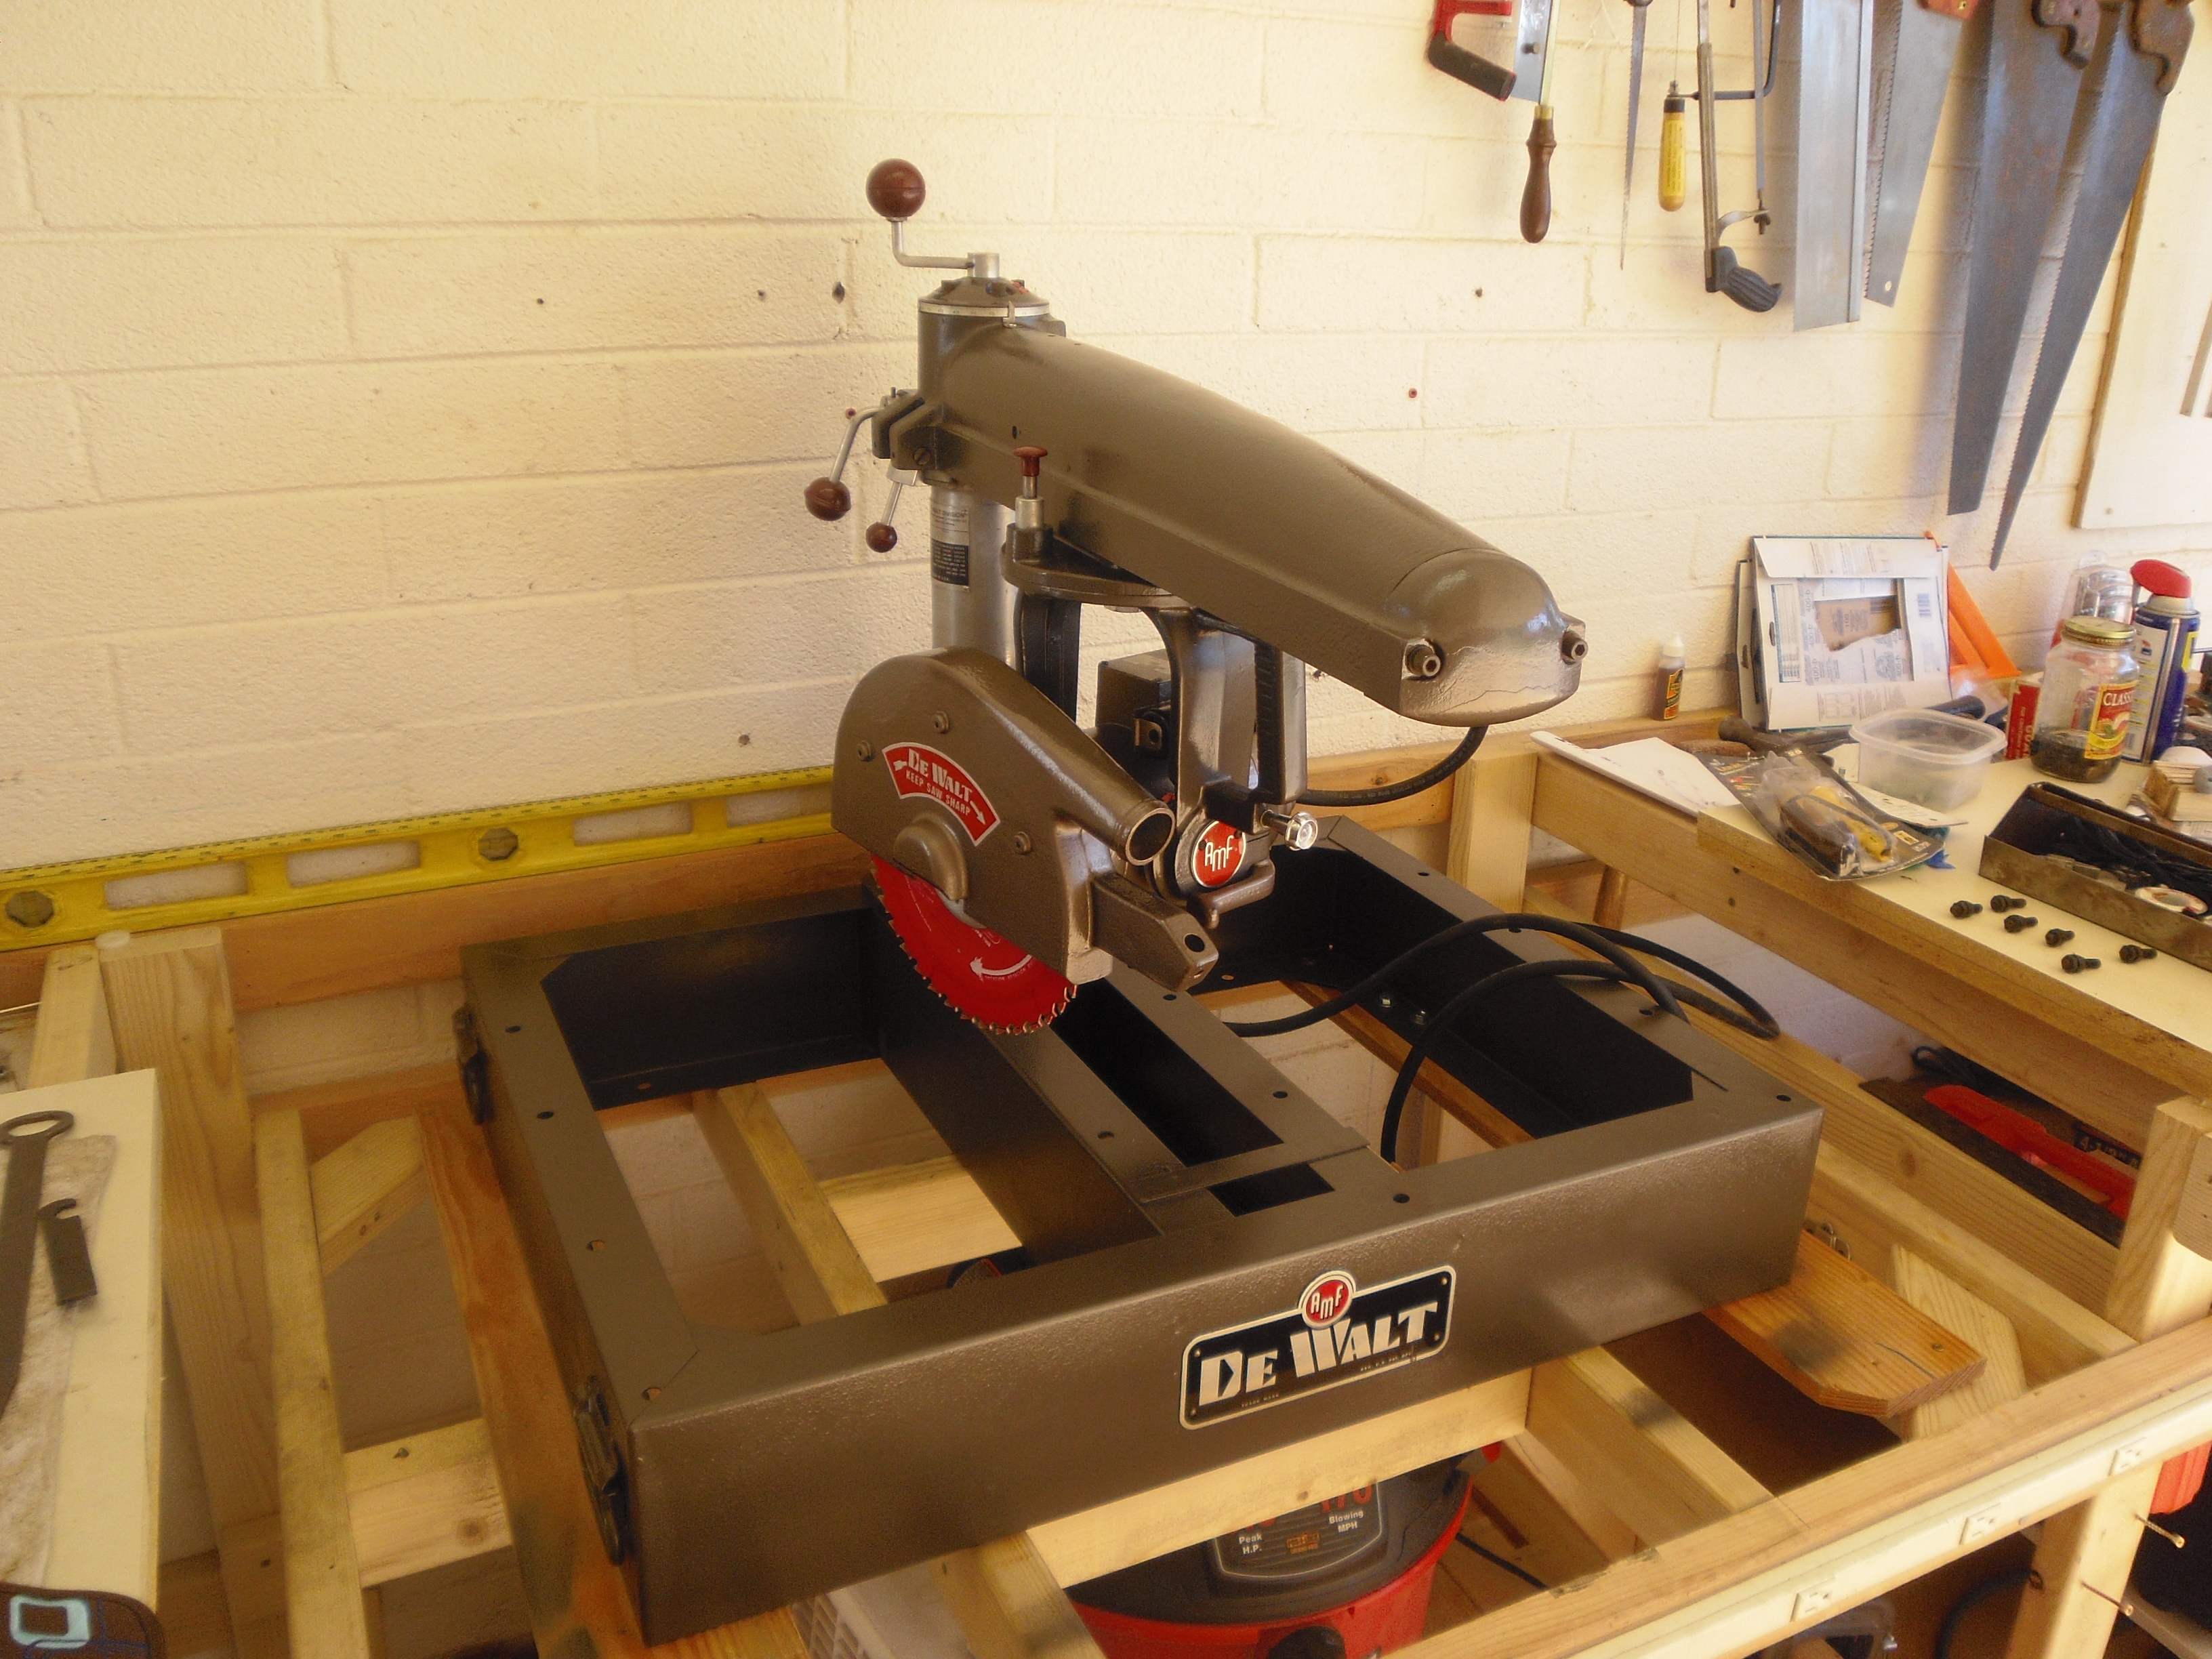
In my retirement, I am currently a denizen of an analogue world that that roughly approaches my teenage ideal. In that world, Plywood, marine plywood especially, was the material I preferred to shape. The preferred shape being that of a hard-chined sailboat. The radial arm saw was, unquestionably, the most exalted workshop tool. Yes, Roy Henderson had one that occupied a central position in his workshop. When I think carefully about it, that is where my idea of a line of tools, Machine Alley, has come from. He had few options, as an under-used recreation room occupied most of the basement. It was in the rec room that his son, Grant, spent his time, building and painting plastic model cars from kits.
A 1957 De Walt Radial Arm Saw, largely as I remember them, although I cannot recall any red sawblades. (Photo: https://vintagewoodshop.wordpress.com/1957-dewalt-10-radial-arm-saw-gw-i/ )
Roy’s shop was one of four that has influenced me. The second was a commercial workshop run by English immigrants building hard-chine, plywood hulled Enterprise sailboats from kits along the shores of Blind Bay, on Shuswap Lake, British Columbia. The third was the school workshop at Vincent Massey Junior High School, where I learned to use assorted woodworking tools, and found that mastering the jack plane was harder than mastering the band saw.
The fourth was the unloved workshop at my parents house in New Westminster. Its tools seemed to be from a previous century, and many probably were. They had belonged to my father’s Uncle, Thomas McGinley. He was the same uncle that had participated in the Klondike gold rush, but had otherwise worked as a carpenter. These tools were all rugged and heavy, designed for work on ship’s timbers or log cabins, rather than more delicate objects. I never saw my father use any of the tools. I’m not sure if it was from a lack of skills or a lack of interest. When my parents sold their house in 1972, these tools were disposed of.
These days I am more moderate in my opinions, but more excessive in my purchases. I am fortunate in being able to buy the tools I want. Yet, I hesitate to buy the best quality. I am buying the equivalent of Craftsman tools: Good, but not great. I don’t mind the challenges of working with imperfect tools. The fact that I may have to use extra time to adjust the table saw’s fence rather than have it snap into a precise position is a challenge with its own reward.
As I approach 70 years, I realize that the time I have to use analogue tools is limited. Yes, I am focusing on analogue woodworking tools. I am more comfortable working with wood than metal, or textiles or plastic or clay. In five years time, the worst of my infatuation with band saws, sliding compound mitre saws (UK)/ chop saws (US), spindle moulders (UK)/ wood shapers (US) and lathes should have eased. That is tomorrow. Today, I want to master this analogue world around me.
Because it is so many years since I used analogue tools seriously, I have to rebuild my skills. At the same time the workshop is being formed. The wisdom of what I had hoped would be a single line of stationary tools along a wall, Machine Alley, is being questioned. The table saw, an essential tool for transforming plywood, MDF and even OSB into useful components is demanding a more central placement. Already now the as yet un-purchased lathe has been repositioned in Machine Alley. The prudence of purchasing a separate thickness planer, rather than one in combination with a jointer, is being questioned. While tools are cheaper now, it doesn’t mean that they are easy to come by. I regret Norway being outside EU’s Customs Union. It makes my purchasing decisions more complex and expensive. Because importing goods is an expensive and bureaucratic hassle, Norwegian tool retailers and importers can ignore people like me, and just offer a selection of popular tools. All of the tools that I want, but cannot find in Norway, can be found stocked in Ireland.
At this point I would like to comment on my feelings in relation to my fate. It is complex, combining regret with acceptance, even contentment. Yes, I regret never having built my own house. Yet, I am sure that I could never build one in Norway, in a way that I would like to build it. Norway is a country without building inspectors, that allows each trade to police itself. A loose canon, such as myself or anyone without trade qualifications, would never be given permission to build such a major undertaking. In Canada, anyone can do anything, but it has to be inspected, to ensure that it meets the standards. I am equally sure that I would find it equally frustrating to build a house in Canada. I am not sure that I could regress to 24″ from 600 mm.
A lack of house building means that my workshop activities have limited scope. The workshop will ensure that improvements are made to the various rooms of the house, including the kitchen and living room. A minor addition or a shed will be added. Siding will be replaced, possibly with stucco. Furniture will be built. That could take up to five years. What will happen after that? Unfortunately, many makers do not plan for their future. They see their activities proceeding linearly, forever.
What I do see happening is that at some point old age will demand a transition away from analogue tools. My eyesight will worsen, and some of my skills may degenerate. Yet, hopefully, working in the workshop will keep my strength up. I am giving myself five years to accomplish my analogue goals. Everything has to be finished by 2022-12-31, although that date may be extended, health permitted.
Let me repeat that comment about my feelings in relation to my fate. “It is complex, combining regret with acceptance, even contentment.” What I am looking forward to is replacing analogue with digital, working more with workshop automation, home automation and robotics, including robots for the elderly.
I am not quite sure what this world will look like. Yet, in my later retirement years, I am looking forward to being a denizen of a digital world that is vastly different from my teenage ideal. In this future world, I may still be using plywood, but my table saw will be replaced with a CNC machine in the centre of the workshop. It will allow me to work with different processes, simply by replacing a head. It will work with different materials, some currently unknown.
CNC Machine kits are available from many sources, including CNC Router Parts. (photo: cncrouterparts.com )
Yet, transitions have to be planned. An analogue workshop will neither appear nor disappear by itself, a digital workshop has to be planned and implemented.
This weblog post was updated 2021/12/21. to eliminate Seeds from the title. This post formed part of a Needs, Seeds and Weeds website that belonged to my daughter, Shelagh. In addition, other things are also out of date, or my opinions have changed. Apart from the title, updating the text to a block format and other minor formatting changes, the text above this paragraph remains as it was before. Any significant content changes are found below this paragraph
Everyone has heard of writer’s block, and much more competent authorities have written on it – so that will not be mentioned beyond this paragraph. Instead, I want to write about maker’s block, and take an example from my own life – the non-installation of a dust extraction system for a workshop. Writer’s block is a writer’s inability to write; Maker’s block is a maker’s inability to make. Here, we will look at why this happens, and how to get the maker making again.
Several months have passed since I purchased a dust extractor. Still there is no sign of any ducting to transport that dust from their production centres to a storage centre. Why not? Unfortunately, there are not many good answers to choose from. Perhaps the best reply is to say, I’m awaiting a miracle.
The challenge is that a dust extractor is a system, not just a single product. The system is made up of many components, that have to work together. These components are all sold individually, not prepackaged in a kit.
There is no single criteria that can be used to judge components. Instead, there are three that compete with each other. Each appears to make a system better, but each also introduces weaknesses. The three criteria are finding and using: 1) a uniform type of material, in this case a plastic; 2) a uniform tube/pipe diameter, 100 mm is the diameter of tubing that comes with the dust extractor; and 3) a wide selection of components.
Of the local shops where I can purchase DIY equipment, only one, Jula, offers blast gates or more specialty components related to dust extraction. One expects these products to have the type of plastic imprinted on them, so that at end of life they can be recycled. Before then, the same information might be useful for knowing what to do with the component. None of these specialty components from Jula have any such markings, and none of the product descriptions include anything about the type of plastic. However, each component does have “Made in Taiwan” on it. From experience, I am fairly certain that each of these components is made from ABS (Acrylonitrile butadiene styrene) plastic, a type most notably known for its use in Lego bricks.
Why is having only one type of plastic so important? The challenge is that it is very difficult to “weld” a plastic from one resin family to a plastic from a different resin family. This means that connections between components made from different types of plastic have to be made mechanically.
I can obtain: hose made of PU (polyurethane) and PVC (polyvinyl chloride); pipe made of PP (polypropylene) and HDPE (high density polyethylene). ABS pipe is more difficult to find.
Pipe/hose diameter.
The dust extractor comes equipped with an inside diameter of 100 mm (that’s about four inches) hose. This is the same diameter that is used for other household ventilation purposes. While hoses have a varying diameter, because of reinforcement wires, ducting and pipe are more stable. Using Vernier calipers, one finds that their diameter varies from about 100 to 103 mm. This is probably because 101.6 mm is the exact equivalent of four inches.
At Jula they offer 6 meters of PU hose with 100 mm inside diameter for NOK 800. This is only part of the cost. Every joint requires the use of a hose clamp at each end, that costs NOK 70 for 2. PU hose is described as being very flexible. Which makes it suitable for “last meter” attachment between a blast-gate and a machine, or – more often than not – an adaptor, which costs NOK 70. A blast-gate costs NOK 100, and a Y-joint separating the machine feed from the common line costs NOK 200. The last meter of machine attachment costs about NOK 570 for each machine.
Hose is not really suitable for transport between the other side of a blast gate, and the dust extractor. One of the challenges has been to find a suitable 100 mm pipe system. At Biltema this size pipe can be purchased for NOK 90 for one meter; At Jula it costs NOK 100, for 860 mm. Unfortunately, there are no sleeves at the end of either pipe, so these must be purchased for every joint. These cost NOK 40 at Biltema.
Component Diversity
The main logical flaw at this point is the expectation is that the selected components are actually suitable for the job. Unfortunately, this is not the case. The miracle that I am awaiting is that these components will suddenly become available, if only I search the internet one more time!
Enter wastewater pipes.
Wastewater pipes are available in 1, 2 and 3 meter lengths (the last one costing NOK 170). Each comes with a sleeve at one end. Sliding sleeves are also available so that cut off pieces can be attached easily. These cost NOK 60 each, as do elbows available in 15, 30, 45 and 90 degree varieties. There are also Y-joints, that cost half the price of the ABS joints, or NOK 100. This variety eases the installation process and reduces waste. There are no problems fitting these components to each other, they are designed to fit together without glue or clamps.
110 mm to 100 mm transition
The key to being able to move on, was the realization that it would be possible to joint 100 mm components with 110 mm components, despite their belonging to different plastic resin families. Weatherstripping can be placed on the exterior of the 100 mm components. These can then be joined together, and filled with silicon. Duct tape can then be wrapped around the entire joint.
Conclusion
The conclusion of this article cannot be written at this moment. At my next opportunity, I have to make a shopping list of 110 mm components, drive into Steinkjer, purchase them and then drive home. Then the difficult part comes, actually doing the work of installing them. The end of maker’s block is within sight.
This weblog post was updated 2021/12/21. to eliminate Weeds from the title. This post formed part of a Needs, Seeds and Weeds website that belonged to my daughter, Shelagh. In addition, other things are also out of date, or my opinions have changed. Apart from the title, updating the text to a block format and other minor formatting changes, the text above this paragraph remains as it was before. Any significant content changes are found below this paragraph