Ethan & Ethel 05: First Stationary Machine

Today, Monday, 2018-08-13, the real-life Ethan is 16 years old. Happy Birthday Ethan! This date also marks the day when I have spent precisely half my life as a father.

Ethan & Ethel are wanting to improve their woodworking workshop by buying a stationary machine. They estimate that using this type of machine can increase their production capacity. Because these machines are expensive, they will have to plan which one to buy first. They are thinking that if they make the right investments, they will be able to build things that others want, and make some money. For example, they have an aunt who wants a garden shed, other relatives who need new kitchen cabinets; and family friends who want hardwood furniture. However, they can’t build all these things at once, and decide to concentrate on building garden sheds.

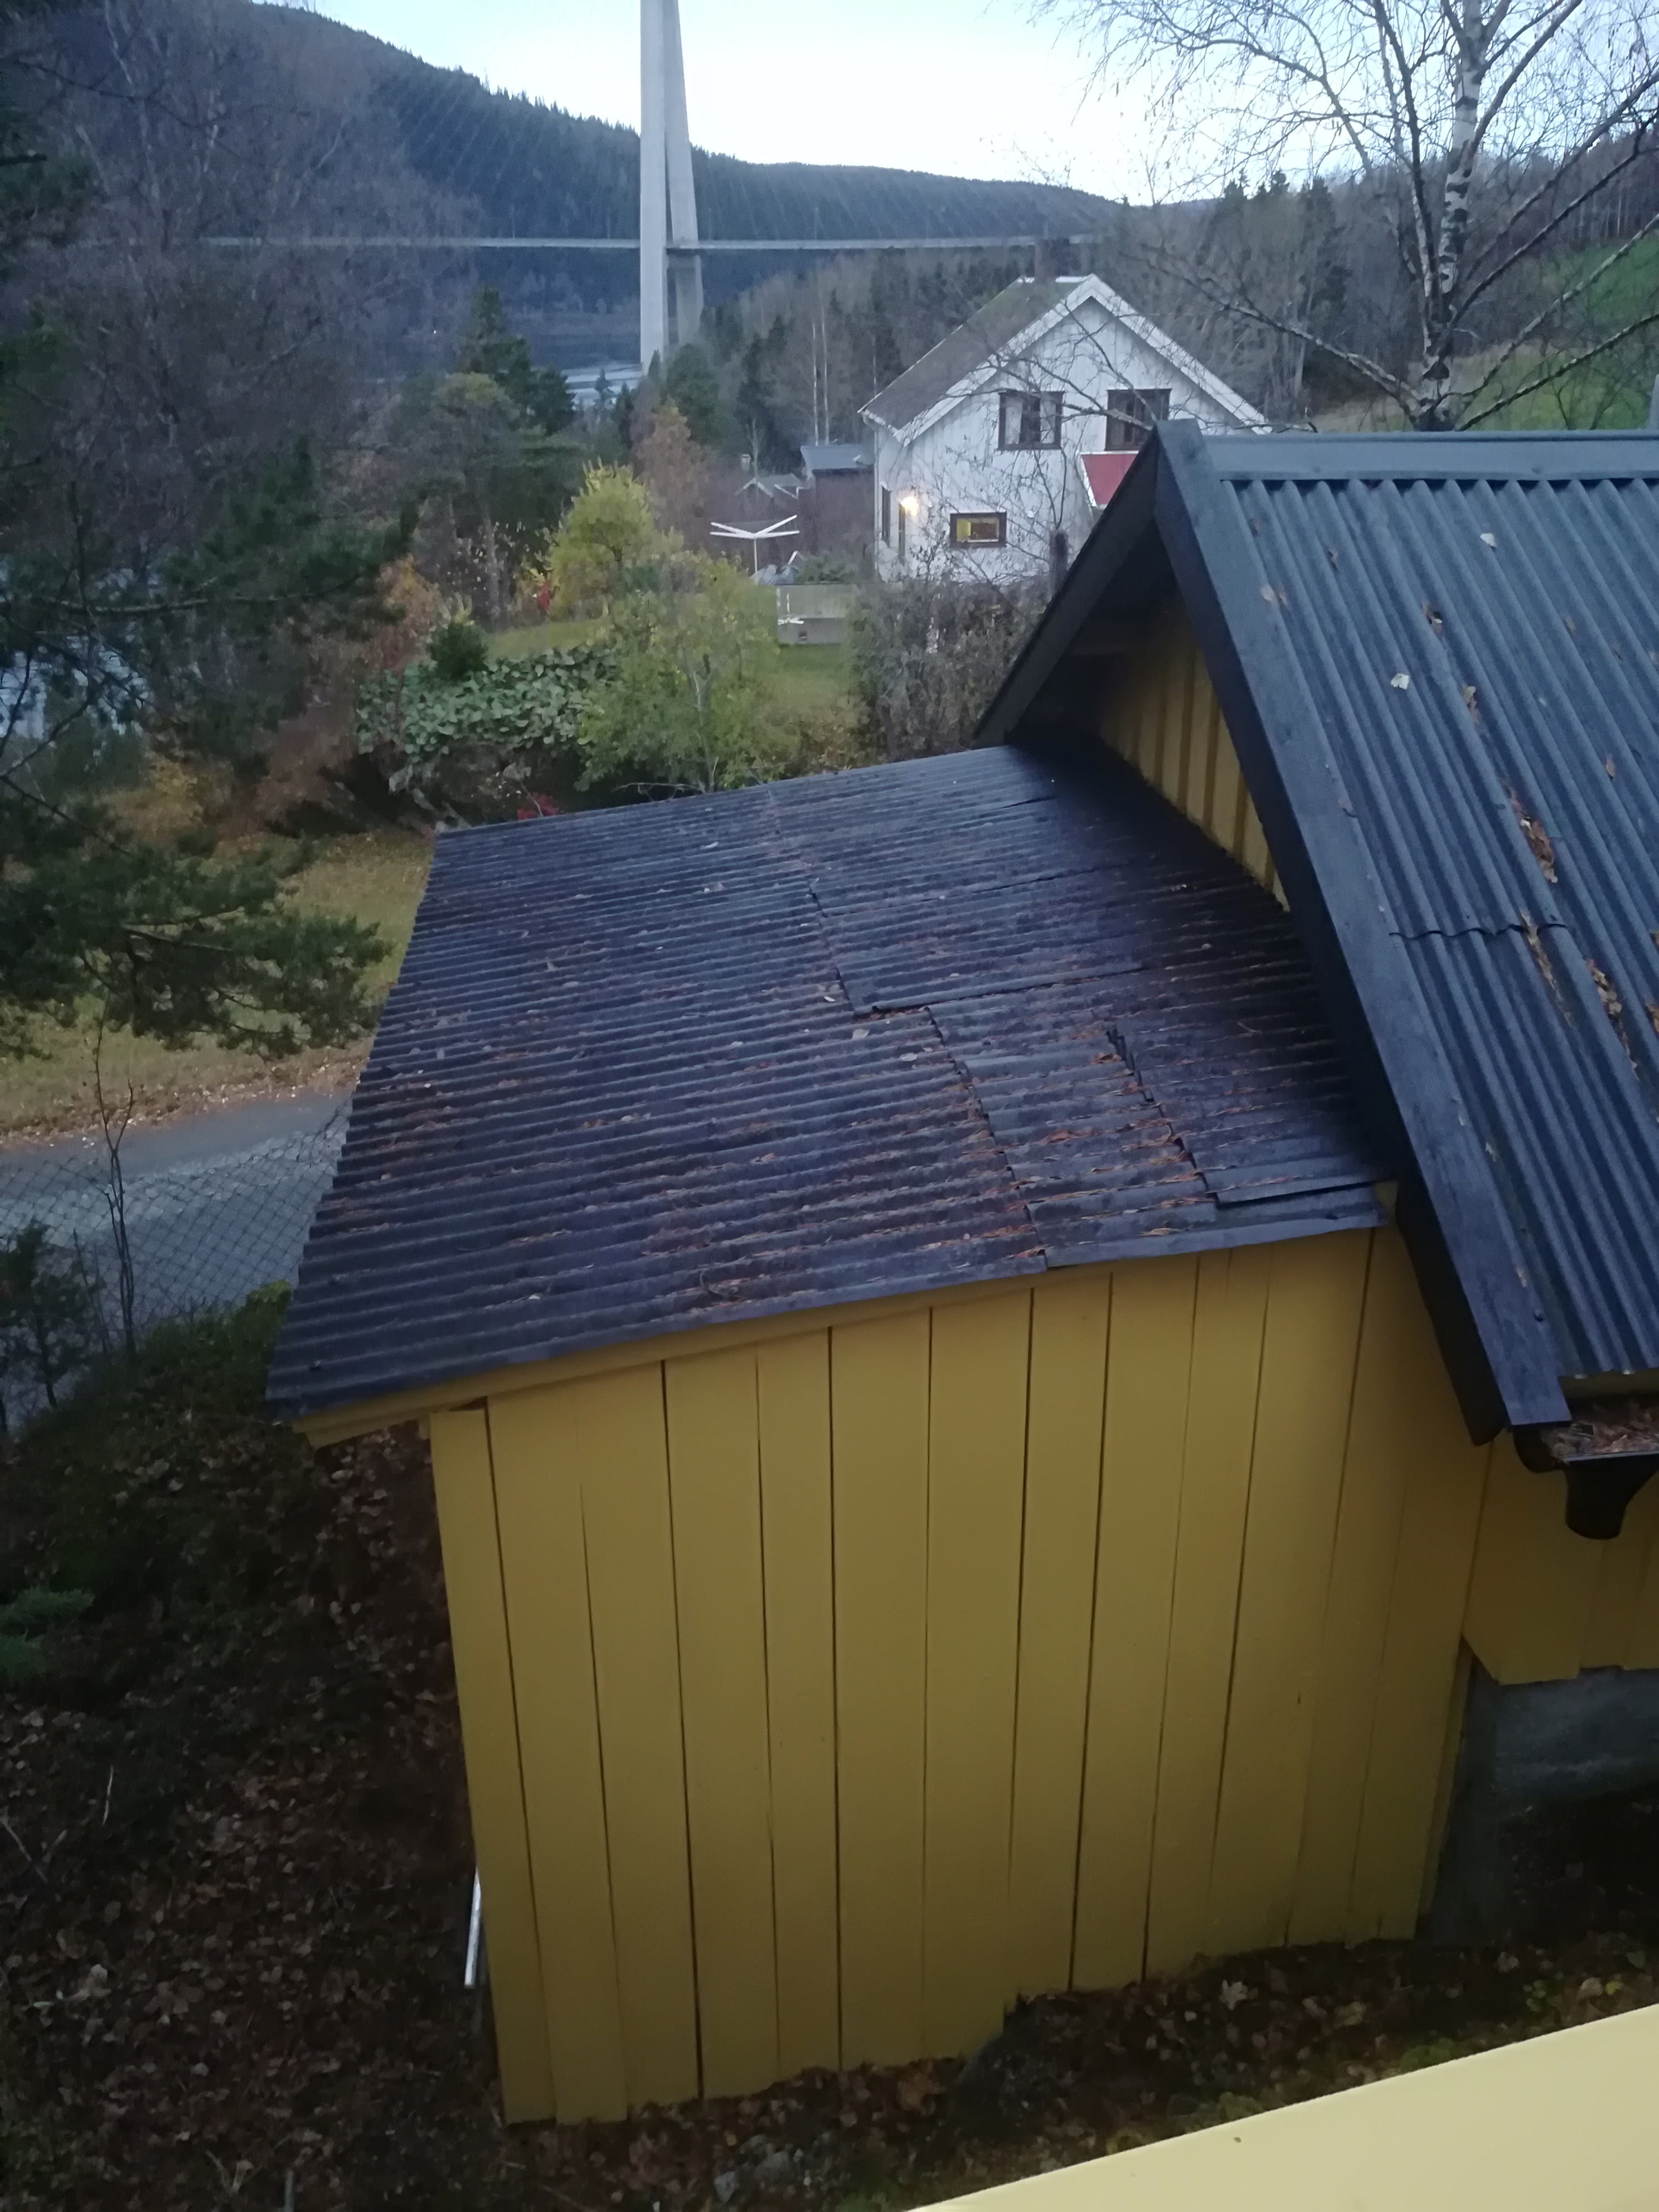
There are many designs for garden sheds. Usually they are small uninsulated buildings. Ethel & Ethan are thinking of using softwood lumber for framing, then covering it with OSB. When they made up a cut list, they realized that they should build it using full sheets of OSB. That means dimensions of 1 200 mm, 2 400 mm or 3 600 mm. Beyond that, and the buildings would be far too big with their limited skill sets. They decided that their first building should be 2 400 mm long by 2 400 mm wide by 2400 mm high at the eaves. At the ridge, it would be 600 mm higher, or 3 000 mm.  It is a small shed, but there is less that can go wrong, and less time and equipment is needed to make it.

They started thinking about pre-cutting the pieces for one shed to save time in the short building season. Then they thought that if they could pre-cut one, they could precut more. Then they contacted other people in their network to see if they could find buyers. After these conversations, they estimated that they could build and sell five of these small sheds in the summer.

They want to buy a chop saw, and know the maximum dimensions of the material they will be working with on the sheds will be about 50 mm by 100 mm. What they really want is a flipover saw, such as a DeWalt DW743. One challenge with this model is its inability to cut joists, if they work on bigger projects. The saw was originally made by the German power tool company, ELU, that was bought by DeWalt in 1994.

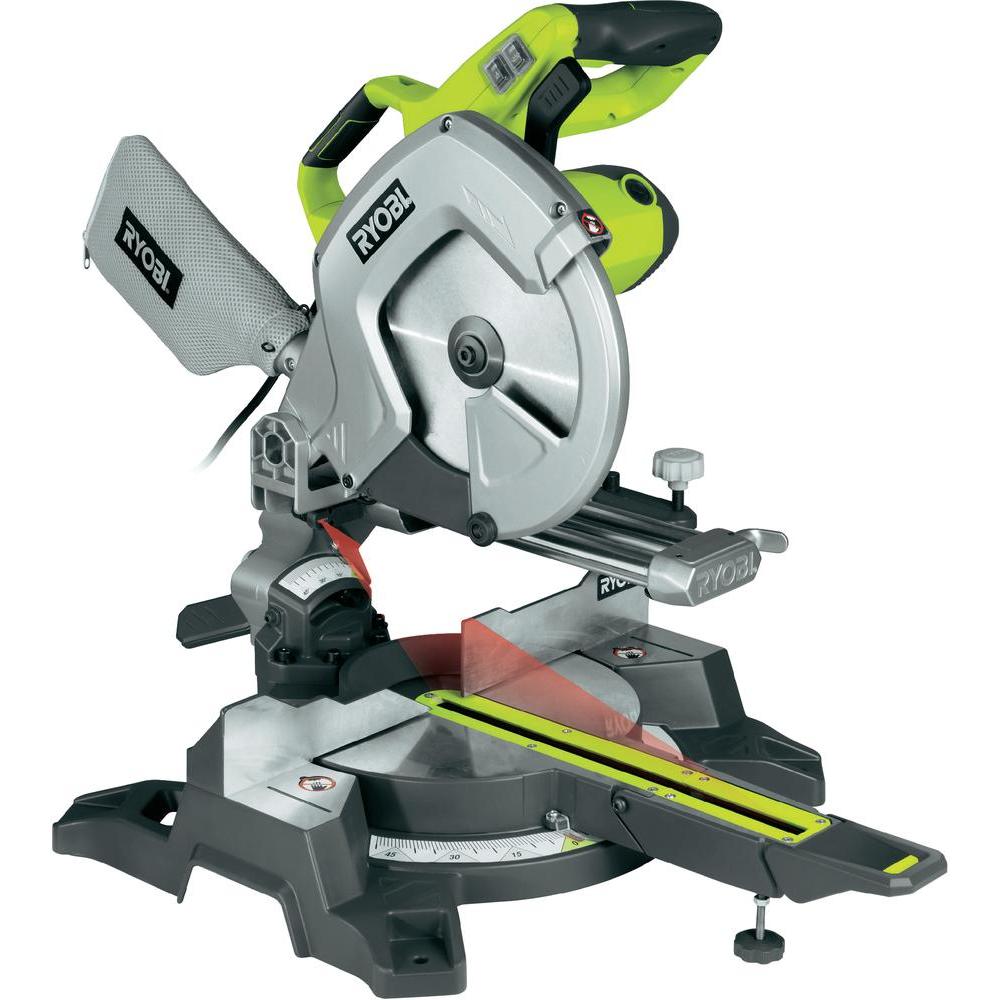
At the Unit One workshop, a Ryobi compound sliding mitre saw is used. It was selected because of price, and the fact that the sliding mechanism is in front of the saw. This prevents it from being used with materials thicker than about 100 mm. Most sliding saws go back towards the wall, which means that the saw has to be set further forward, increasing the amount of space used. Perhaps the best mitre saw is a Bosch axial-glide saw. Its main disadvantage is price, costing almost four times that of a Ryobi.

Lumber dimensions: A 2 × 4 when dressed is 1-1/2″ × 3-1/2″ or 38 mm × 89 mm. In Europe it is 48 mm x 98 mm.

A sliding compound mitre saw and a plunge saw make a versatile pair. Table saws are more dangerous than either of these saws, because the operator holds the material being cut, instead of the saw, making it easier to accidentally move hands into the spinning blade.

Functional Tool Names

There are two fundamentally different ways to cut wood, with or across the grain. Wood grain is important because it affects the shape of saw teeth. A rip-cut comes from rip: to split or saw timber in the direction of the grain, and cut: to divide with a sharp-edged instrument. It needs a saw with a blade that chisels the wood. In contrast, a cross-cut, splits or saws the wood perpendicular to the grain, it needs a blade that shears the wood fibers.  Blades that rip-cut well do not cross-cut well.

Most woodworkers use one type of electric saw to rip-cut and a different type of electric saw to cross-cut. While cross-cutting with a blade designed for rip-cutting, is not energy efficient it is not dangerous, rip-cutting with a saw designed for cross-cutting is worse, because it can be very dangerous. Circular saw blades designed for rip-cutting have a smaller number of larger teeth than similar blades designed for cross-cutting.

These two different saws are referred to as table saws (for rip-cutting) and mitre saws (for cross-cutting). Other names for these saws are used. The problem with the name table saw, is that it is a descriptive name, rather than a functional name. Yes, it is a saw with a blade that emerges from a table. A functional name, would be to refer to it as a rip saw, perhaps even a stationary electric rip saw. This name focuses on the primary task of the saw, which is to make rip-cuts.

scheppach hs 105
Scheppach HS 105 stationary electric rip-saw (Photo: Scheppach)

The name mitre saw has even more problems associated with it. However, the term chop saw (which is also used) at least provides it with a functional name. What we referred to as a table saw in the previous paragraph, also makes mitre cuts. Indeed it almost always comes with a mitre gauge to facilitate these cuts. However, given a choice, it is more efficient to use a saw referred to as a mitre saw. Both types of saws also make bevel cuts, which require the saw blade to change its angle with respect to a base, or table. A functional name, would be to refer to it as a cross-cut saw, perhaps even a stationary electric cross-cut saw. This name focuses on the primary task of the saw, which is to make cross-cuts. Even using the name chop saw would be better than mitre saw.

ryobi ems254l
Ryobi EMS 254 L stationary electric cross-cut saw (photo: Ryobi)

The most important reason for opting to use a functional tool name is safety. While most professional woodworkers are informed about the differences between rip-cut and cross-cut saws, and the hazards of using cross-cut saws to make rip-cuts, this will not be reinforced if this function is missing from the tool name.

At the Unit One workshop, we now have a (stationary electric) rip-cut saw and a (stationary electric) cross-cut saw. In the future, tool names will be reviewed to ensure that functional rather than descriptive names are used. It is a safety issue.

Update: The illustration below shows the difference between saw teeth used for ripping, and those used for crosscutting.

sawteeth

This weblog post was updated 2021/12/21. to eliminate Seeds from the title. This post formed part of a Needs, Seeds and Weeds website that belonged to my daughter, Shelagh. In addition, other things are also out of date, or my opinions have changed. Apart from the title, updating the text to a block format and other minor formatting changes, the text above this paragraph remains as it was before. Any significant content changes are found below this paragraph.

Maximum Dimensions

When a workshop is being designed, one of the first questions that has to be asked (and answered) is, What type of raw material is being used? While there are a lot of general workshops that can handle an assortment of raw materials, one material may distinguish it above all else. Currently, my workshop is oriented to woodworking, with an emphasis on hardwoods and furniture. Hardwood is harder and slower to cut than softwoods. So, whenever I have evaluated woodworking tools, it is to ensure that they can work with hardwoods. In many cases, it means having more electric power. For example, while many table saws and chop saws can operate using 1 200 Watts, I have selected machines that have 2 000 Watts.

The second question that has to be asked has to do with maximum dimensions. Many woodworking machines are designed for use on construction sites. In Scandinavia (not to mention USA and Canada) this means that they will be used with softwoods. The maximum sized board that has to be handled is typically 4 800 mm long, with a width of 300 mm and a thickness of 50 mm. Of course they also have to be able to handle a wide variety of sheet goods. these will typically have dimensions of 1 220 mm in width, by up to 3 000 mm in length. Thicknesses over 30 mm are extremely rare.

A furniture oriented workshop has to focus on other dimensions than those found on construction sites, although sheet goods are similar to those described above. With respect to lumber, there can be a need to work with thicker materials. At the Unit One workshop, the maximum design thickness is 75 mm. The maximum width is 300 mm and the maximum length is 2 400 mm. It should also be mentioned that boards up to 6 000 mm can be “chopped” into shorter lengths without problems. Beyond this, some doors may have to be opened. It is also possible to handle widths up to 600 mm. First position a board accurately at the chop saw using end stops. Make the first cut, flip the material, reposition, then make the second cut.

All of the woodworking equipment has been purchased with these dimensions in mind. This, in part, is why it has been so difficult to buy a chop saw, a sliding compound mitre saw, that can handle materials 300 mm in width, and 75 mm in thickness. Many chop saws are not suitable. It should also be noted, that I wanted to keep the commonality of blade size with the table saw. This meant 254mm x 30 mm. For several weeks I have tried to purchase a Scheppach HM 100 LXU. While the Scheppach is slightly over-dimensioned in terms of cutting width, it only just meets the workshop standard in terms of cutting depth. The reverse is true of the Ryobi EMS 254 L. With the workshop standard firmly in mind, I was able to substitute the Ryobi machine for the Scheppach without technical difficulty. Living with Ryobi green (or is it yellow?) instead of Scheppach blue may be another matter.

Ryobi EMS 254 L 1
Ryobi EMS 254 L, a sliding compound mitre saw. (Photo: Ryobi)
Ryobi EMS 254 L 2
Ryobi EMS 254 L in staged use. (Photo: Ryobi)

Sliding Compound Mitre Saw comparison

AttributeRyobi EMS 254 L Scheppach HM 100 LXU
Cross cuts at 90°90 x 300 mm78 x 340 mm
Compound cut 45°/45°58 x 200 mm 42 x 240 mm
Bevel cut 45°58 x 300 mm  42 x 340 mm
Mitre cut 45°90 x 200 mm78 x 240 mm
Speed4 500 /min5 000 /min
Power2 000 W2 000 W
Weight16 kg15.7 kg
Blade size254 x 30 mm254 x 30 mm

With table saws, the critical dimension is depth of cut. The Scheppach HS 105 table saw is adequately powered (2 000 Watts) and is able to cut material up to 80 mm in thickness. With planers, it is the width of material that is critical. The Meec 250-025 planer is also adequately powered (2 000 Watts) and is able to plane materials up to 330 mm wide. Combination jointer planers are often sold. The jointer on top is unnecessarily wide, while the thickness planer underneath is too narrow. My jointer needs will be met with a self-built spindle moulder capable of using a router bit 80 mm in height. This exceeds the workshop thickness standard.

One exception to the material rules of 75 x 300 x 2 400 mm maximum dimensions, has to do with lathes. Here, the maximum size is 300 mm in diameter, with a length of 1 000 mm. No lathe has been purchased yet, and this purchase will probably be delayed by up to four years because these will mainly be used in the production of dining room chairs.

This weblog post was updated 2021/12/21. to eliminate Needs from the title. This post formed part of a Needs, Seeds and Weeds website that belonged to my daughter, Shelagh. In addition, other things are also out of date, or my opinions have changed. Apart from the title, updating the text to a block format and other minor formatting changes, the text above this paragraph remains as it was before. Any significant content changes are found below this paragraph.

I am on table saw #2 at Cliff Cottage, a Bosch PTS-10 model, that works considerably better than its Scheppach predecessor. I have had even discussed replacing the Ryobi EMS 254 L mitre saw with something as simple as a Bosch PCM 800 S. Regardless of what happens, the Ryobi will not be allowed to exist as a functioning saw after the end of 2023.

Ethan & Ethel 02: Dust Extractor & Air Cleaner

Breathing. It’s a task Ethan & Ethel do all the time, to stay alive. Unfortunately, there are environments that make this breathing uncomfortable, even damaging, sometimes deadly. This post is going to look at how a woodworking workshop can be constructed to ensure that most sawdust is collected, and the air is filtered so it is fit to breathe.

Sawdust

There are three levels of sawdust collection that can be used: 0) broom and dustpan or shovel; 1) shop vacuum; 2) detached, ducted extraction system.

Level 0: Just cleaning up after yourself with a broom, may make a workshop look clean, but it will not provide a healthy environment. This is an unacceptable level of dust collection.

Level 1: The minimum acceptable level of dust collection involves the use of a shop vacuum attached directly to a tool being used.

A shop vacuum can be developed into a dust system by including a hose reel and a separator. A hose reel will hold 10 meters of 50 mm diameter hose, with a crank and tension adjustment. Due to the length of the hose on the reel, considerable power (e.g. 3 kW or more) may be required to power the vacuum.

A hose reel encourages use of a dust separator that can be permanently positioned in a fixed location. A dust separator captures sawdust, wood chips, and other debris before it enters the vacuum. Most separators contain cyclones that disrupt air flow, causing most wood dust particles and other materials that are heavier than air to separate out. They do not enter the vacuum. This vortex effect adds life to vacuum filters and prevents the loss of suction caused by a clogging.


Rockler dust system
A shop vacuum attached to a separator and a hose (photo: Rockler)

Level 2: detached, ducted collection system

The Annex is a shed that was added onto the original garage that has become the Unit One workshop. If you enter the annex today, you will find that it contains the gardener’s former workbench and stacks of firewood. Soon, the Annex will be re-purposed, and many of the dirtiest, noisiest and smelliest activities will be confined to this area. This does not mean that the rest of the workshop will be clean, quiet and fresh smelling.

bty
The Annex, home of dirty, noisy and smelly activities. (photo: Brock McLellan)

The equipment used in a level 2 ducted system is very similar to that used with level 1 equipment. There is a vacuum and a separator. 100 mm flexible tubing or metal ducting connects the machines. Both have advantages and disadvantages. While flexible tubing is preferred for attachment to a machine, in other places a more solid, metal duct is preferred. Transparent material allows one to see blockages if they occur. Metal duct prevents the build-up of static electricity, which could result in a fire.

hose
100 mm diameter flexible tubing is often used for dust collection in a workshop, This is available in 6 meter lengths, and can be cut to size. (foto: Jula)

duct
100 mm galvanized spiral duct, made from sheet metal. (photo: NORFI Absaugtechnik GmbH)

A smooth transition is needed where hoses, tubes and ducts meet. Y connectors are often used for this purpose.

Y
Y-connector, used to smooth air-flow where two ducts meet (photo: Jula)

Most of the time in a small workshop, only one machine can be used at a time. Each machine is attached to the dust collection system, but blast gates are used to close the dust collector so that inactive machines do not result in air being sucked through the system. Only a active machine has its blast gate open. This saves a lot of energy, allowing a much smaller sized vacuum to be used. At Unit One, the vacuum uses 1100 W.

Blast gate
Blast gate in closed position, preventing air from being sucked through a system. (photo: Jula)

Cleaning floors, and other horizontal surfaces, in a workshop is a necessary part of work. While some people use vacuums for this, others uses brooms and brushes of various types. The collected dust can be swept into a dust port.

Dust chanel
A dust port. (photo: Jula)

Lots of other pieces of equipment are needed, including bends and clamps, to make a level 2 dust collector. Interestingly, 6 meters of duct costs more than the vacuum I am using.

Dust collection can be automated, and this subject will be revisited in terms of using an Intelligent Workshop Assistant.

Air Cleaner

While dust collection is important, it doesn’t eliminate all dust from the air. This requires the use of an air cleaner. Two projects by Canadian woodworkers, are especially inspiring.

Matthias Wandell: http://woodgears.ca/dust/cleaner.html

John Heisz: http://www.ibuildit.ca/Workshop%20Projects/shop-air-cleaner-1.html

Respirators

Part of the Annex is slated to become a spray booth, to be used for the painting of wooden, metal and other objects.

A spray booth is a closed environment controlling air flow, pressure, temperature, air flow and humidity. The area is ventilated using electric fans, and heated with electric heaters to speed paint drying. Toxic solvents and paint particles are exhausted outside after filtering to reduce air pollution.

When possible, HPLV (high pressure, low volume) equipment is used. This is similar to a conventional spray gun using a compressor to supply the air, but the spray gun works at lower pressure (LP), while a higher volume (HV) of air is used to aerosolise and propel the paint. A turbine using a vacuum cleaner derived motor propels the air. This results in more paint reaching the target surface, reduces overspray, material consumption and air pollution.  The system offers three advantages: reduced paint waste, short drying times, and precise and efficient spraying that reduces paint preparation and (often) the need for masking.

Despite the equipment built into the workshop, there is a need for respirators. At Unit One most painting involves only a few minutes of work, so the level of protection is less than that used in environments where people paint for longer periods of the day.

WorkSafe BC provides a free 136 page pdf book, Breathe Safer – How to use Respirators Safely and Start a Respirator Program. It can be downloaded using this link: https://www.worksafebc.com/en/resources/health-safety/books-guides/breathe-safer-how-to-use-respirators-safely-and-start-a-respirator-program

fcveb
Painter, wearing respirator and safety glasses, but without protective clothing. (photo: Trish McLellan)