Previously, three weblog posts have been published to celebrate World Goth Day. These were about art, music and clothing. In 2023, there was so much other material written, that the chosen topic, Gothic architecture, was delayed until 2024. Now, at publication it is 2024-05-22, and the sixteenth World Goth Day!
When Gothic architecture as a topic came to mind, I began to wonder about the extent of Gothic buildings in Norway. Thus, I looked up Gotisk arkitektur = Gothic architecture, in the Norwegian Wikipedia.
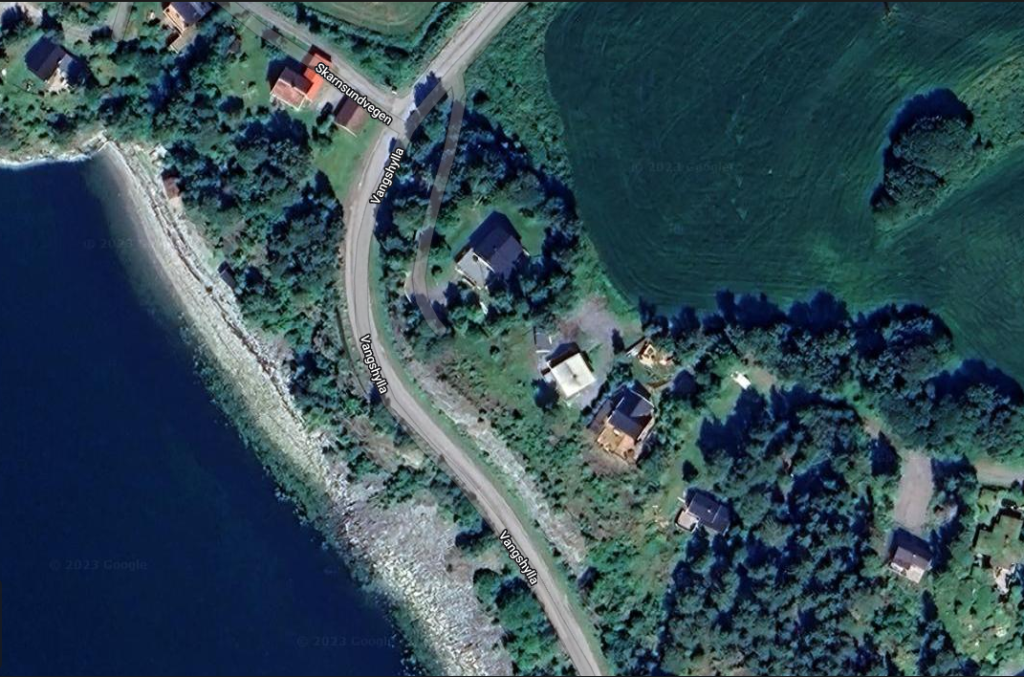
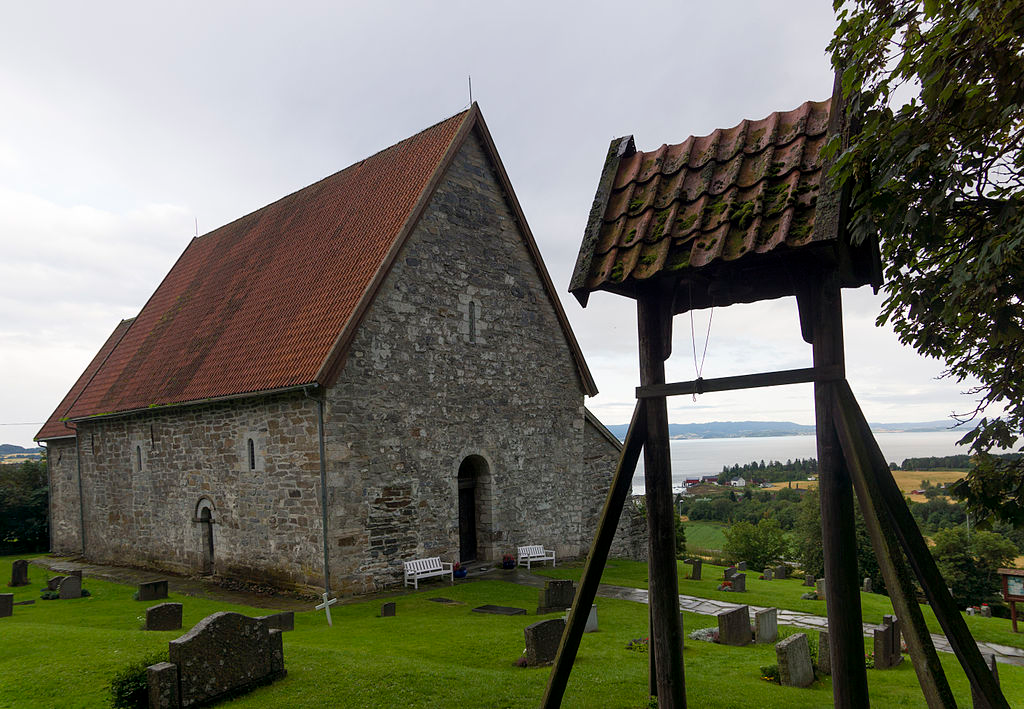
Translated into English, the section on Norway begins: Perhaps the earliest example of Gothic in the Nordics is a pointed arched portal at Sakshaug Old Church in Nord-Trøndelag. That church is precisely 11.0 km by road, east of Cliff Cottage. My thought then was that there was no need to describe something foreign, when I have source material almost on my doorstep.
Sakshaug Old Church was likely built from 1150 to 1180, and was consecrated in 1184. It is a place on our annual visitation list when, usually in July, we visit the graves of people we have known, who are no longer with us in this physical domain. We visit two people who are buried beside the church.
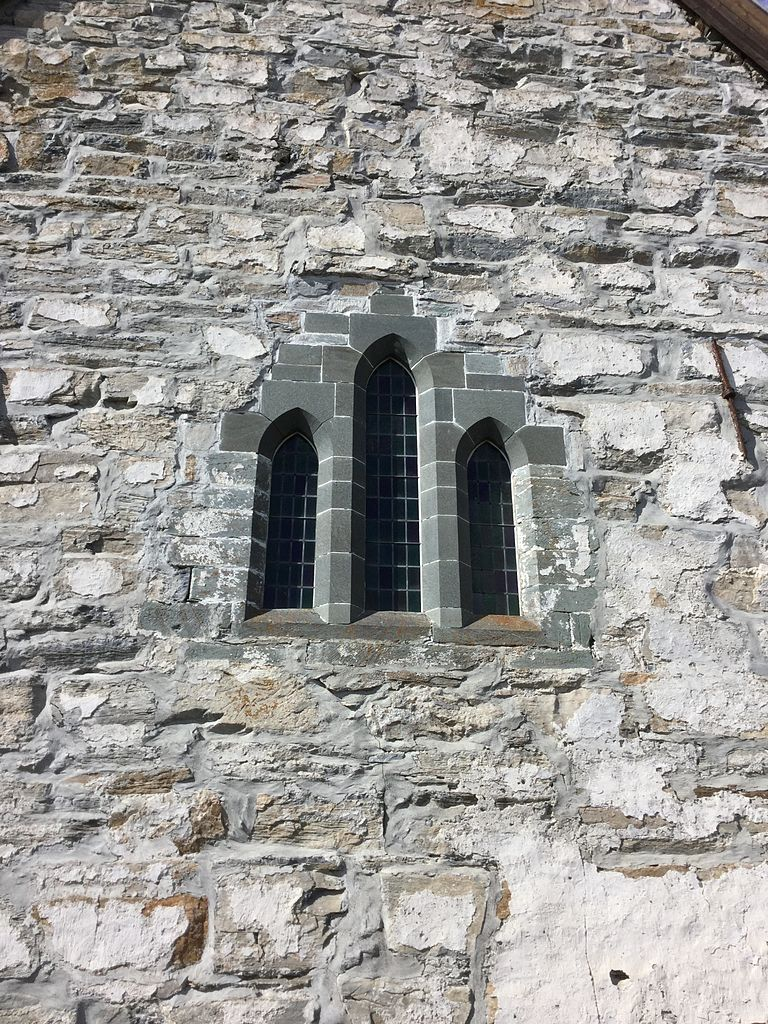
Most churches undergo change throughout their existence. This is undoubtedly true of Sakshaug Old Church. Thus, the choir was rebuilt with Gothic windows 1220–1230. Near these Gothic windows in the choir and on the chancel arch, there are 21 unique stone masons’ marks which show that it was stone masons from the construction of Nidaros Cathedral who built this church. Over the years, both exterior and interior have changed significantly.
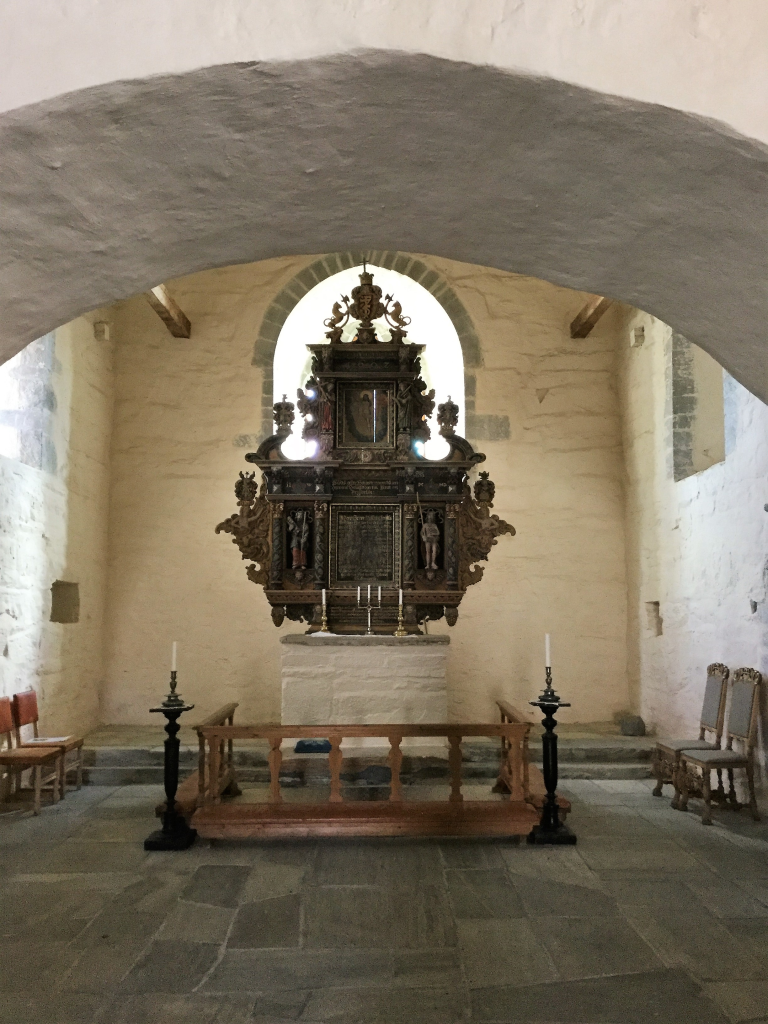
About five hundred years after the church was originally built, a pulpit from 1646 and an altarpiece from about 1655 were incorporated into the building. Both are carved in wood, presumably by Johan Johansen = Johan Bilthugger = Johan the wood carver. He died in 1657 in Trondheim, and was active in Trondheim and throughout Trøndelag in the middle of the 17th century. He is known for several altarpieces and pulpits.
In 1814, Sakshaug Old Church served as an election church for Inderøy Parish. Together with more than 300 other parish churches across Norway, it was a polling station for elections to the 1814 Norwegian Constituent Assembly which wrote the Constitution of Norway.
The Church Act of 1851 required church buildings have room to hold 30% of the people living in the parish. With a seating capacity of 200, the old church was too small to meet the requirements of the Church Act. It was replaced by the larger Sakshaug New Church, described below. After the new church was completed, the old church was closed. The wood roof, tower, decor and other woodwork were removed and sold. The only parts of the building that remained were the stone walls.
The pulpit was stored in the Science Museum, in Trondheim, while the altarpiece was used in Sakshaug New Church until 1957. It has now been returned to the old church. The ownership of the church was transferred to the Society for the Preservation of Ancient Norwegian Monuments in 1873. The church ruins sat for years without anything being done, but in the early 20th century, work began to restore the church. The ruins were finally enclosed by a roof in 1926. Work was completed in 1958, when it was re-consecrated.
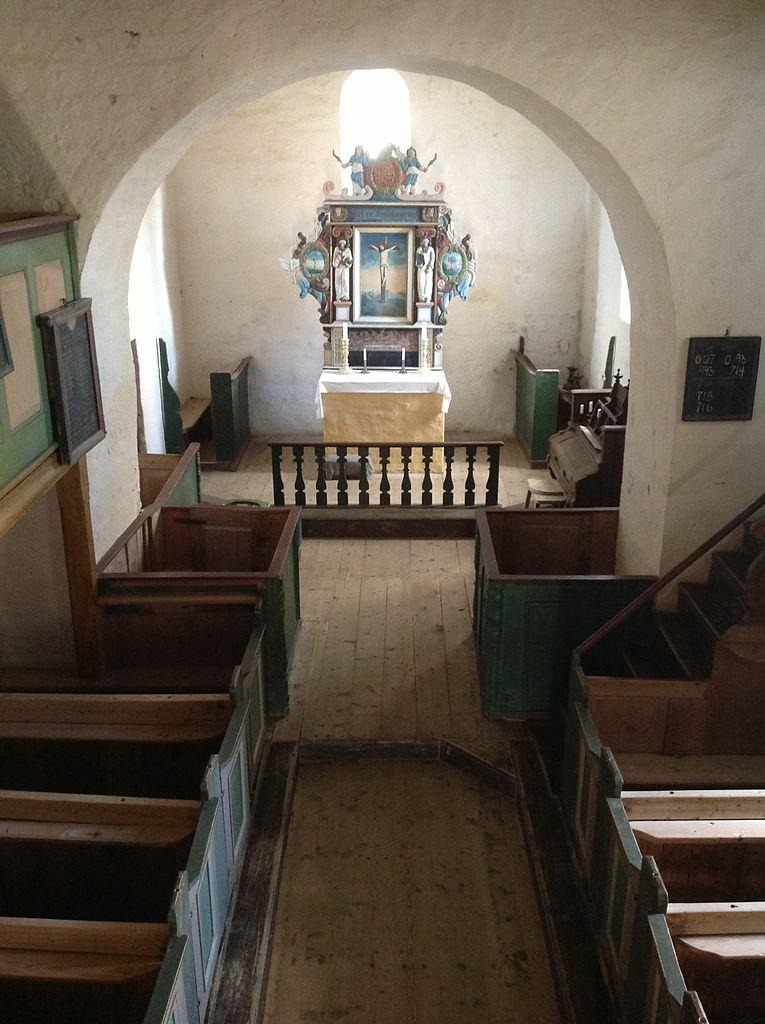
A second church with Gothic elements is located at Hustad, in Sandvollan, 13.8 km NNE of Sakshaug Old Church. Historical records of the church date from 1133, but construction probably started about 1160. It was mainly built of quarry stone. This masonry is almost completely preserved. The church has an entry porch on the west end with a tower above it. There is a rectangular nave and a narrower, rectangular chancel. Dendrochronology = tree dating from the church show that the trees used to build the roof structure of the nave were cut down in 1162–1163. Based on masonry techniques and stylistic features of the portals, it has been concluded that the church was completed about 1163. The two portals to the north and south have Romanesque arches. The west tower was completed about 1180. The wooden pews are original, dating from about the same time. The cemetery, surrounding the church, is enclosed by a log fence, the only such preserved fence in Trøndelag.
In 1650, a tower, serving as the building’s main entrance, was rebuilt/ replaced, and a wooden sacristy was constructed on the north side. Baroque-style furniture was also added. The current altarpiece depicting the Crucifixion of Jesus is from 1702. The pulpit has painted carvings of the Evangelists.
Hustad church was one of 632 churches and properties sold between 1723 to 1730 by Frederik V (1671 – 1730), King of Denmark and Norway 1699 – 1730. About 100 were sold to congregations, while the rest were sold to individuals, often high ranking clergymen. Later, congregations bought back most churches, with municipal help. In retrospect, it has been argued that the King never owned these properties. The alleged reason for the sale was so that the King could pay debts from the Great Northern War. The last private owner sold the church to the people of the parish in 1838. The church was renovated and the interior painted in bright colors soon after that.
Wikipedia tells us, The Great Northern War (1700–1721) was a conflict in which a coalition led by the Tsardom of Russia successfully contested the supremacy of the Swedish Empire in Northern, Central and Eastern Europe. The initial leaders of the anti-Swedish alliance were Peter I of Russia, Frederick IV of Denmark–Norway and Augustus II the Strong of Saxony–Poland–Lithuania. Frederick IV and Augustus II were defeated by Sweden, under Charles XII, and forced out of the alliance in 1700 and 1706 respectively, but rejoined it in 1709 after the defeat of Charles XII at the Battle of Poltava. George I of Great Britain and the Electorate of Hanover joined the coalition in 1714 for Hanover and in 1717 for Britain, and Frederick William I of Brandenburg-Prussia joined it in 1715.
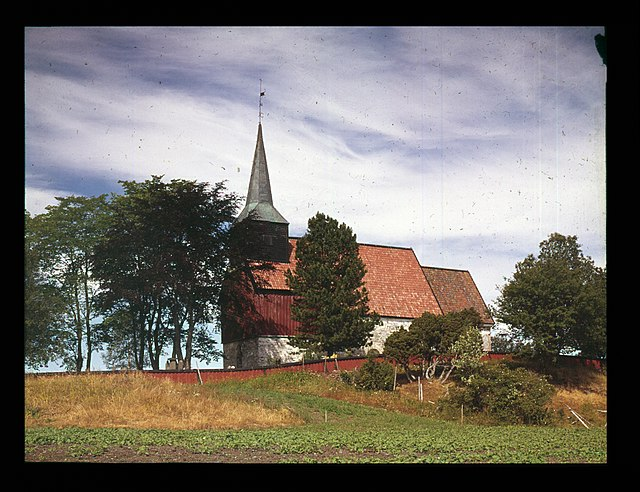
In 1885, permission was granted to build Heggstad Church, because Hustad did not meet the size requirements of the Church Act. It was built in 1887 using Håkon Mosling’s plans. Heggstad church seats about 250 people. After its completion, Hustad church was closed and sold to the Society for the Preservation of Ancient Norwegian Monuments who maintains the building and run it as a museum.
This is also a place we visit annually. We have two friends who are buried there.
Sakshaug New Church is the second largest church in Trøndelag, only exceeded by Nidaros Cathedral in Trondheim. The new church was built in a Neo-Gothic long church style, construction was started in 1870 and completed in 1871, the same year the church was consecrated. It was designed by Håkon Mosling. Originally, the church could accommodate 1 200 people, but fire regulations limit this now to 850 people. The reason for such a large church and excess is related to Inderøy’s position of power towards the end of the 19th century. Arguably, it was the second most important place in Trøndelag. Its power declined significantly in the 20th century, and is non-existent in the 21st century. We know many people who are buried at Sakshaug New Church, and read prayers at three of them, on our annual visit.
Note: Håkon Mosling (1840-1914) was a Norwegian builder and architect. He lived in several places, including Trondheim (1865-1873), Steinkjer (1874-1894), and Oslo (1894-1914). As part of his architectural practice, he worked as a builder and had a carpentry workshop in Steinkjer. For the last 20 years of his professional life, he was employed as a draftsman for the military at Akershus Fortress in Oslo. Due to his limited schooling, several of his designs underwent extensive proofreading and adjustments by Jacob Wilhelm Nordan (1824 – 1892) who was the architect employed by the Ministry of Church Affairs.
The system that administrates the churches is archaic. Inderøy has a population of less than 7 000 people. It also has seven churches, of which two are Gothic. Few people actually attend church services. This includes active Christians, who choose to use their chapels = bedehus (Norwegian) = prayer houses (literal translation). Residents with a non-Christian background have difficulty finding an appropriate, dignified place to celebrate sacred events, such as birth, adulthood (confirmation), marriage and death, Thus, I thought it would be more interesting to write about Norwegian religious excesses.
What I find disturbing, as a non-Christian, is that both medieval churches were re-consecrated. This effectively prevents their use by non-Christians.
Originally, in 1814, the Norwegian Constitution Article 2 read: The Evangelical-Lutheran religion remains the public religion of the State. Those inhabitants, who confess thereto, are bound to raise their children to the same. Jesuits and monastic orders are not permitted. Jews are still prohibited from entry to the Realm.The constitution has been modified many times. The prohibitions against Jews, monastic orders and Jesuits were removed by constitutional amendments in 1851, 1897 and 1953, respectively. The Quizling government reimposed the constitutional prohibitions against Jews during the second world war. The Evangelical-Lutheran church is now the Church of Norway (CoN).
In 2012-05, parliament passed a constitutional amendment, for the second time, to separate church and state. This formally made Norway a secular country with no official religion.
Article 2 of the Norwegian constitution, revised in 2014, currently reads, in its official English translation: Our values will remain our Christian and humanist heritage. This Constitution shall ensure democracy, a state based on the rule of law and human rights. Article 4 currently reads: The King shall at all times profess the Evangelical-Lutheran religion.
Article 4 was not originally intended to be included in the revision of the Constitution, and only ended up there at the insistence of the current king, Harold V (1937 -). It also shows why a country with a monarchy cannot be fully democratic. One overly influential person has the ability to disregard democratic rule. I may be a citizen of two monarchies, and have lived in them for most of my life, but I am a republican, not a monarchist.
The Norwegian state has felt an obligation to provide financial support to the CoN. Yet, by providing this support, the Norwegian state also has an obligation to provide financial support to all other religions. Since the 1980s, membership in CoN has been declining, at the rate of about 1% per year. Currently, about 63% of the Norwegian population are members of CoN. At this rate, CoN will be a minority religion in 13 years = 2037.
Not all Norwegian politicians are especially religious. Thus, there are various opinions as to the massive amount of state aid given to religious groups. If the state provides economic support to religious groups, there has to be a system of proportionality built in. Financial favoritism of one religion would not be allowed. So payments are made on the basis of membership numbers. CoN is bureaucratic, and has a lot of expenses, including old churches that need a lot of maintenance, and cost a lot to heat. Declining membership does not result in declining costs. So, once CoN costs are determined, they are divided by the number of members. This gives the per capita funding available to every other religious/ humanist organization, that meet basic requirements. The Baha’i Faith is one organization receiving such grants.
Most CoN members are passive. Few attend church services. Their participation involves a small number of important transitions: Baptism, confirmation, marriage and burial. Yet, the CoN has the right to deny non-Christians the use of church buildings, owned by municipalities. This is allegedly because, such use would require the buildings to be re-consecrated! Other Christians, including Catholics, have no such restrictions imposed on them.
20th Century Gothic
The philosopher Rolland Barthes (1915 – 1980), author of Mythologies (1957-Fr/ 1972-En), in a section titled, The New Citroen, writes: I think that cars today are almost the exact equivalent of the great Gothic cathedrals: I mean the supreme creation of an era, conceived with passion by unknown artists, and consumed in image if not in usage by a whole population which appropriates them as a purely magical object. (p. 88)
Personal note: I have also written to the Inderøy graveyard authorities on behalf of Trish and myself, requesting to be buried, when the time comes, at the graveyard immediately across the road from Sakshaug Old Church. Alasdair has one friend who is buried there. It has a number of tall old trees, so it is the closest we come in Inderøy to a forest graveyard, with an aura of tranquil beauty. I also requested that we be buried in accord with Baha’i burial practices, which means that the graves have to be alligned with the Baha’i qibla = the tomb of Baha’u’llah, at Acca, in today’s Israel, north of Haifa. The graveyard authorities have a responsibility to accommodate everyone, not just members of the Church of Norway.
World Goth Day #17 will look at Gothic history. It will be published on Thursday, 2025-05-22.