Cheap table saw blade guards are seldom worth the plastic they are made of.
One reviewer suggested that potential purchasers of table saws should disregard the saw blade guards that come with the machines. They will probably have to be replaced with more appropriate equipment. Recently, I was happy to have been given that advice. When a 25 kg sheet of Baltic birch plywood crashed into my guard it shattered, with two large broken pieces the result.
A temporary repair involved the disassembly of the two main plastic parts. Contact cement was then used to glue each broken pieces to its main piece. Finally, the two main parts were assembled again. If this guard is ever used again, it will be further reinforced with duct tape. While the repairs were being made, I was building the next iteration of a saw blade guard in my mind.
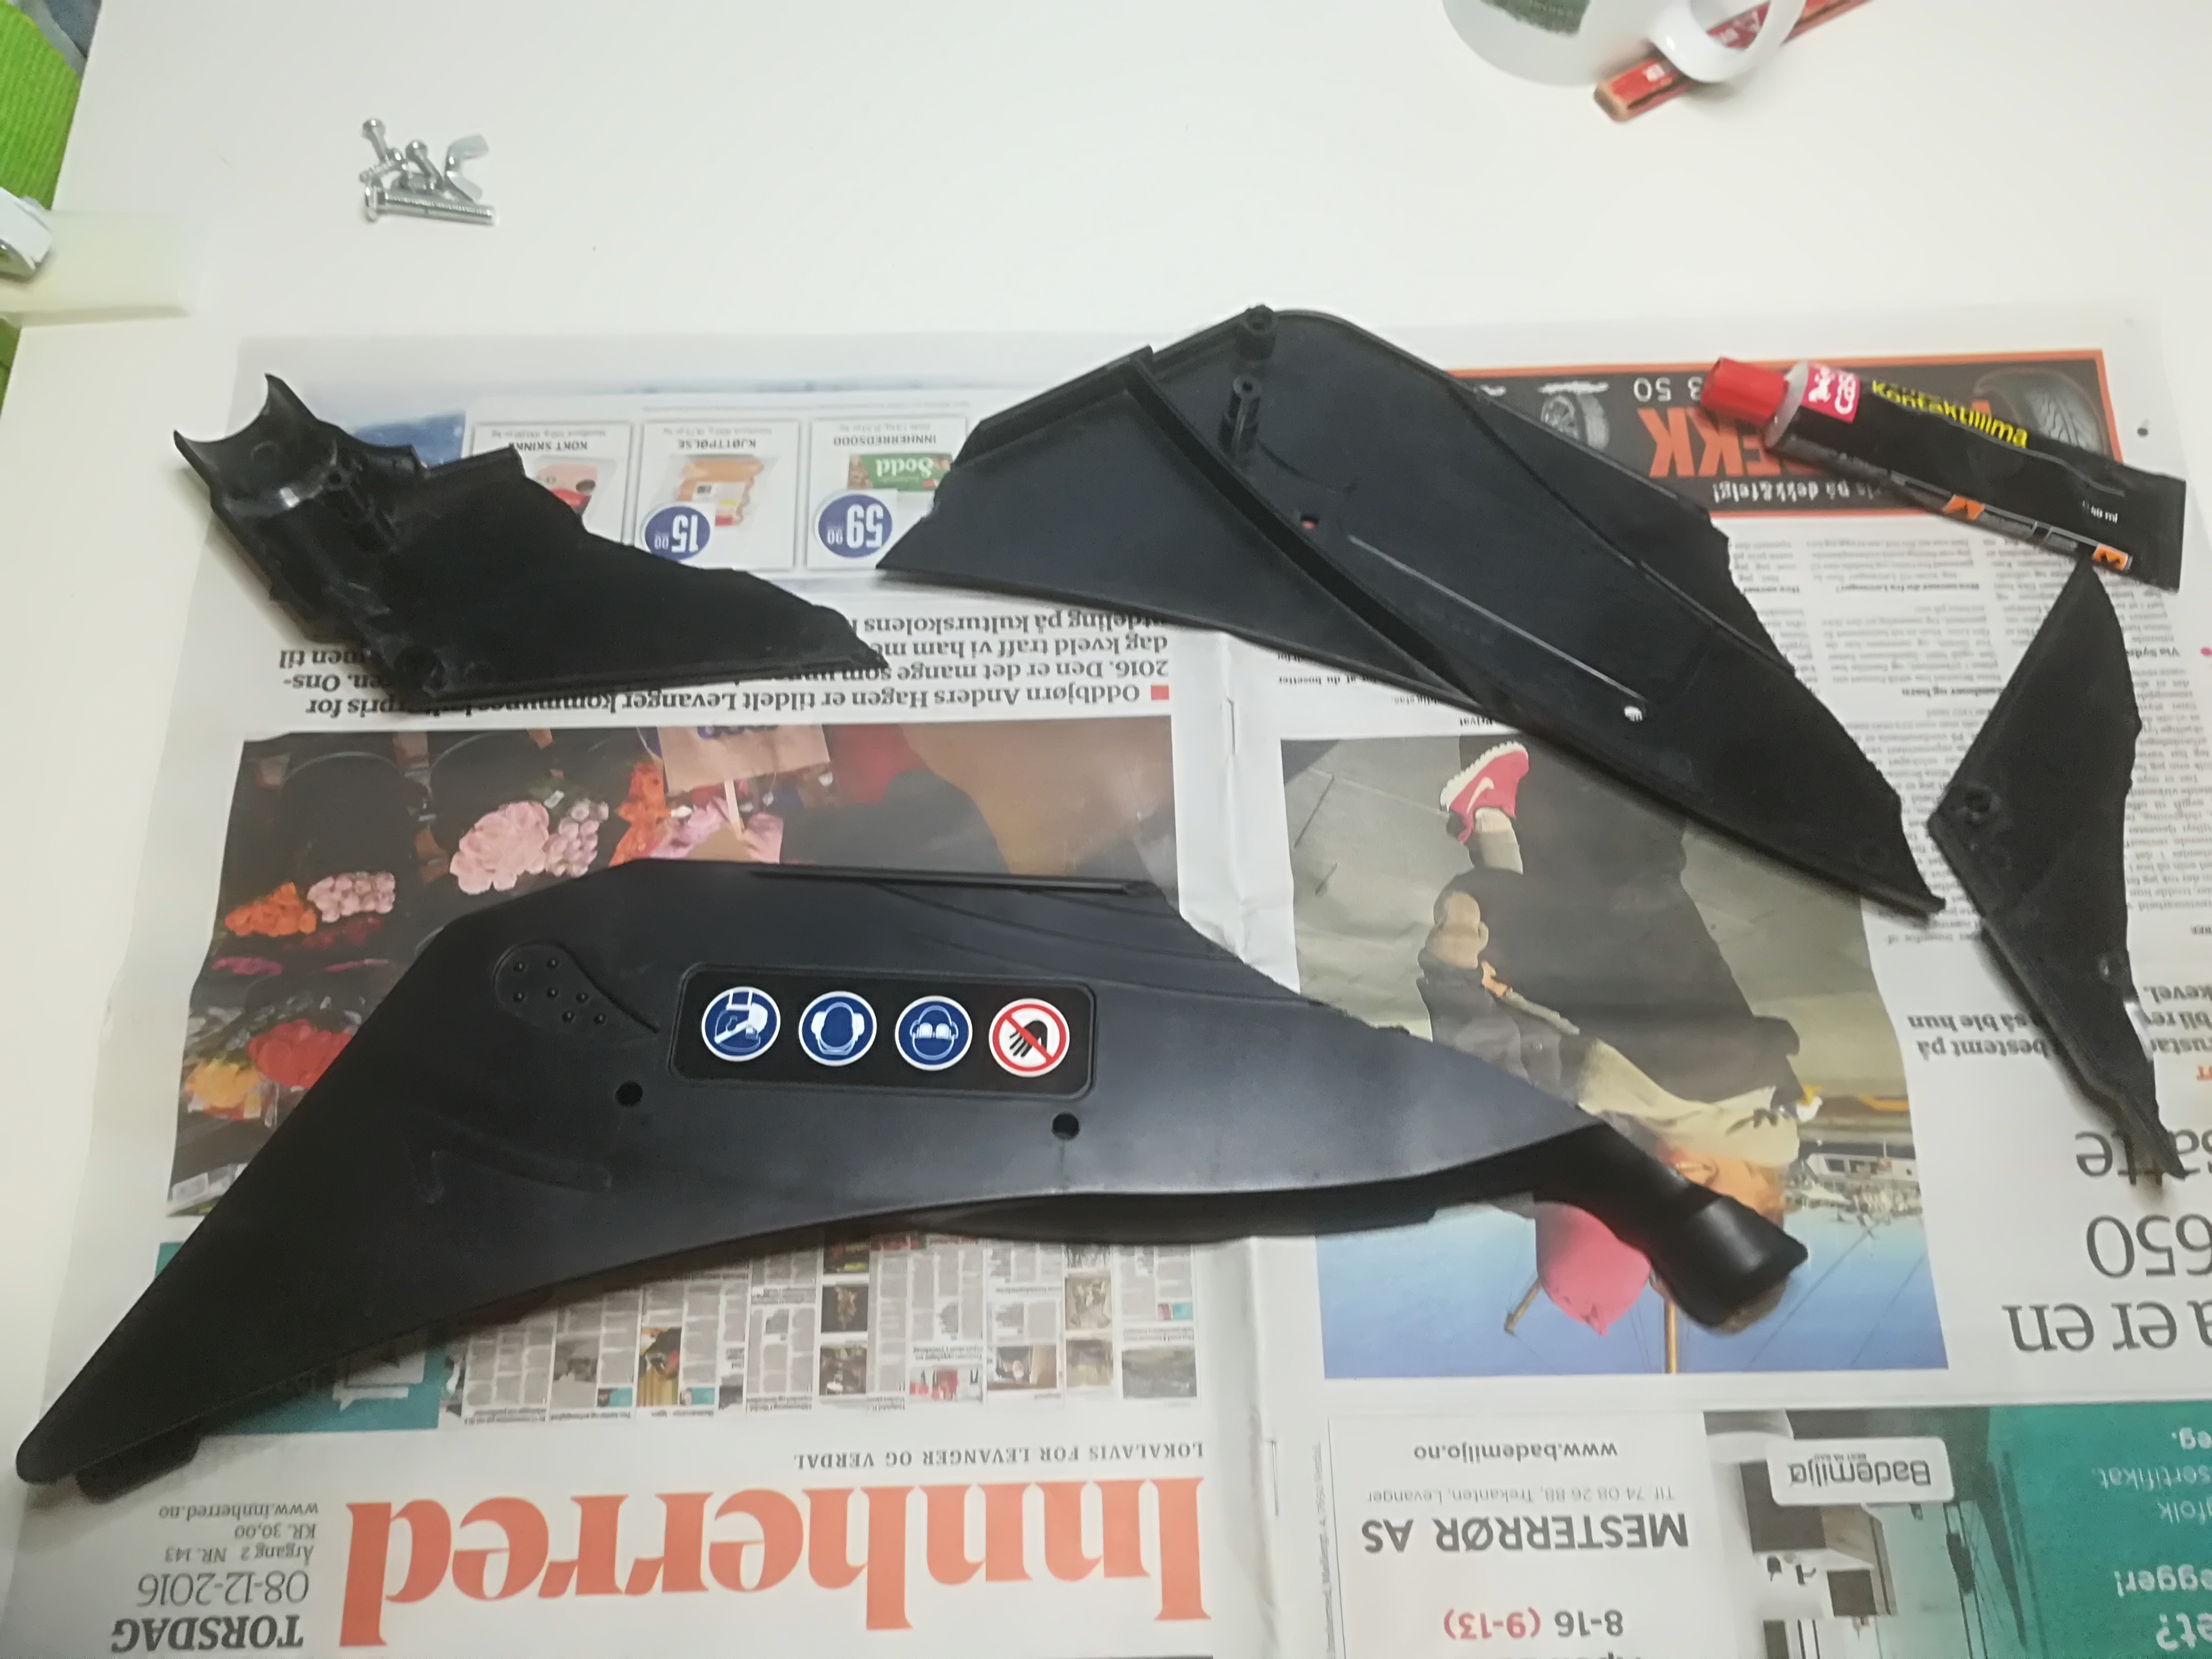
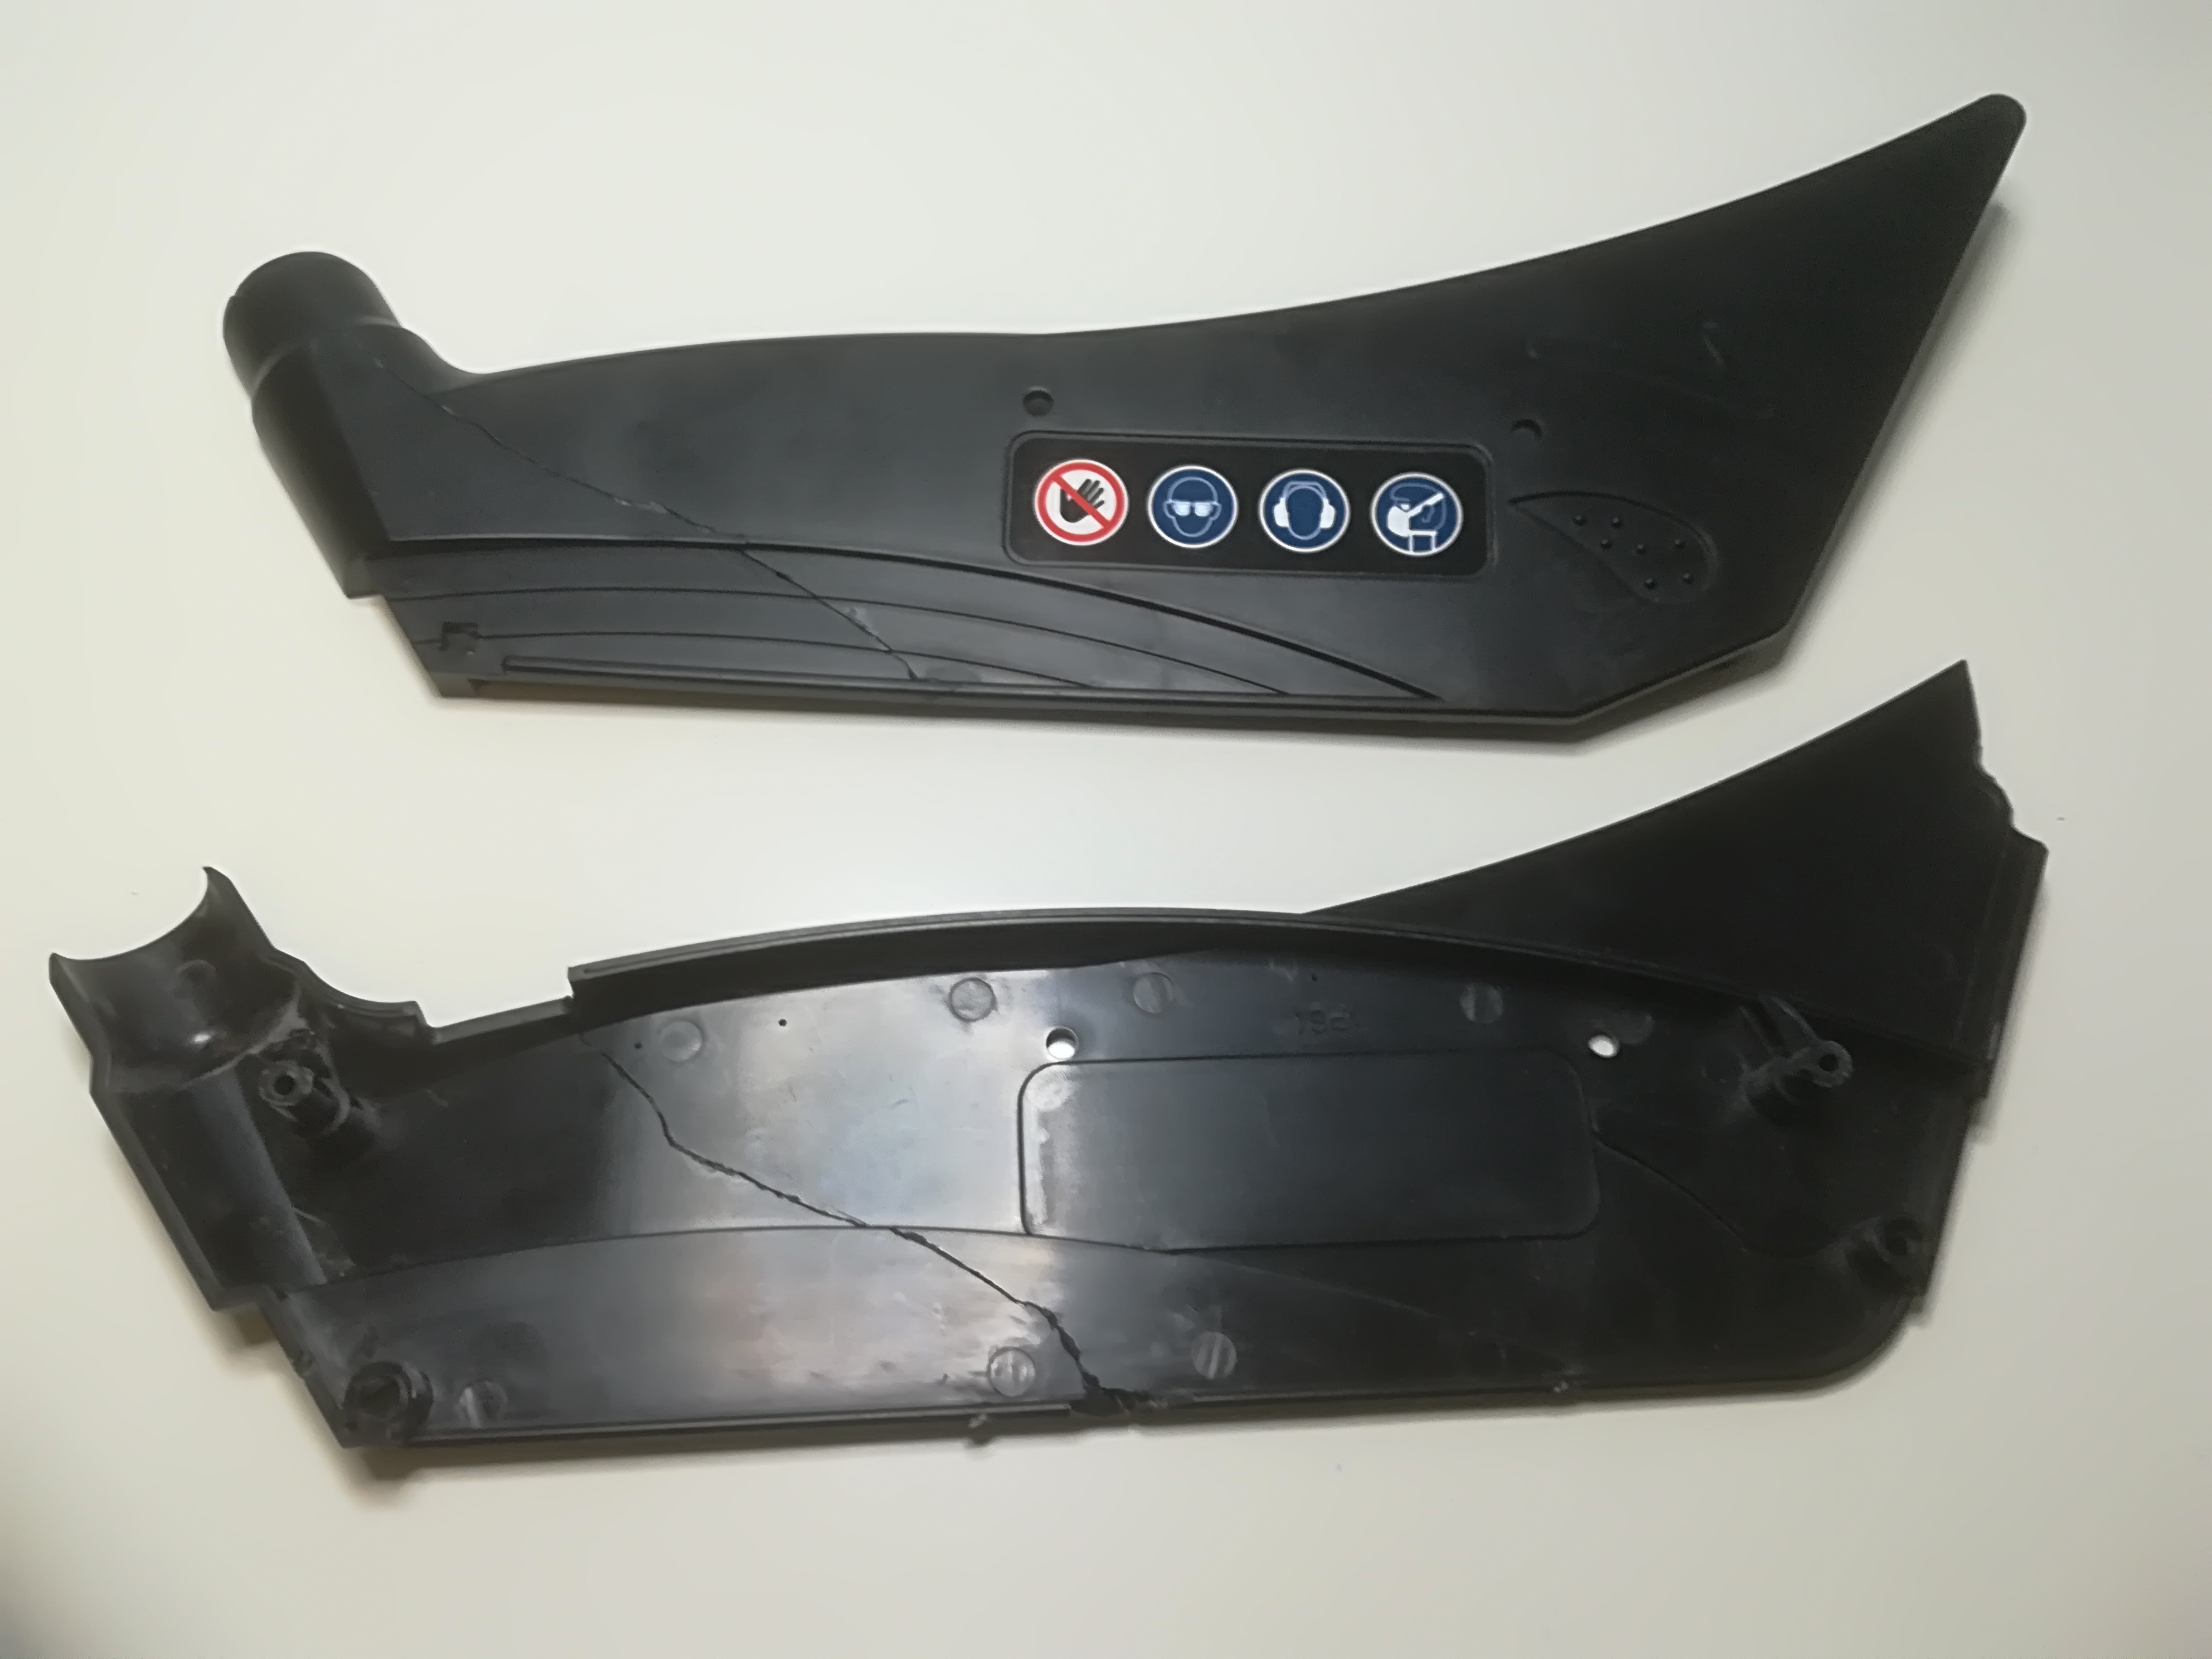
Here are the four pieces of the broken saw blade guard, along with the screws used to hold each half of the guard together.The pieces after being glued together with contact cement.The reassembled saw blade guard.
The guard was actually not fit for purpose. While the guard had its own connection to the dust collector, it was unable to accommodate sheets of plywood because its hose was in the way. Thus, I had to disconnect the hose while cutting the plywood.
Marmot is the brand name of products I make for my own personal enjoyment. During the design process of the saw blade guard, I made 4 iterations of the design, designated V (for version) 1 to 4.
V1
V1 is conceptually the same guard as the original Scheppach guard, but made with 12 mm Baltic birch plywood. The version was made just before I went off to sleep for the night.
V2
In the morning, when I awoke, I knew there were two changes that had to be made to the guard. The first was the use of 6 mm Baltic birch plywood for the side pieces. This reduced the width of the guard by 12 mm. The second was a repositioning of the dust extractor. It now exits the guard horizontally, rather than vertically.
V3
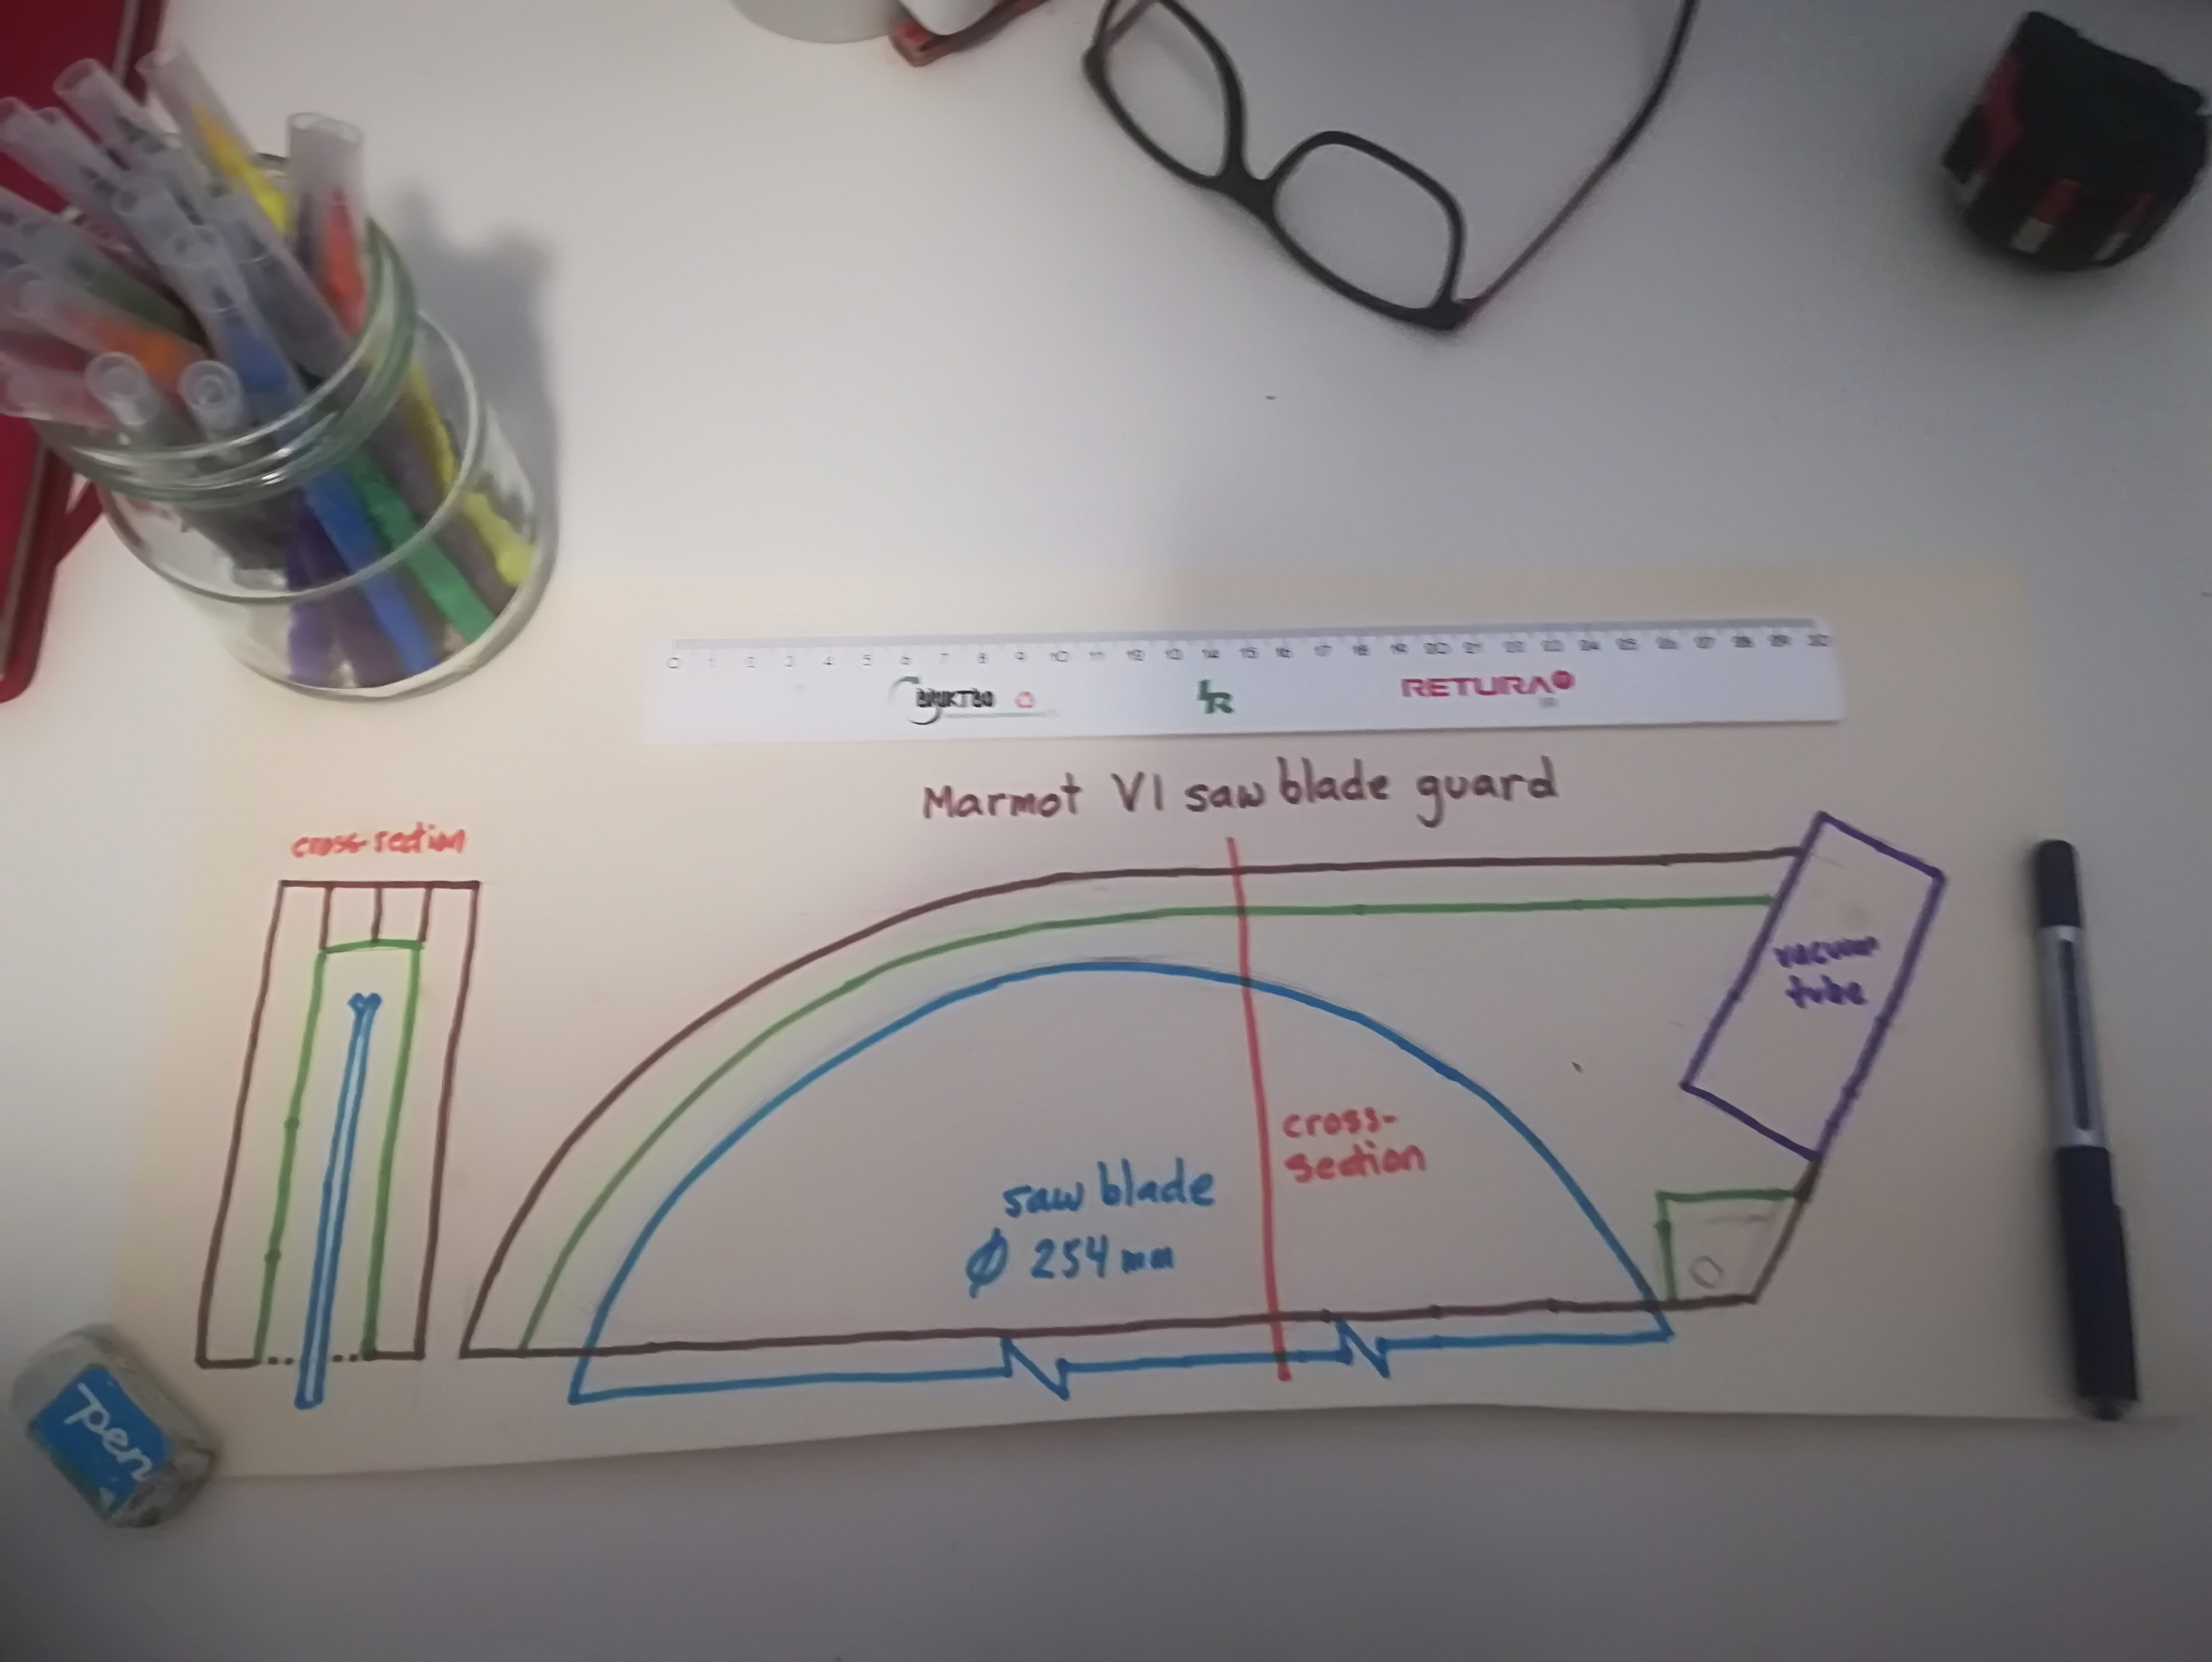
Here the main change was the orientation of the drawing. In terms of materials, I tried to take advantage of the irregular size of Baltic birch plywood. Its sheets are 1220 mm x 2440 mm. When making 600 mm oriented products, this leaves lengths of 20 mm plywood and widths of 40 mm plywood as waste. In this case, this waste can be used to make some of the structural components for the guard, in particular those coloured green in the drawings. No sooner had I made the drawing, than I noticed a logical flaw, which necessitated another version, V4.
V4
To save time, I got out my light table. which made redrawing faster, but slightly less accurate than using a pencil, eraser and ruler. The logical error involved the thickness of the orange pieces in V4. These are 6 mm in V4, but 12 mm in V3. These pieces originate in the isosceles right triangles removed from the front of the 300 x 110 mm rectangular sides. These have a side length of 90 mm, and a hypotenuse length of 127 mm. Each of these triangles has two additional isosceles right triangles removed to be used to strengthen the front of the guard. Their side lengths are 25 mm, with a hypotenuse length of 35 mm.
The next step will to actually build the saw blade guard, and to test it out.
This weblog post was updated 2021/12/21. to eliminate Weeds from the title. This post formed part of a Needs, Seeds and Weeds website that belonged to my daughter, Shelagh. In addition, other things are also out of date, or my opinions have changed. Apart from the title, updating the text to a block format and other minor formatting changes, the text above this paragraph remains as it was before. Any significant content changes are found below this paragraph
Older people report higher levels of contentment than teenagers and younger adults. They are resilient. They set realistic goals. The paradox of old age is that as people’s minds and bodies decline,they feel better. In memory tests, they recall positive images better than negative; under functional magnetic resonance imaging, their brains respond more mildly to stressful images than the brains of younger people.
The secret is to spend energy on the things one can still do that brings satisfaction, not to dwell on what one had lost to age. It is time to be wild, but in a friendly, considerate way that does not harm others. It is a time to be thankful.
I would like to take this moment to thank Trish for everything she has given me, including a lovely lab coat to wear in the workshop.
Some things in life are just so important that they just have to be learned. Memorization can be the right approach for some. For others, it might mean keeping a piece of paper handy, with formulas written out. Regardless, Ohm’s law and related formulas have to be learned.
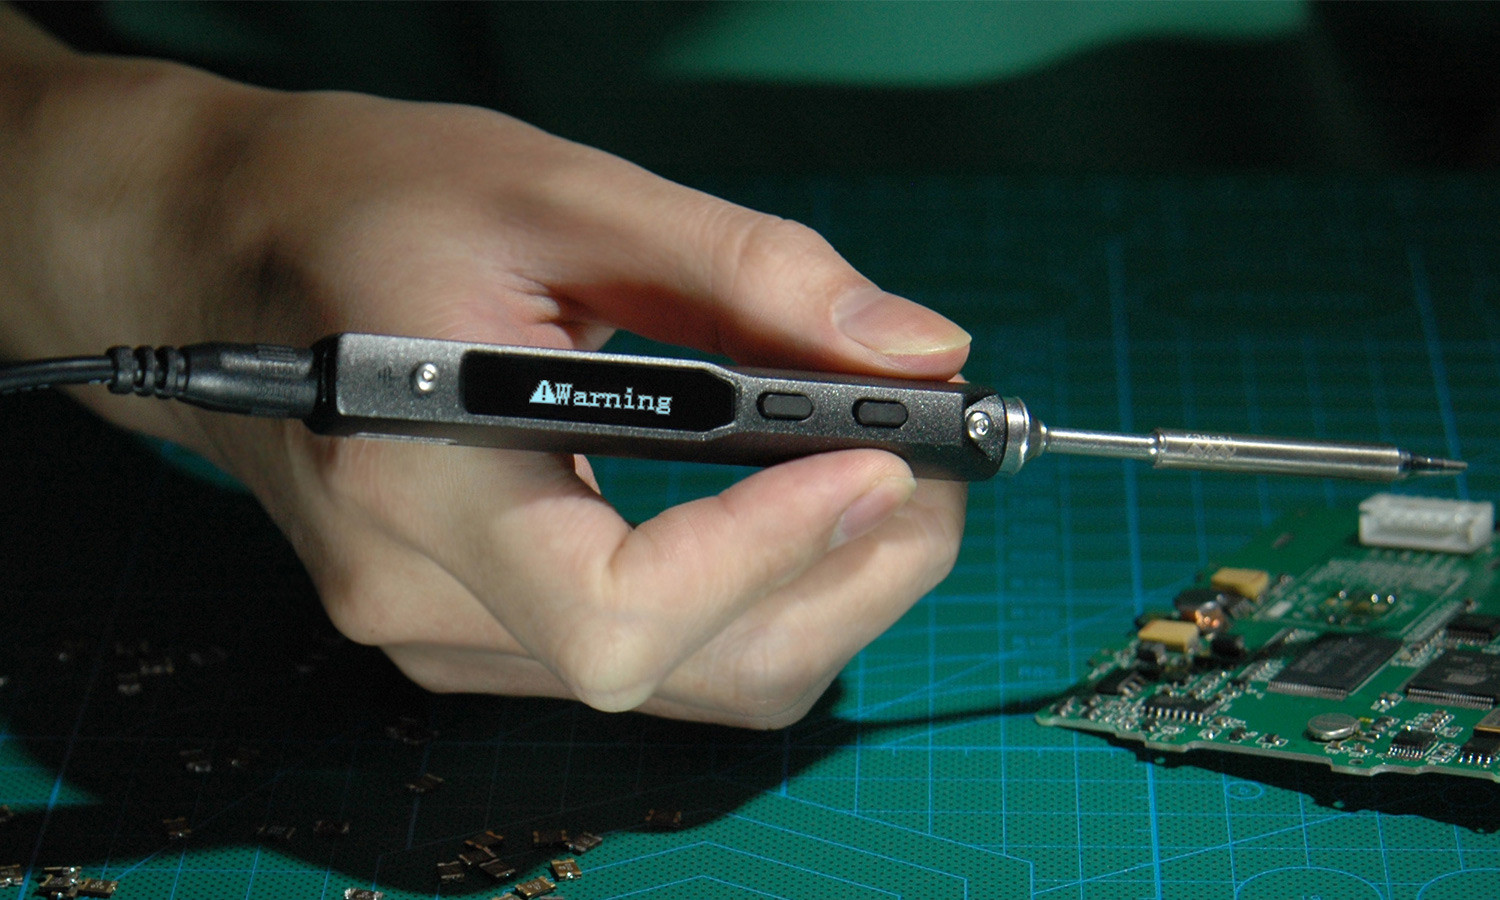
Fortunately, a cool soldering iron will help explain Ohm’s law, and the related formulas. The soldering iron is a Miniware TS100.
A Miniware TS 100 Soldering iron shows a warning when it is too hot compared to a preset maximum temperature. (photo: Miniware)
Ethan has saved up his money to buy a TS 100 soldering iron. Unfortunately, he didn’t have enough money to buy a new power supply, so he wants to know if he can use this one, which he has lying around:
A power supply with 12 V and 2 A output values. Is it good enough to power a TS 100 soldering iron?
This gives him an opportunity to learn about electricity and how it works. A plumbing analogy is often used to explain electric power. Think of voltage, the pressure driving electricity through a wire, as water pressure forcing water through a pipe. The cross-section area of a pipe is like current, or amperage. The bigger the pipe, the more water that can be pressed through. The diameter of the electrical wires determines how much current is allowed through the system. If more current is pressed through than the wires are designed for, a device could fry.
The problem.
The TS 100 instruction sheet says that a maximum of 65 W can be obtained with a 24 V power supply. It also says that the minimum requirement is 17 W with a 12 V power supply. The power supply itself confirms that it provides 12 V output. But it doesn’t mention amperage, only wattage. The easiest way to find out if a correct amperage is being supplied is to use a power triangle. This is what it looks like, in three almost identical versions:
The power triangle allows Ethan to find an unknown value, when two values are known. In this thought experiment we know the power (P=17 W) and the voltage (V=12 V) but not the amperage (I). (illustration: http://www.electronics-tutorials.ws)
Ethan uses the middle power triangle, because he knows the power (17 watts) and the voltage (12 volts) but is missing the current or amperage, abbreviated as I. So he takes out his cell phone, uses the calculator app and inputs the necessary numbers, as shown here: I = 17 / 12 = 1.41 A. Since 1.41 A is less than 2 A, Ethan can use the power supply he already has.
A soldering iron works by using a resistor to heat up a metal tip. The relationship between the Voltage, Current and Resistance forms the basis of Ohm’s Law, which can be shown as another triangle, the Ohm’s Law triangle, also in three version, below:
The Ohm’s triangle shows relationships between I = current, measured in A = amperes or amps, V previously E = voltage, measured in volts. R = resistance, measured in Ω (ohms).
Using the third triangle, the resistance is found using the following formula: R = V /A = 12 / 1.41 = 8.5 Ω.
Starting off only knowing two values, Ethan ends up knowing four. These relationships are summarized in the Ohm’s law pie chart:
The Ohm’s law pie shows all of the twelve calculations that can be made. If you know two values, then you will only need to use two formulas to calculate the missing two values. The secret is knowing which two.
These relationships are explained even better in an Ohm’s law matrix. If any two values are know, the relevant row can be found by looking at the leftmost column. That row will show the two formulas that are needed to calculate the missing values.
Electricity comes into houses in the form of alternating current (AC). This is because AC can be easily transformed into lower or higher voltages as required. Most workshop equipment uses standard household voltage. In North America, this is 120 V. In Europe, it is 220 (or 230 or 240) V. The other big difference is that North America supplies electricity at 60 Hz, while in Europe it is 50 Hz.
These differences used to create lots of problems, but if you look at the power supply shown above, you will see that it can use any input from 100 V to 240 V. There is also no problem using 50 Hz or 60 Hz. This means that the same power supply can be used anywhere in the world. The only thing needed is a plug adapter.
An adapter is useful when travelling from one part of the world to another. This adapter allows North American devices, for example a power supply, to be plugged into European wall sockets.
Not everything works this well. Clocks are notoriously bad, because many tell time based on the frequency of the network. A European clock brought to North America, may show 28.8 hours in the course of a day. A North American clock brought to Europe, may show only 20 hours in the course of the same day.
The biggest difference between North America and Europe is in the wiring that is required to run equipment. That is because current or amperage (and not power or wattage) determines the thickness of wires used. A 2 000 W mitre saw on a 120 V system needs a 20 A circuit breaker and #10 wire which is 5.26 mm² (in Europe, it has just exceeded the 16 A wiring limit, 2.5 mm²). On a 240 V system this same mitre saw only needs a 10 A circuit breaker and #14 wire which is 2.08 mm² ( In Europe, one could actually get away with 1.5 mm²).
Workshops need a lot of electrical power because they use machines that are transforming material into useful products. The work being done requires energy. That is not the only use of energy. Heating and dust extraction are also major energy consumers.
The Cost of Heating
Ethel and Ethan have a problem. They find the work space soooo cold that they have installed a 1500 W heater. The twins turn on the heat one hour before they begin working, and turn it off half an hour before they plan to stop. So far this month, they have had the heater on 46 hours.
A workshop needs energy to do work or create heat. Work is officially measured in joules ( J ). One joule is the same as one watt-second. If one knows how many watts one is using, and how many seconds it is being used, it is easy to calculate the number of joules.
Work = 1500 W · 46 hours · 60 min/hour · 60 sec/min = 248 400 000 J or 248.4 MJ (mega-joules). When calculating joules, it can be useful to know that there are 3 600 seconds in one hour, and 86 400 seconds in one day (24 hours).
When it comes to buying electricity, the kilowatt-hour is the standard units of energy recorded by the electricity meter. This can be a lot easier to calculate: 1 500 W, is the same as 1.5 kW; 46 hours is the same as, well, 46 hours. The heater’s electrical consumption is 1.5 kW · 46 h = 69 kWh. The price of 1 kWh varies, but in some places is about 15 cents. So the cost of heating the work space for a month is 69 kWh · $0.15 = $10.35.
Bonus Questions. Since the twins live in Canada, they have 120 V electrical power in their workshop. Calculate: What is the Amperage required for a 1500 W heater? What is the resistance inside the heater? (answers: 12.5 A; 9.6 Ω)
Power Requirements
Here are the wattages I use in the Unit One workshop. If all of the machines and other equipment were all turned on, they would use over 19 kW. Fortunately, that has never happened.
Use
Wattage
Workshop
Lighting
100 W
Computing
100 W
Compressor
750 W
Workshop air cleaner
200 W
Dust extractor
1 100 W
Heating
2 000 W
Stationary machines
Jointer
1 250 W
Planer
1 500 W
Compound mitre saw
2 000 W
Table saw
1 400 W
Band saw
750 W
Drill press
500 W
Sander
500 W
Bench grinder
400 W
Portable tools
HVLP spray gun
600 W
Jig saw
800 W
Bayonet saw
1 000 W
Plunge (Track) saw
1 400 W
Router
1 400 W
Power drill
500 W
Angle grinder
800 W
Load
Because only one (perhaps two) power tools are being used at any one time, the workshop’s maximum load is 6 250 W. The worst tool to use is the compound mitre saw (2 000 W). In addition, there is a need for lighting (100 W), computing (100 W), workshop air cleaner (200 W), dust extractor (1 100 W). At times a compressor is in use (750 W), and in winter, a heater may be turned on (2 000 W).
Three-phase power is supplied to the workshop at 230 V and 16 A with three load lines (L1, L2 and L3) coming in. These load lines are paired up to make 3 single-phase circuits. The total power coming into the workshop is 6370 Watts.
Several illustrations for this blog post have been borrowed from: http://www.electronics-tutorials.ws, which is the place to go for electronics tutorials.
Breathing. It’s a task Ethan & Ethel do all the time, to stay alive. Unfortunately, there are environments that make this breathing uncomfortable, even damaging, sometimes deadly. This post is going to look at how a woodworking workshop can be constructed to ensure that most sawdust is collected, and the air is filtered so it is fit to breathe.
Sawdust
There are three levels of sawdust collection that can be used: 0) broom and dustpan or shovel; 1) shop vacuum; 2) detached, ducted extraction system.
Level 0: Just cleaning up after yourself with a broom, may make a workshop look clean, but it will not provide a healthy environment. This is an unacceptable level of dust collection.
Level 1: The minimum acceptable level of dust collection involves the use of a shop vacuum attached directly to a tool being used.
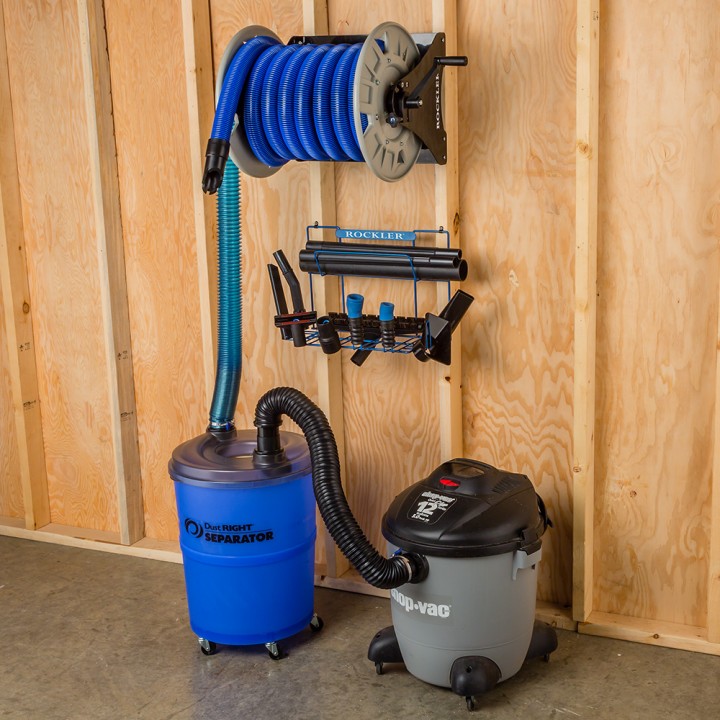
A shop vacuum can be developed into a dust system by including a hose reel and a separator. A hose reel will hold 10 meters of 50 mm diameter hose, with a crank and tension adjustment. Due to the length of the hose on the reel, considerable power (e.g. 3 kW or more) may be required to power the vacuum.
A hose reel encourages use of a dust separator that can be permanently positioned in a fixed location. A dust separator captures sawdust, wood chips, and other debris before it enters the vacuum. Most separators contain cyclones that disrupt air flow, causing most wood dust particles and other materials that are heavier than air to separate out. They do not enter the vacuum. This vortex effect adds life to vacuum filters and prevents the loss of suction caused by a clogging.
A shop vacuum attached to a separator and a hose (photo: Rockler)
Level 2: detached, ducted collection system
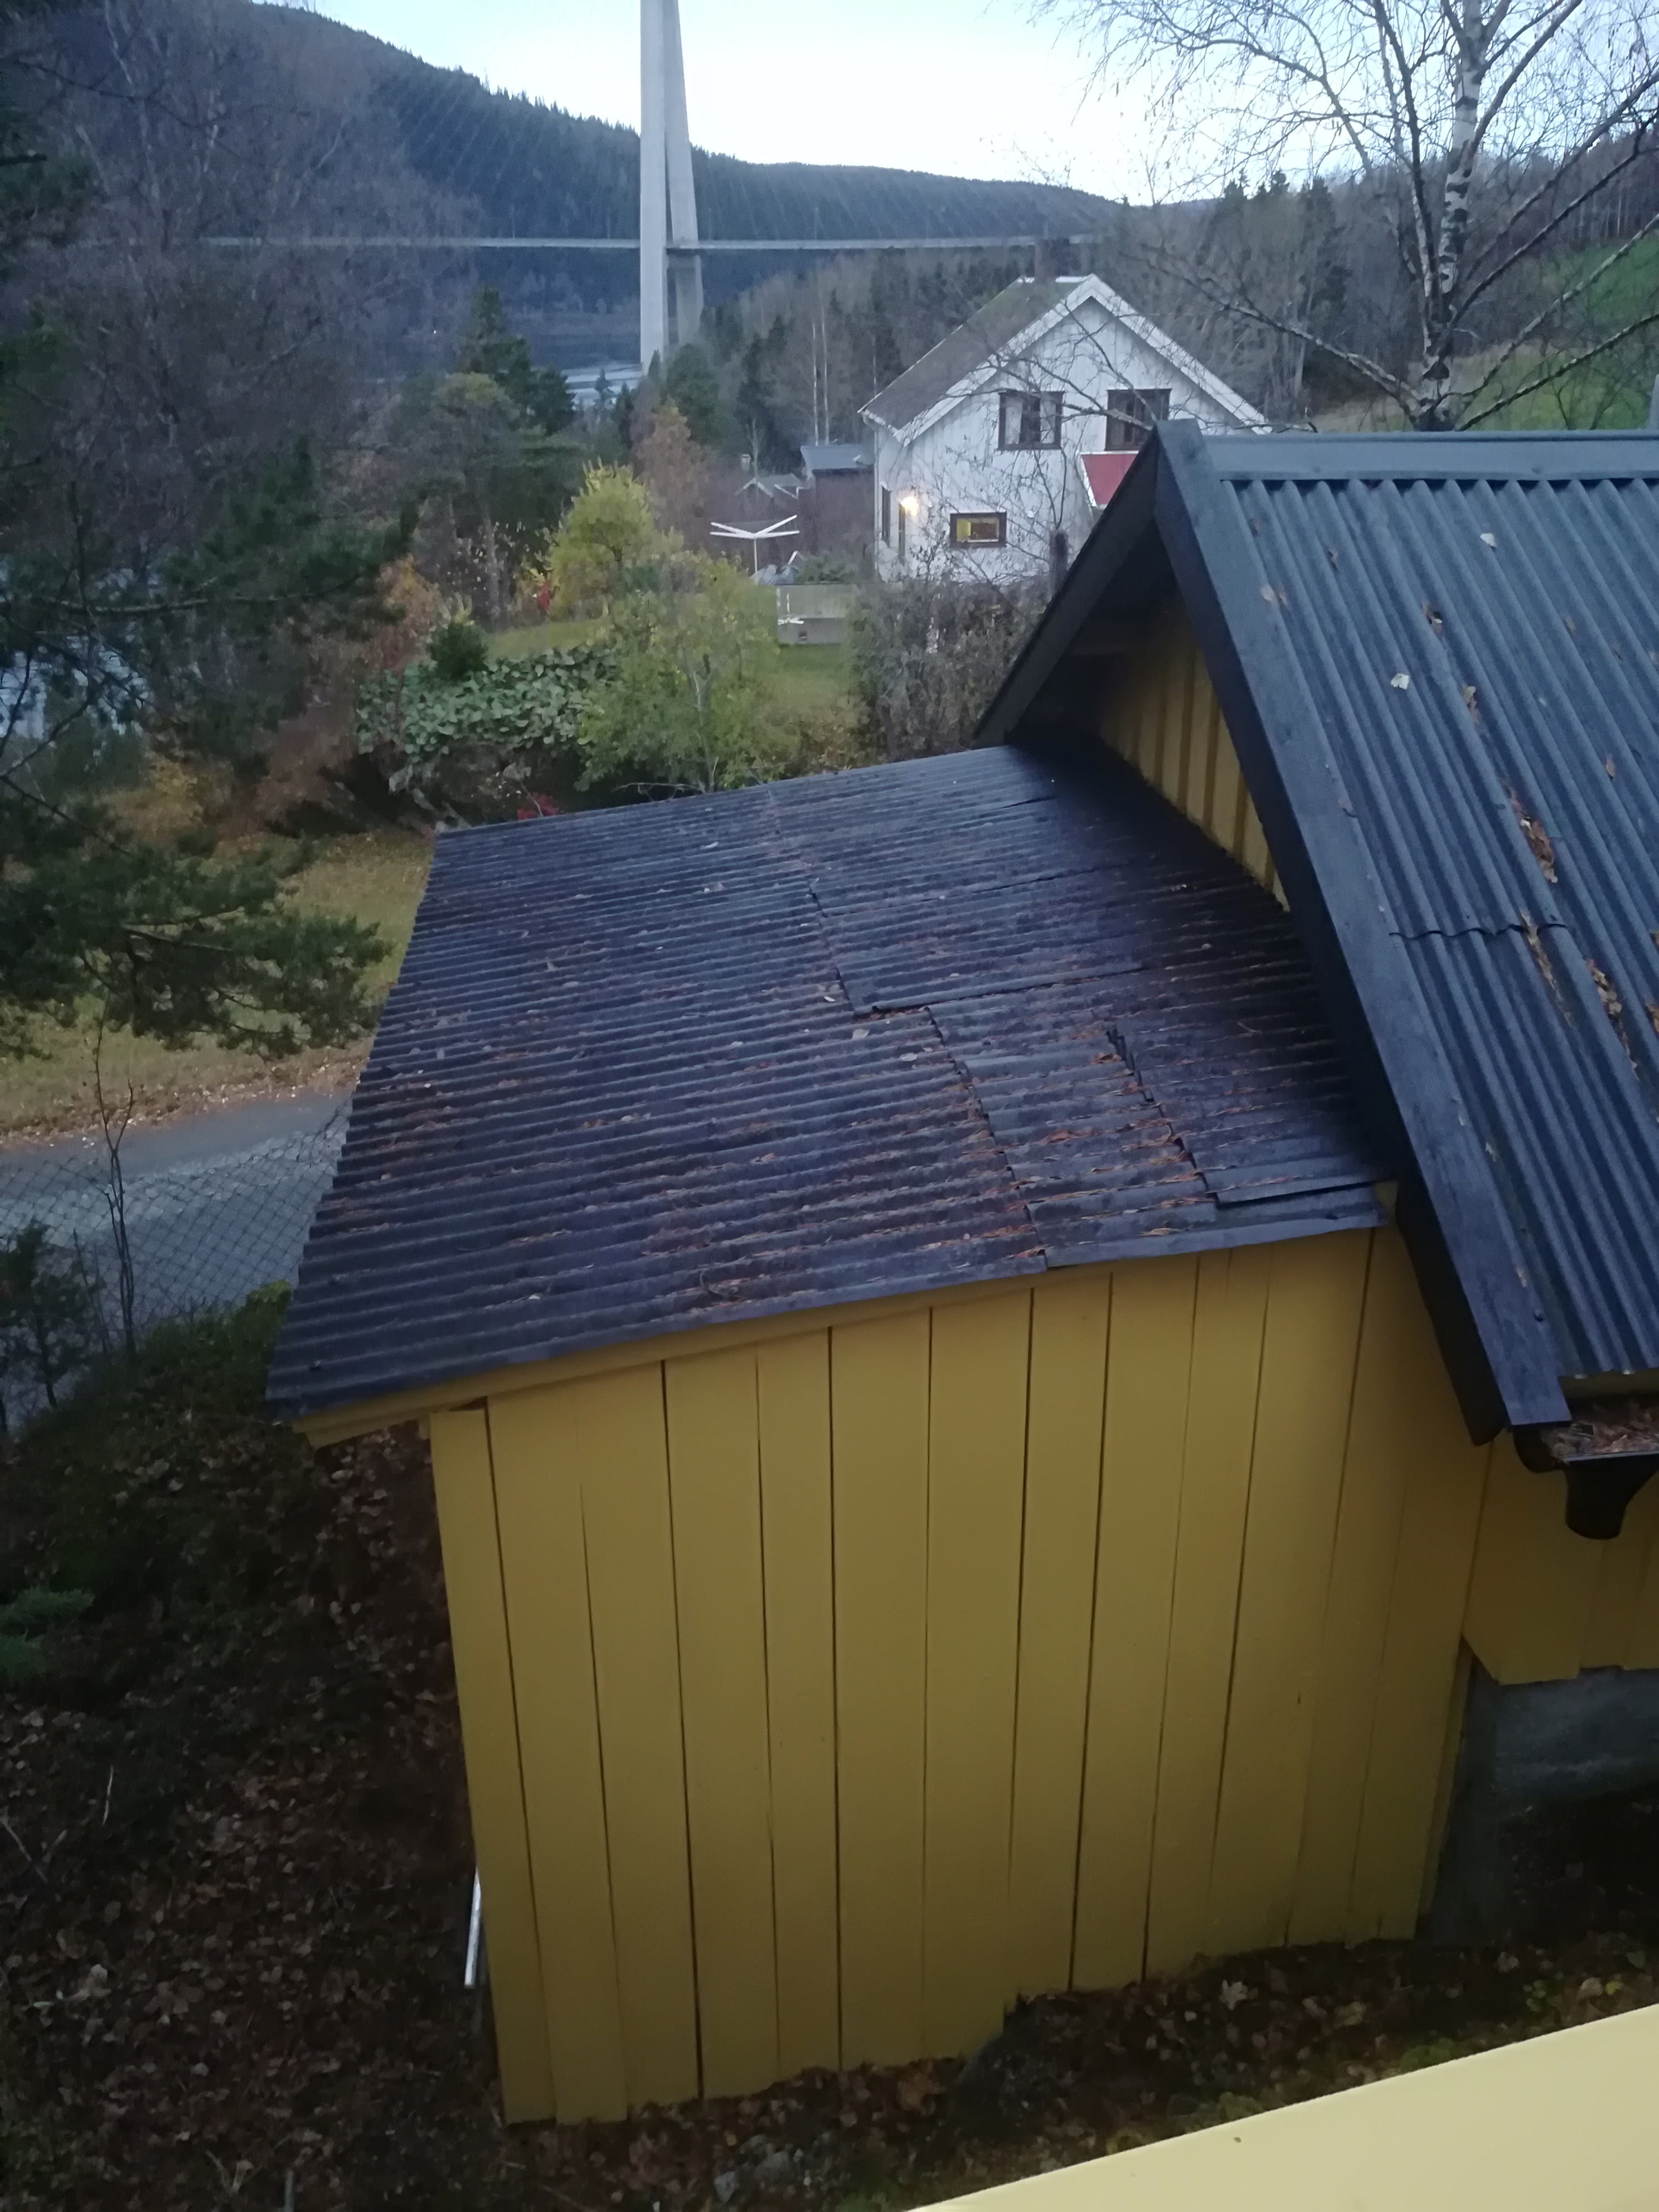
The Annex is a shed that was added onto the original garage that has become the Unit One workshop. If you enter the annex today, you will find that it contains the gardener’s former workbench and stacks of firewood. Soon, the Annex will be re-purposed, and many of the dirtiest, noisiest and smelliest activities will be confined to this area. This does not mean that the rest of the workshop will be clean, quiet and fresh smelling.
The Annex, home of dirty, noisy and smelly activities. (photo: Brock McLellan)
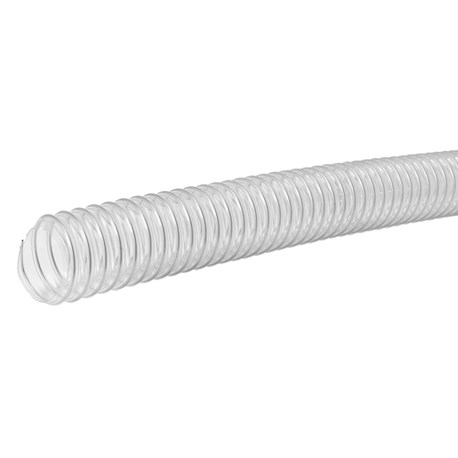
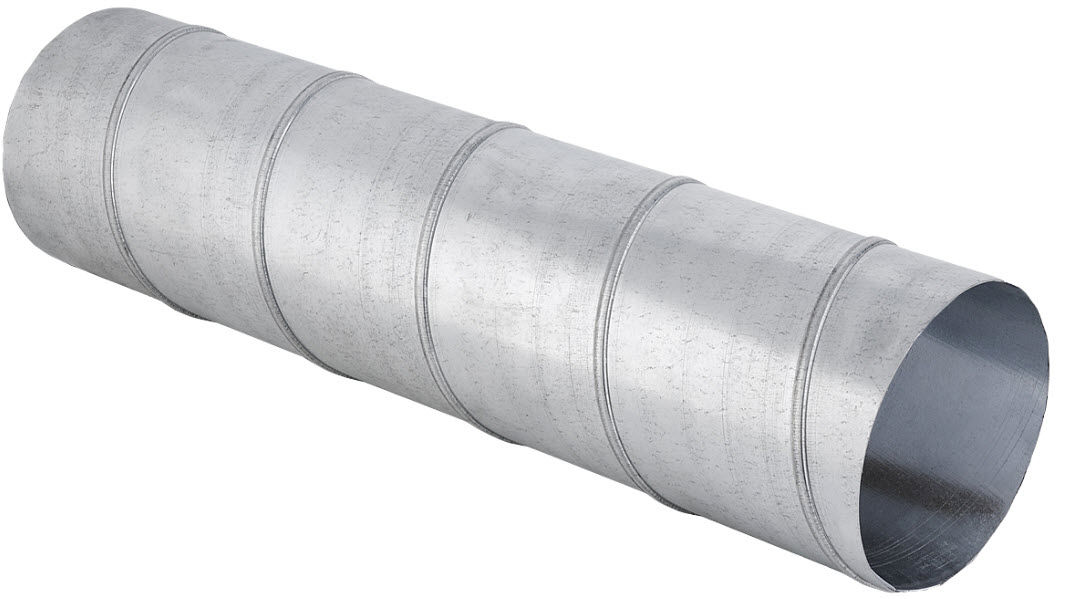
The equipment used in a level 2 ducted system is very similar to that used with level 1 equipment. There is a vacuum and a separator. 100 mm flexible tubing or metal ducting connects the machines. Both have advantages and disadvantages. While flexible tubing is preferred for attachment to a machine, in other places a more solid, metal duct is preferred. Transparent material allows one to see blockages if they occur. Metal duct prevents the build-up of static electricity, which could result in a fire.
100 mm diameter flexible tubing is often used for dust collection in a workshop, This is available in 6 meter lengths, and can be cut to size. (foto: Jula)
100 mm galvanized spiral duct, made from sheet metal. (photo: NORFI Absaugtechnik GmbH)
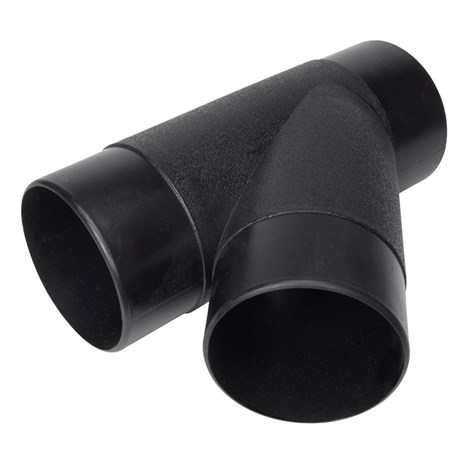
A smooth transition is needed where hoses, tubes and ducts meet. Y connectors are often used for this purpose.
Y-connector, used to smooth air-flow where two ducts meet (photo: Jula)
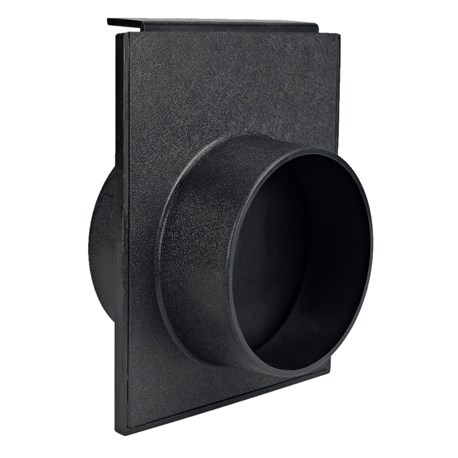
Most of the time in a small workshop, only one machine can be used at a time. Each machine is attached to the dust collection system, but blast gates are used to close the dust collector so that inactive machines do not result in air being sucked through the system. Only a active machine has its blast gate open. This saves a lot of energy, allowing a much smaller sized vacuum to be used. At Unit One, the vacuum uses 1100 W.
Blast gate in closed position, preventing air from being sucked through a system. (photo: Jula)
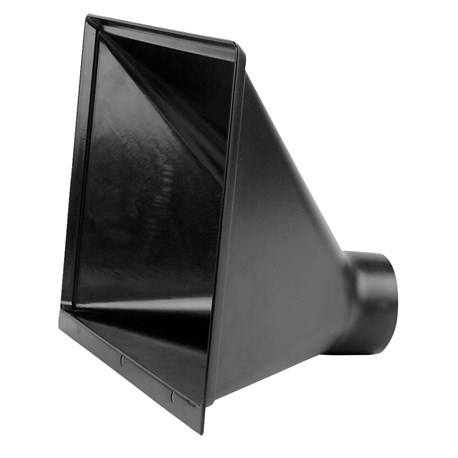
Cleaning floors, and other horizontal surfaces, in a workshop is a necessary part of work. While some people use vacuums for this, others uses brooms and brushes of various types. The collected dust can be swept into a dust port.
A dust port. (photo: Jula)
Lots of other pieces of equipment are needed, including bends and clamps, to make a level 2 dust collector. Interestingly, 6 meters of duct costs more than the vacuum I am using.
Dust collection can be automated, and this subject will be revisited in terms of using an Intelligent Workshop Assistant.
Air Cleaner
While dust collection is important, it doesn’t eliminate all dust from the air. This requires the use of an air cleaner. Two projects by Canadian woodworkers, are especially inspiring.
John Heisz: http://www.ibuildit.ca/Workshop%20Projects/shop-air-cleaner-1.html
Respirators
Part of the Annex is slated to become a spray booth, to be used for the painting of wooden, metal and other objects.
A spray booth is a closed environment controlling air flow, pressure, temperature, air flow and humidity. The area is ventilated using electric fans, and heated with electric heaters to speed paint drying. Toxic solvents and paint particles are exhausted outside after filtering to reduce air pollution.
When possible, HPLV (high pressure, low volume) equipment is used. This is similar to a conventional spray gun using a compressor to supply the air, but the spray gun works at lower pressure (LP), while a higher volume (HV) of air is used to aerosolise and propel the paint. A turbine using a vacuum cleaner derived motor propels the air. This results in more paint reaching the target surface, reduces overspray, material consumption and air pollution. The system offers three advantages: reduced paint waste, short drying times, and precise and efficient spraying that reduces paint preparation and (often) the need for masking.
Despite the equipment built into the workshop, there is a need for respirators. At Unit One most painting involves only a few minutes of work, so the level of protection is less than that used in environments where people paint for longer periods of the day.
WorkSafe BC provides a free 136 page pdf book, Breathe Safer – How to use Respirators Safely and Start a Respirator Program. It can be downloaded using this link: https://www.worksafebc.com/en/resources/health-safety/books-guides/breathe-safer-how-to-use-respirators-safely-and-start-a-respirator-program
Painter, wearing respirator and safety glasses, but without protective clothing. (photo: Trish McLellan)
Welcome to the Unit One Work Space, Ethan & Ethel. Here, everyone is required to wear appropriate clothing and safety equipment.
A lot of information about personal protective clothing and equipment is available from WorkSafeBC: https://www.worksafebc.com/en/law-policy/occupational-health-safety/searchable-ohs-regulation/ohs-regulation/part-08-personal-protective-clothing-and-equipment
Unit One uses the regulations here as guidelines for setting its own policy. Sometimes the rules are even stricter than those the government requires.
Identity Cards and Patches
At Unit One, everyone is issued an identity card. This contains a lot of information that could be needed in acute situations. For example, it lists name, birth date, blood type (if known), current medications, chronic medical conditions, allergies, personal contact information, and contact information in case of an emergency.
While this information is also stored in an encrypted format in the Unit One database, it is important to have this information physically available. Computers don’t always work.
Unit One
Billi Sodd
Birthdate:
1950-01-01
Medications:
Insulin
Allergies:
none
Blood Type:
O
Emergency Contact:
Ivan Sodd 604-527-4660
The ID card also lists courses you have taken such as first aid and hot work, as well as the machines your are qualified to use.
Qualification
Status
Expiry Date
First Aid
Basic
2019-01-01
Hot Work
Basic
2020-01-01
Table Saw
Supervisor
2020-01-01
Mitre Saw
Supervisor
2020-01-01
Band Saw
Supervisor
2020-01-01
Planer
Basic
2025-01-01
Router
Basic
2025-01-01
CNC
Lathe; Mill
2025-01-01
Electronics
DC; AC
2050-01-01
3D printer
Basic
2050-01-01
Laser cutter
None
–
A Unit One ID patch is available to sew onto work jackets. This includes the Unit One logo, and your name. Its colour indicates your work status: orange – novice, must work under supervision; yellow – qualified, allowed to work without supervision; white – supervisor, allowed to train and supervise other people; blue – member of the board of directors.
Clothing
Personal clothing must be of a type and in a condition which will not expose the worker to any unnecessary or avoidable hazards. First of all, this means that no dresses or skirts are allowed, girls. This is because trousers are safer to work in. Because there is a danger of contact with moving parts of machinery or with electrically energized equipment, clothing must fit closely about the body,
Everyone at Unit One wears trousers. This model includes space for knee protection. (photo: Jula)
Neckwear, bracelets, wristwatches, rings or similar articles may not be worn, except for medical alert bracelets. Similarly cranial (that means head) and facial hair must be confined, or worn at a length which will prevent it from being snagged or caught in the work process.
Everyone at Unit One must have suitable gloves to protect hands from abrasion, chemical or other injury.
Flame resistant clothing must be worn when performing hot work, including welding.
Headgear
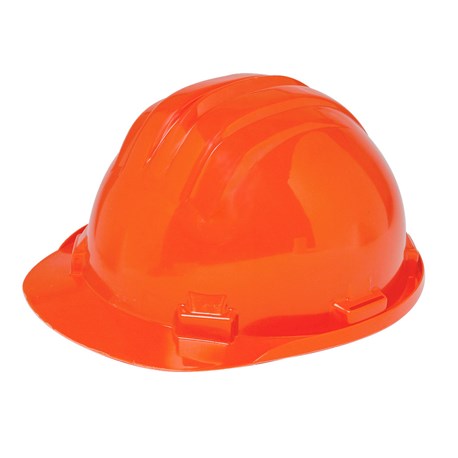
Unit One provides safety headgear in situations where there is a danger of head injury. Our headgear is colour coded (see above).
Orange headgear, worn when needed. The orange colour indicates that the person wearing it is a novice who can work only under supervision. (photo: Jula)
Eyewear & face protection
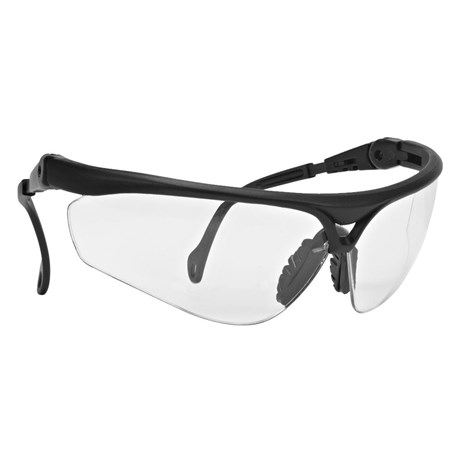
Properly fitting safety eyewear must be worn if one is handling or exposed to materials which are likely to injure or irritate the eyes. In some cases these must be fitted with sideshields.
Eye Protection (photo: Jula)
If there is a risk of face injury, suitable face protection must be worn.
Footwear
Footwear must be of a design, construction, and material appropriate to the protection required. The following factors must be considered: slipping; tripping; uneven terrain; abrasion; ankle protection and foot support; potential for musculoskeletal injury; crushing potential; temperature extremes; corrosive substances; puncture hazards; electrical shock; any other recognizable hazard.
Hearing protection
While we have a supply of ear plugs at Unit One, we encourage people to use ear muffs. These offer less noise-reduction variability among users, are designed so that one size fits most head sizes, are not easily misplaced or lost, and may be worn with minor ear infections. However, they are less portable and heavier than ear plugs, may be less convenient for use with other personal protective equipment, may be less comfortable with hot work, and may interfere with the wearing of safety glasses because wearing glasses breaks the seal between the ear muff and the skin, resulting in decreased hearing protection.
Ear Muffs (photo: Jula)
Respirators and face masks
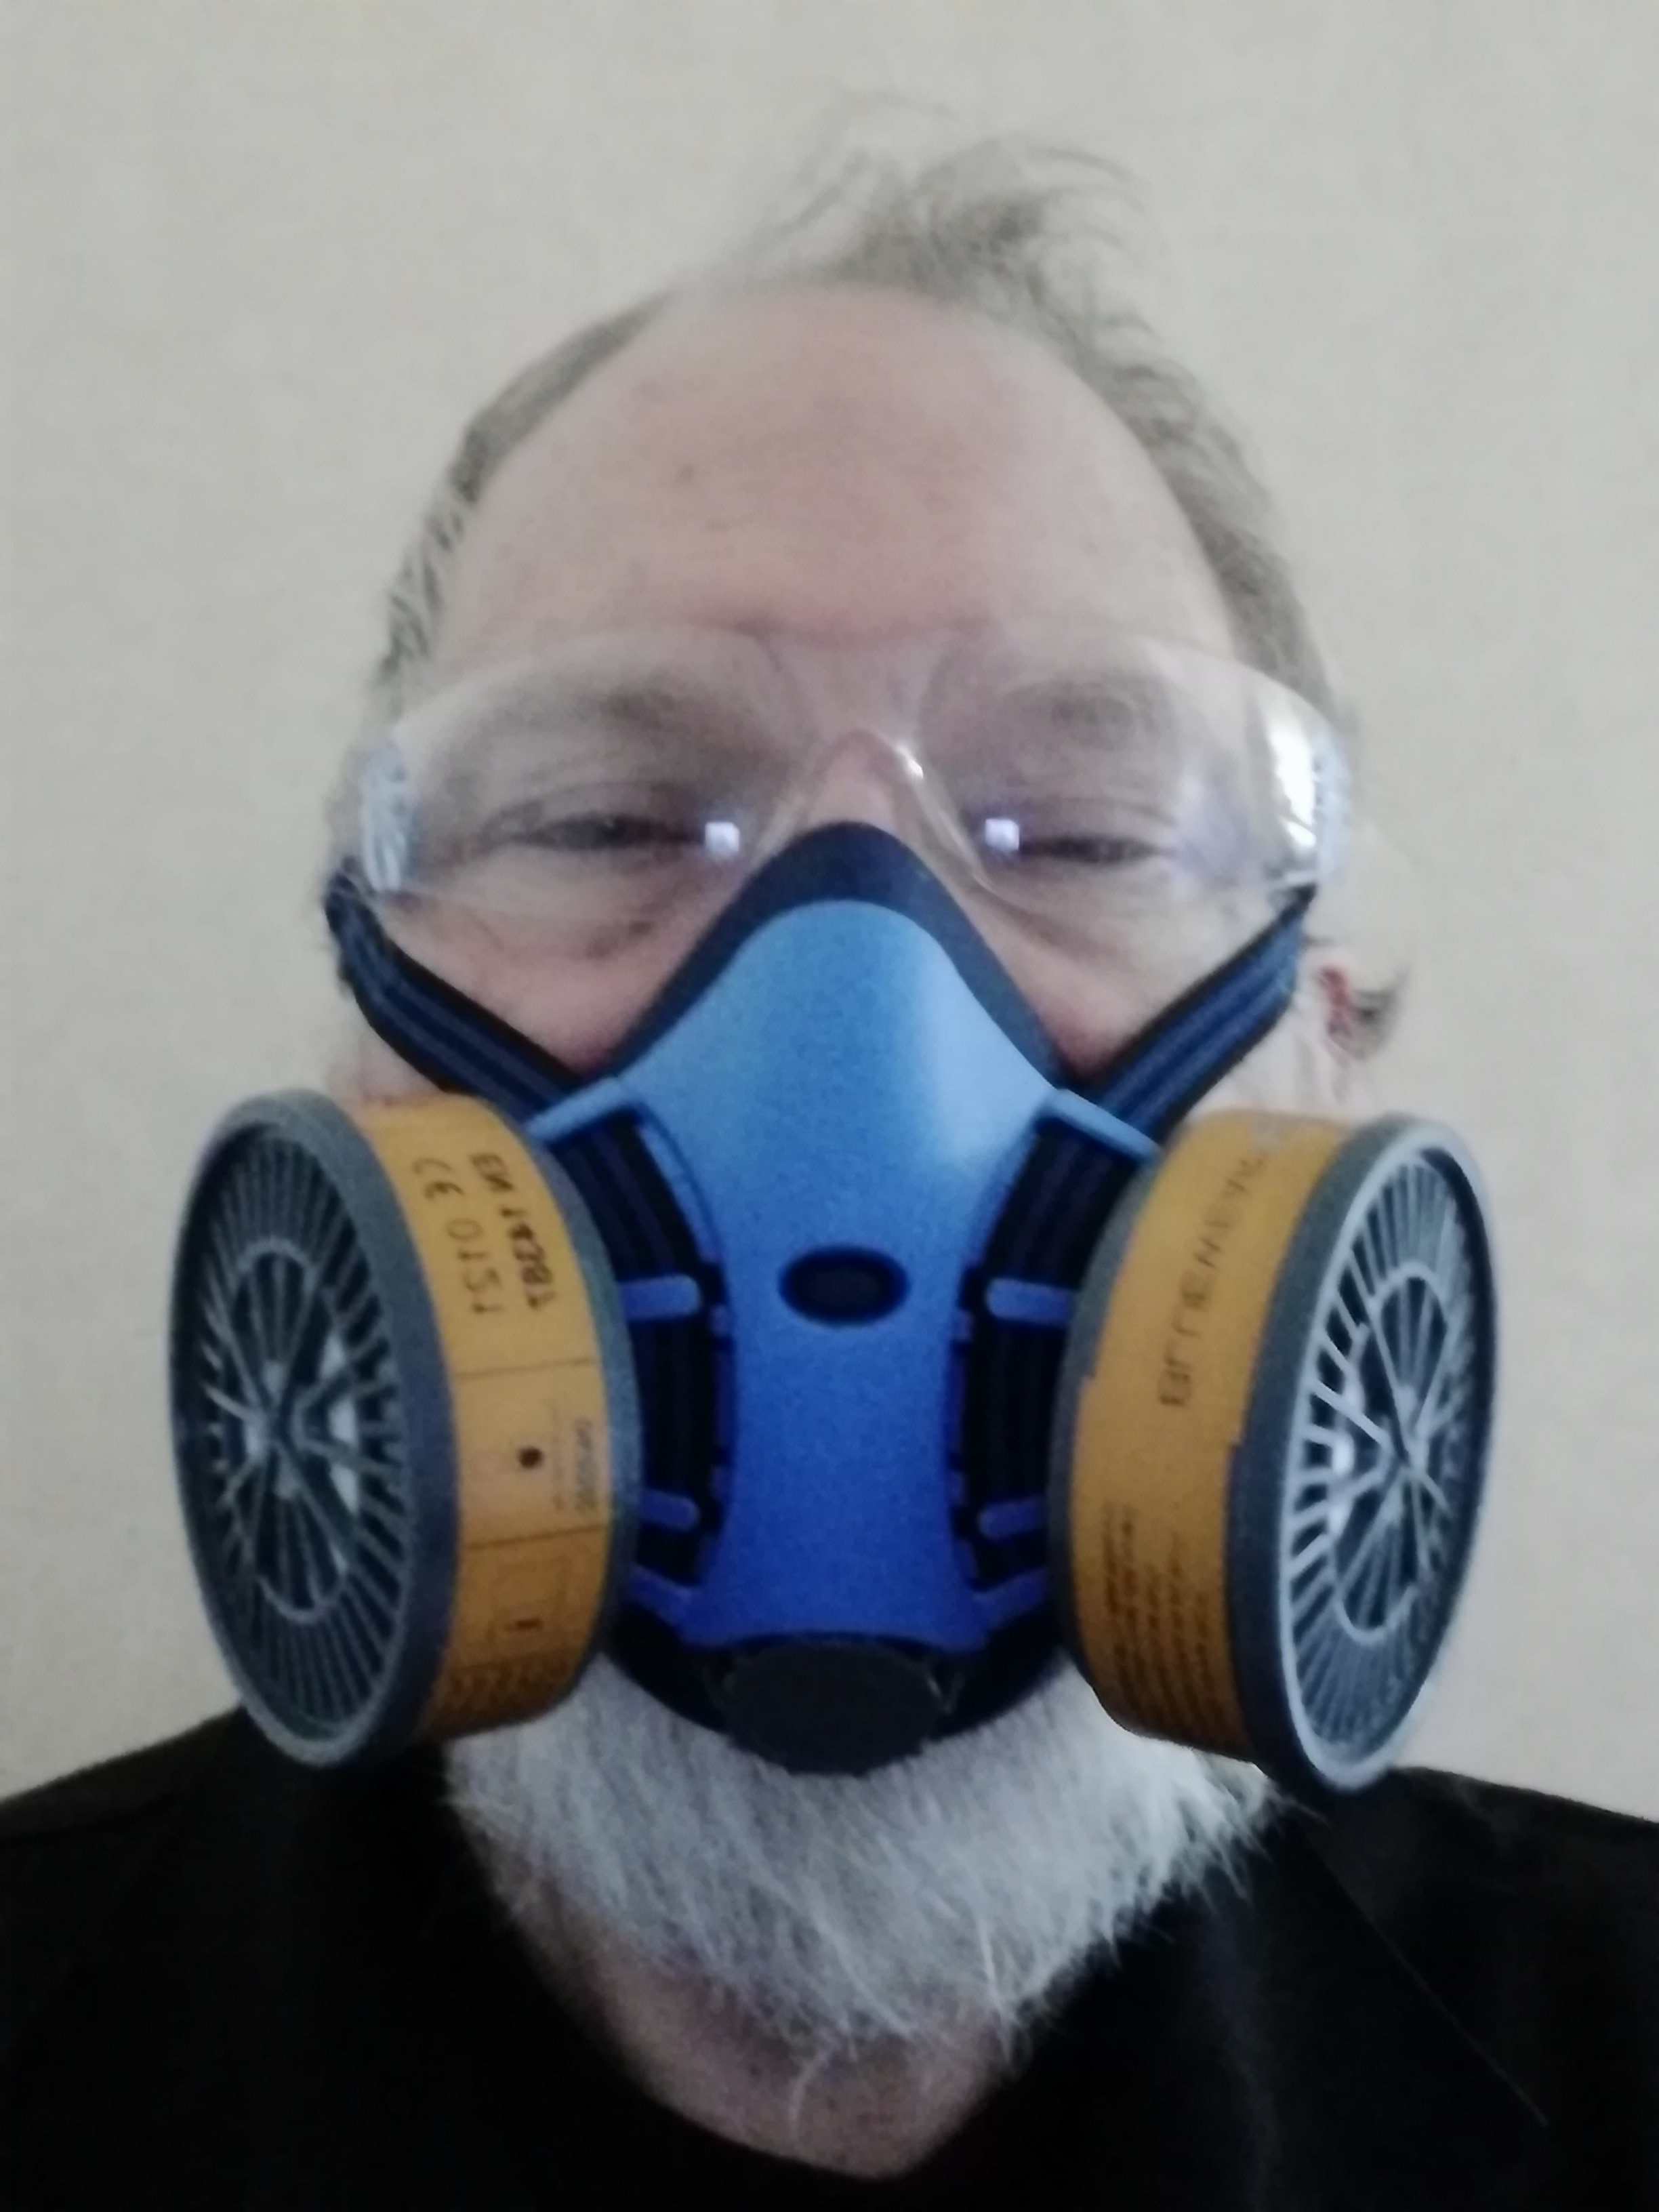
We typically use non-powered, air purifying half facepieces with sorbent cartridges when working with organic solvents. If dust is the issue, we use face masks.
Respirator used when working with organic solvents. (photo: Jula)
First Aid kit
At the entrance to Unit One there is a first aid kit that contains most items that should be used to treat minor injuries. This kit is never locked, and is accessible to everyone.
This is the first aid kit we have at Unit One. The lock has been disabled so that anyone can access it. (photo: Jula)
Fire extinguishers
Unit One is equipped with two fire extinguishers, suitable for all types of fires. These are located at opposite ends of the workshop.
Unit One is equipped with two fire extinguishers, one each at either end of the workshop. (photo: Jula)
Next time, we will be focusing on air quality management.
It doesn’t happen often, but a new family has moved into Ginnunga Gap. I haven’t seen much of Maw and Paw Maker, but their children, Ethan and Ethel, have already started hanging around the Unit One workshop.
The twins are 15 years old, and just starting out to make things. At Unit One we’re going to be writing some posts that will help them figure out what to do in a workshop. We want to make sure they learn how to “Do It Ourselves” safely.
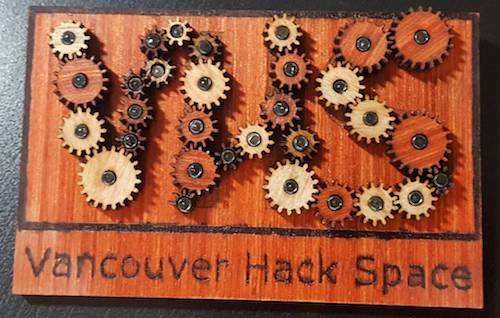
Here are some gears made by Jake McIvor at the Vancouver Hack Space. Vanhack is very similar in approach to making things as Unit One. Visit vanhack.ca (photo: Jake McIvor)
What is Unit One? That is a good question. There are lots of answers, and they can vary from day to day. Here are a few for you to consider.
Answer One. Unit One is whatever you want it to be.
Answer Two. Unit One is a state of mind. It is an imaginary workshop (20th century term) or maker space (21st century term) that encourages cooperation.
Answer Three. Unit One is a real world working space (compromise term) used to construct prototypes of designs to be shared. The designs and prototypes are used to solve real world problems experienced by real, living people.
Answer Four. Unit One is a cooperative association of working spaces where people do whatever they feel they want to do. In some, the focus may be on repair and recycling. In others, it may be the production of entertaining videos to be freely distributed for all to enjoy. Textiles may be the focus of yet more groups. Regardless of what is done, there is an attitude of respect for all participants. In all cases, Unit One offers freely equivalent products to what multi-national corporations want to sell.
Where is Unit One located?
Answer One. At present there is only one location Ginnunga Gap, the primordial void. The Wikipedia article on Ginnungagap refers to Jan de Vries (1977) Altnordisches etymologisches Wörterbuch p. 167 and F. X. Dillmann (1998) “Ginnungagap” in: H. Beck, H. Steuer. & D. Timpe, (Eds.) Reallexikon der germanischen Altertumskunde, Volume 12, pp. 118 -123 as interpreting Ginnungagap as signifying a “magical (and creative) power-filled space.” A perfect term for Unit One.
Answer Two. Current location: Vangshylla, Norway. Future locations being considered: Bergen, Norway; Essex, Ontario; Burnaby, Prince Rupert, Kamloops, Quesnel, all in British Columbia.
For more information about assorted varieties of working spaces see:
My understanding of David Pye (1914-1993) and his attitude to work and design, is that a project isn’t worth doing if there isn’t risk. Design can only result in failure. Even a “good” design will only make us less unhappy. David was not an optimist.
So it is with the Unit One workshop. The building may have been designed as a garage, but for more than twenty years it (garden shed excepted) was used for dead storage. A great deal of effort was put in to transform this storeroom into a functioning workshop. There is more window space, bringing in more light. The walls are insulated, allowing it to be warmer. The walls and ceiling are covered in OSB, keeping the building cleaner. The walls are painted white, brightening the space. Yet, it remains an imperfect structure. Walls are only about two meters high, not even the standard 2.4 meters, or a preferred 3 meters. There are issues with the floor that need to be addressed. Yes, there are lots of other issues. Despite these failures, I am less unhappy with the workshop than I have ever been before with any working space.
There are still a few things that need to be completed before the workshop will be ready for use. Building out dust extraction; supplying compressed air; implementing a command and control system, and a system for health, environment and safety. Yet, the defining moment that will transform a garage storeroom into a workshop is when that space provides a functioning workbench. Functionality is added when it is equipped with at least one vice physically capable of holding a workpiece. When that first piece is attached, the workshop as a system of systems becomes operationalized.
I have been avoiding acquiring a workbench too early, so that other systems could be in place first. As soon as the workbench is in place, the workshop will no longer be in a construction phase, it will be in an operational phase. Construction activities will then no longer be related to building a workshop, but to improving it.
With my background in computer science and operations management, I am more interested in making the workshop, than I am in having the workshop make anything. That is one reason why I don’t mind other people working in the workshop, and would encourage it.
Example: Dust Extraction vs Air Quality Control
One of the upcoming challenges is air quality control. Almost anyone can take a shop vacuum and attach its hose to a planer. That is dust extraction. An air quality control system functions at a completely different level. First, dust extraction has to be provided to every machine. Since the vacuum unit will not have enough power to provide a vacuum simultaneously to all of the machines, there has to be a system to select the one (and it probably will be just one) to be used at any given moment. In practice, this means that there will be a vast network of piping (arcs) that end up at attachment points with blast gates (nodes). These blast gates allow/ prevent that particular node/attachment point to suck up dust. At Unit One, the blast gates will be controlled by micro-processors communicating through a dedicated workshop WIFI network.
Even with a large network of nodes, this will not be enough to ensure a clean working environment. There has to be a workshop air filtration system that circulates the air through filters, removing any remaining dust particles.
At some point chemicals may be used that result in unhealthy organic and non-organic substances entering the workshop. There may be methods to extract these from the air using more filters, but in an imperfect world it may be necessary for workers (and everyone else in the workshop)to use masks with filters to achieve desired results.
Unit One as Micro-factory
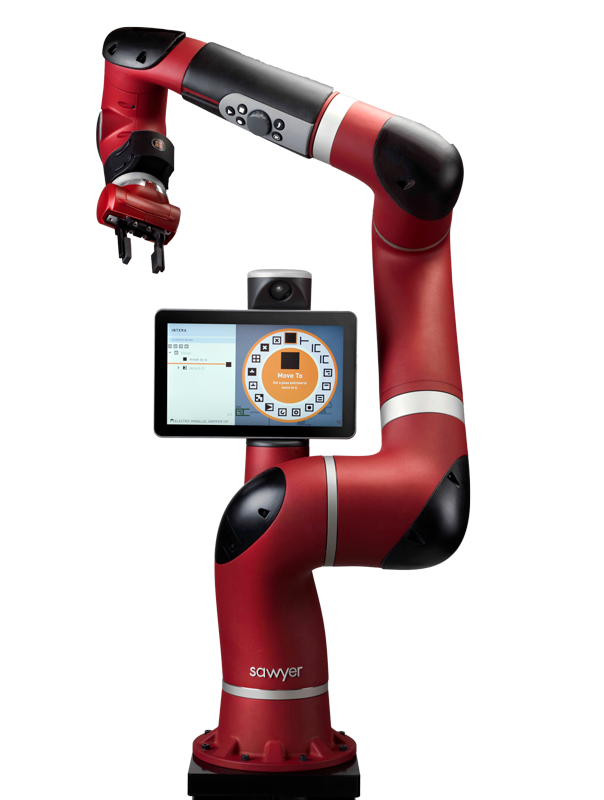
The Unit One workshop is designed as a factory prototype, or a micro-factory. Why? Because I want people to achieve a balance between “making” and “thinking about making”. The time a person spends making, limits her from thinking about making, and improving not only the product, but also production process. At some point, it would probably be better for people to devote most of their energies to thinking about making, and let someone like Sawyer do the making.
Sawyer is another cobot that costs USD 25 000 (photo: Retink Robotics)osts USD
Sawyer, and many of his friends, have attitudes that complement those of living people. Sawyer doesn’t mind working 160 hours a week. He is content with 8 hours off, for maintenance. That means he can work 8000 hours a year. Sawyer can do the most boring and repetitive jobs, and he does them without complaint. Of course, It costs money to have Sawyer work. At a price of USD 25 000 (NOK 200 000) (for the base model) he is going to cost NOK 5 an hour, for each of the 40 000 hours he will be able to work in his lifetime. After five years, he is going to end up on the scrapheap – or in the Unit One museum.
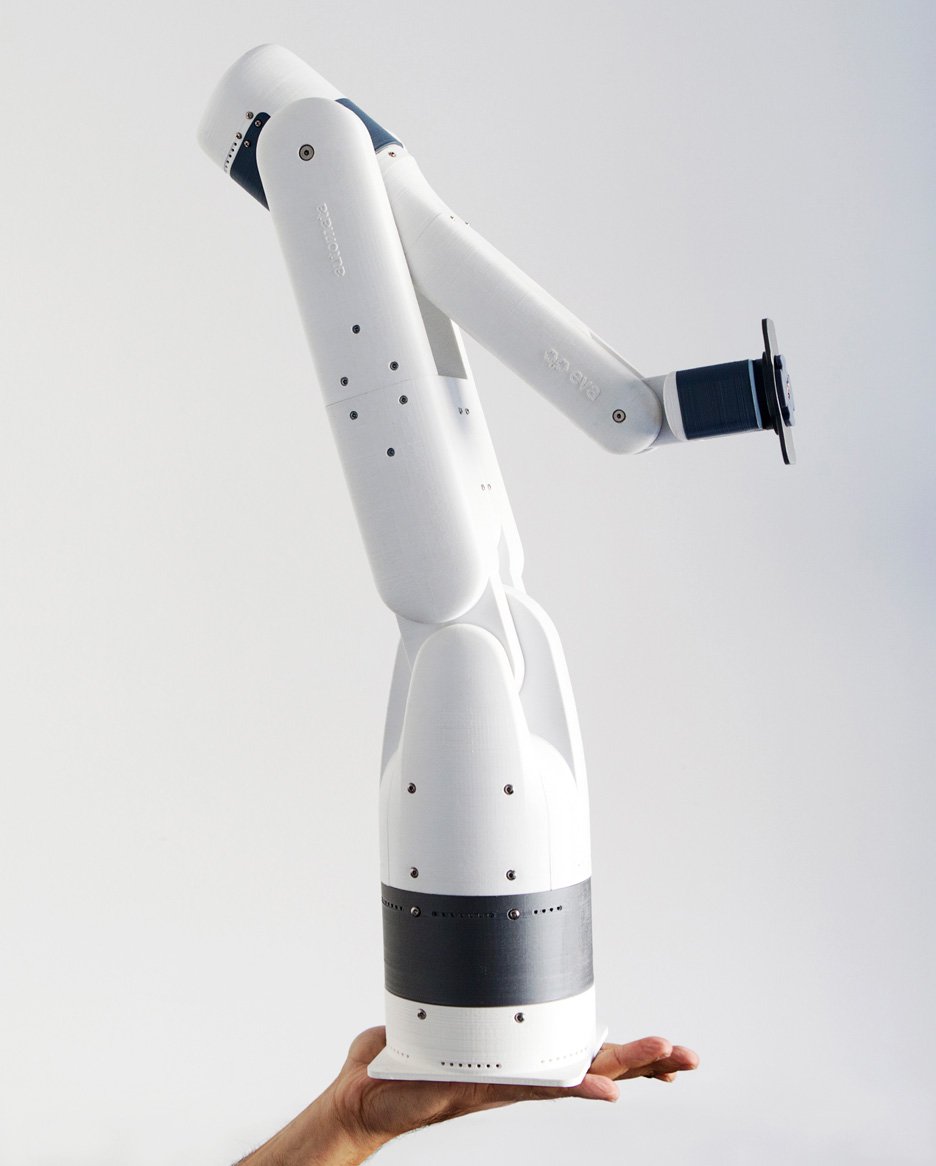
If one can’t afford Sawyer, then Eva may be just the assistant one needs. She costs USD 3 000 (NOK 24 000) and will be able to work for less than NOK 1 an hour. Eva’s work capabilities are considerably less than Sawyer’s, which explains the price difference.
Eva, a cooperative robot costing USD 3 000 (photo: Automata)
In short, the workshop is a space for prototype and process development. Afterwards, as risk is eliminated, work is left more and more to Sawyer and friends.
News Flash! CFO (Chief Financial Officer) Precious Dollar has just informed me that I have no budget to hire Sawyer. In fact, there may be no budget to pay Billi or anybody else. I may be working alone, and not getting paid.
Motto & Mission Statements
Motto: Do it Ourselves.
Mission Statement (Articulate, measured version): Providing space, tools and machines to transform individual and collective visions into practical products that make the world a better place.
Mission Statement (Mash up vision): Mashing dreams, ideas, designs (half baked or even burnt from excessive cooking), large quantities of skills at different levels of mastery, and even a little brute strength, with a bunch of raw materials of different qualities and quantities, machines and other tools, resulting in products that slowly, even begrudgingly, emerge for the benefit of individuals and the community.
Taking Machine Alley as an example, how does Unit One go from idea (some would say dream, or even illusion) to physical reality, in its selection of machines? The mission statement provokes more questions than it answers. Which machines and tools are going to be used? Which materials? Which processes?
Research: To begin with, we had some informal ideas of what was needed. We knew that some people of the community were wanting to work with traditional products, and decided that wood would be a good place to start. So we read up on the tools that a woodworking shop needed. We came up with a list that included a lot of hand tools, some hand electric tools, and some stationary machines.
Analyse: Once the list of stationary machines was complete, they were analysed. Would they physically fit into the area available? Were they durable? Were they suitable for amateurs to use?
Decide: At this stage, a short list emerges of the most appropriate products. These are then ranked according to perceived suitability.
Source: Once the product has been decided upon, it is necessary to find a suitable vendor. Here one wants to check the reliability of the company, and its ability to handle deviant situations, such as parcels going astray. (Deviant, here, is used as a strictly professional, mathematical concept.)
Order: At this stage a product, a price, a vendor, and a shipping method are selected, and an agreement is made to acquire a specific product.
Purchase: This involves the agreement to transfer of funds to the vendor, including the conditions that have to be met before payment is made.
Receive: This involves the arrival of the product at Unit One.
Pay: For some, this is the hardest part of the whole process, and represents the time when money is removed from one’s own bank account and transferred to someone else’s.
Install: Prepare a machine so that it can be used for production processes.
Test: Investigate performance parameters of a machine, and measure how close these come to achieving these goals. If necessary, measures may have to be put in place to compensate for any deviation from expected results.
Commission: Once the testing phase is complete, a machine is commissioned. Its operational status becomes “active”, which involves two operational situations. It is either “on duty”, allowing it to be operated, or it is “off duty” allowing it to be maintained or repaired.
Maintain: This involves periodic, preventative care for a machine; a “wellness” program for the mechanical components of a workshop.
Repair: This is an unplanned situation, where a machine is unable to operate, and has to have parts and/or labour applied so that it will be able to operate again.
Operate: The day by day running of a machine.
At some point, new technological developments or, more likely, the inability to source spares, will make further use of a machine untenable. The machine will then have reached its end of life.
Decommission: A formal decision to remove a machine from active duty. In some cases a machine may be sold, or given an alternative use. In other cases, it will be dismantled
Dismantle: Separating a machine into components, some of which may be recycled.
Dispose: The physical removal of a machine from the workshop.
Note: This post is a work in progress. It will be periodically revised and given a new version number.
Some days I am overwhelmed by the response to this blog. So many questions! One of the more frequently asked questions is, “Where is Cliff Cottage?”
Cliff Cottage, along with Unit One, is physically located in uptown Ginnunga Gap. The uptown is situated about 300 meters away from downtown Ginnunga Gap, which is the location of a former ferry quay, as shown in the photo below.
Downtown Ginnunga Gap (photo: Alasdair McLellan)
Some people have difficulties with directions. One person lacks a functional understanding of left and right. Another has an inability to orientate himself in a grid using north, east, south and west. Because the buildings are not oriented along a conventional grid framework, the walls of the house and workshop have become proxies for conventional directions, and will soon have “street signs” posted, so everyone can check. Here are the proxy directions: Nifl (which points to the land of ice) where the workshop doors are placed; Carmel (which points to a beloved mountain in Israel) which hosts Machine Alley; Muspel (which points to the land of fire) is the wall adjoining the Annex; and Atlantis, which has a (highly theoretical) view over the Atlantic ocean, but overlooks the main workbench.
In much the same way that some British firms hold royal warrants allowing them to print on their offices, factories and even product packages something like, “By Appointment to Her Wellness …., suppliers of toilet paper and other fine sanitary products,” Unit One humbly writes, “By Appointment to the Citizens of Ginnunga Gap, Unit One suppliers of space, tools and machines to transform individual and collective visions into practical products that make the world a better place.”
Visiting British, Norwegian or other royalty will be treated with the same respect that we treat all members of the Greater Ginnunga Gap community.
The Unit One Workshop is scheduled to start operation on Monday, 01 January 2018 at 12 noon. If you would like to be included in the official opening celebration all you have to do is contact the operations manager: brock@mclellan.no and have your name added to the list of invited guests.
At the moment a number of speakers have been invited to entertain guests. Not all of these have accepted, yet – so there could be some changes.
Proton Bletchley: Unit One – A Community Workshop (15 minutes)
Precious Dollar: What it costs to construct a workshop (10 minutes)
Billi Sodd: Prison workshops (This is dependent on Billi being able to obtain day release from Verdal Prison) (unknown duration)
Refreshments served
Jade Marmot: The fun of DIY videos (30 minutes)
Brock McLellan: Closing remarks (10 minutes)
During that first day, at 14:00, a Health, Environment and Safety course will be conducted, so that people wanting to use the workshop will know how to protect themselves and the environment.
To begin with, equipment at the workshop will focus on woodworking. A number of stationary machines will be available, if not on opening day, then soon thereafter, including: table saw, band saw, mitre saw, router, planer, jointer and drill stand.
About once a month there will be a “fredag fika” in the workshop. The first of these is planned for Friday, 5 January 2018 at 12:00. However, if people would rather have this on a different day, or time, these wishes can be accommodated. This meeting will give people several days to reflect on how they want to use the workshop, and the rules that are needed to govern its use.
Enhet En Verksted
Verkstedet til Unit One/ Enhet En er planlagt å starte drift mandag 01 januar 2018 kl 12.00. Hvis du vil bli med på den offisielle åpningsfestet, må du bare kontakte operasjonssjefen: brock@mclellan.no og få navnet ditt lagt til listen over inviterte gjester.
I øyeblikket har en rekke talere blitt invitert til å underholde gjester. Ikke alle disse har akseptert, ennå – så det kan være noen endringer.
Proton Bletchley: Enhet 1 – Et versted for fellesskapet (15 minutter)
Precious Dollar: Hva koster det å bygge et verksted (10 minutter)
Billi Sodd: Verksteder på fengsel (Dette er avhengig av at Billi for frigang fra Verdal fengsel) (ukjent varighet)
Servering av forfriskninger
Jade Marmot: Den morsomme med DIY videoer (30 minutter)
I løpet av den første dagen, klokken 14.00, vil det gjennomføres et helse-, miljø- og sikkerhetskurs, slik at folk som ønsker å bruke verkstedet, vil få opplæring om hvordan de skal beskytte seg selv og miljøet.
Til å begynne med vil utstyret på verkstedet fokusere på trebearbeiding. En rekke stasjonære maskiner vil være tilgjengelige, om ikke på åpningsdagen, så snart deretter: bordsag, båndsag, gjæresag, fres, tykkelseshøvel, jointer og borestativ.
Omtrent en gang i måneden vil det være en “fredag fika” i verkstedet. Den første av disse er planlagt fredag 5. januar 2018 klokken 12.00. Men hvis folk heller vil ha dette på en annen dag eller tid, kan dato og/eller klokkeslett endres. Dette møtet vil gi folk flere dager til å reflektere over hvordan de vil bruke verkstedet, og de reglene som trengs for å styre bruken av det.