Renewal of Furnishings

Ye have been enjoined to renew the furnishings of your homes after the passing of each nineteen years; thus hath it been ordained by One Who is Omniscient and All-Perceiving. He, verily, is desirous of refinement, both for you yourselves and for all that ye possess; lay not aside the fear of God and be not of the negligent. Whoso findeth that his means are insufficient to this purpose hath been excused by God, the Ever-Forgiving, the Most Bounteous.

Kitab-i-Aqdas

Since I retired, Alasdair and I have made a few simple modifications to that building formerly known as the garage (with attached shed), but now referred to as the workshop (with attached annex). My hope is that this building will result in something more than just more conspicuous consumption, but will be a small center for practical social change.

In the Baha’i Faith, there is a requirement to refurbish, as shown in the above text. This text generates discussion, not only in terms of what should be included (cars?) but also the handling of antiques and rare possessions. Some days, I read the text as an admonition to keep possessions longer than is common today. The Tripp-Trapp chairs in the house are about 34 years and 28 years old, respectively. They are still used daily. None of our cars have lasted 19 years, yet. However, I will be very disappointed if my 2023 VW Buzz doesn’t last at least 19 years. In fact, I have every intention of keeping it until my 100th birthday in 2048, when it will be 25 years old.

VW Buzz
A VW I.D. Buzz prototype from 2017. It is expected to enter production in 2023. I am not sure how often I will be carrying surf boards on the roof, as I expect to end my active surfing career in 2018, at the age of 70. The Buzz may be in some way described as environmentally friendly, but it does consume large quantities of materials. It could become a symbol of conspicuous consumption in the future. (Photo: VW)

The workshop is designed to aid refurbishment, not just selfishly – but also in terms of community. It is a place where products are to be designed, and prototypes made. If the prototypes are successful, then further copies may be made. This may even involve batch production.

An equally important act is the publication of product information. The workshop is, naturally, an open source environment. Products designs developed there are to be made freely available to others.  This blog will be an important element in distributing information. However, there are other things that need to be done. One of the challenges of the open-source movement is quality control. Products need to be tested, and the results of those tests have to enter a feedback loop, so that designs can be improved.

Woodworking is the initial focus of the workshop. Shop cabinets and French cleat storage units will be some of the first products to be made. The goal is to have the workshop in working order by 2018.01.01. “Machine Alley”, a 6-meter (20 feet) long section of the workshop will consist of eight 600 mm (24 inches) long units, with a uniform height. Machines will have their own particular unit assigned to them. However, it should be a relatively easy task (less than one hour of work) to move a machine to a different location.

bty
The first production machine purchased for the workshop, a planer. This length of wall is to be known as “Machine Alley”, and will be the location where stationary machines will be kept. Photo: Brock McLellan

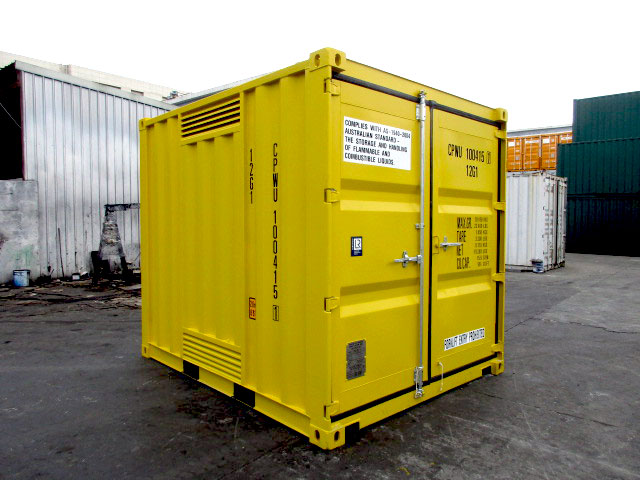
A large number of wooden products are being considered for the workshop including: a replacement garden shed, a winter garden, kitchen cabinets, a replacement dining table and chairs. At the community level there may be a need for geodesic dome greenhouses that could be produced at this, or another workshop, in the Vangshylla community.

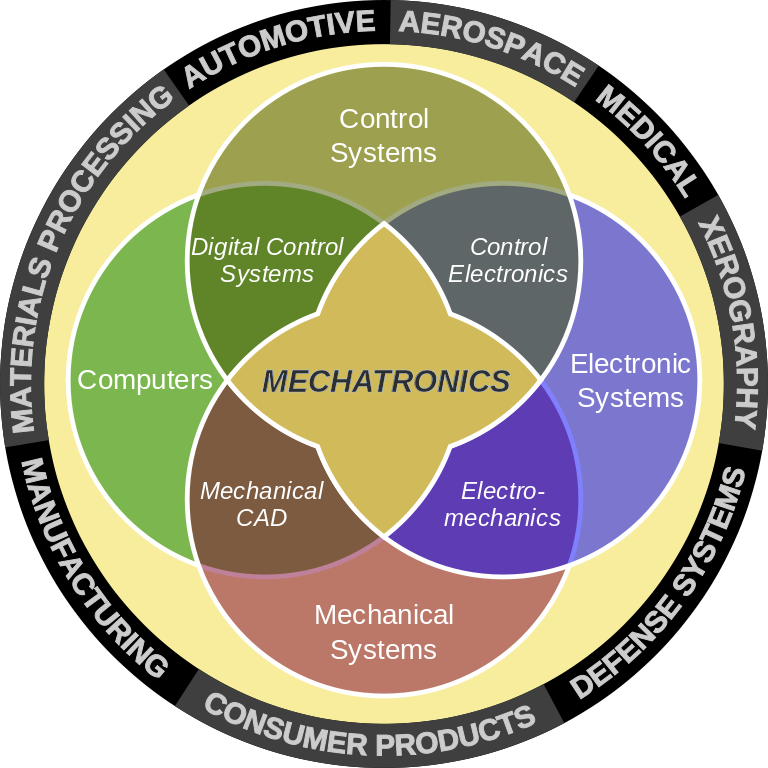
As our own personal refurbishment becomes more complete, I see a gradual transition to other materials than wood. A solar water heater is one example of a product that uses very little wood, more plastic and a lot of metal. With the use of active systems, it is here that we are entering the world of mechatronics (mechanics + electronics + a lot more).

768px-Mecha_workaround.svg
Aerial Euler diagram showing the sub-fields of Mechatronics (Photo: Rensselaer Polytechnic Institute, 2012).

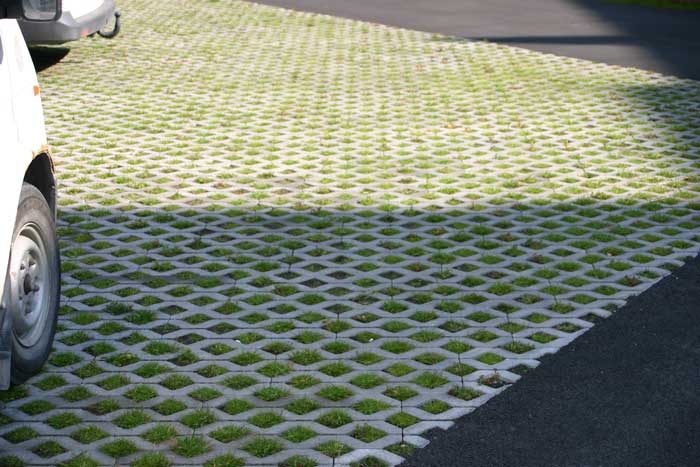
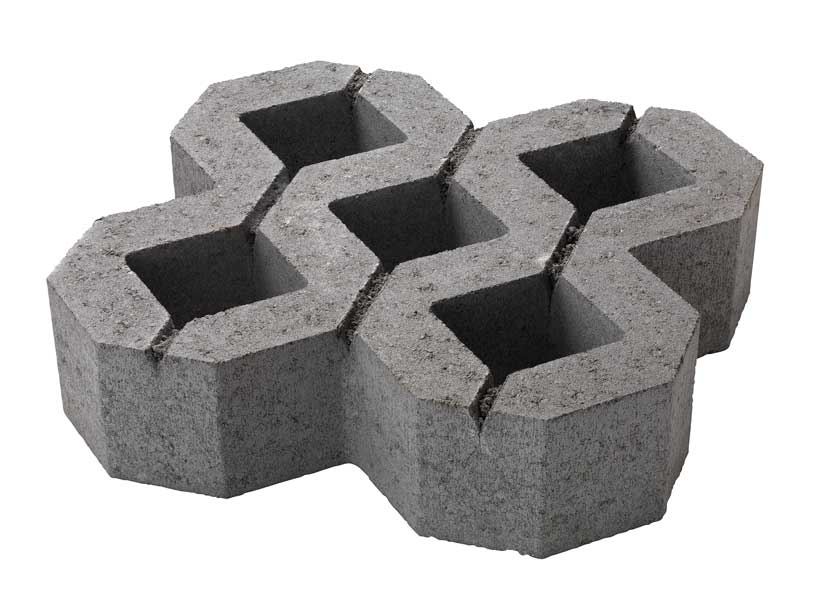
Personally, I would also like to learn other construction skills. I have made a decision that using a gym or studio to exercise is a waste of time and money. Lifting a few tons of wood or steel is as good exercise as lifting weights. I won’t even mention the word, spinning. In the Unit One blog, there has been some discussion about making paving stones, and using stucco (rendering) on walls. These activities will keep anyone in shape.

While I would like to work with heavy materials for as long as possible, aging is an ongoing process. At some point a refocusing on robotics may be natural. Regardless, a key element is a focus on community – and the needs of others. I am looking forward to using the workshop over the next 19 years. By then, at the age of 88, there could be yet another refurbishment, with new horizons opening for me to explore.

Why Stucco? A concise summary

the_bo_kaap_cape_town
The Bo-Kapp area of Cape Town features colourful stucco houses (Photo: http://www.holidaybug.co.za/)

Here is a summary of the reasons why one should choose stucco as an exterior cladding. This is not a balanced article, it does not include the reasons why stucco should be avoided.

1. Versatile

Can be applied over many different types of surfaces including concrete masonry or wood framing

Can be applied seamlessly

Can be layered to creates a heavily textured surface

Can be used in new builds as well as renovations

2. Installs quickly

A conventional house usually requires between one and two days, including drying time

3. Energy efficient

Low U-value (or if you prefer the inverse, high R-value)

4. Durable

Expands and contracts as the temperature changes

Reduced risk of flaking, cracking or crumbling

Can last over fifty years with little maintenance

Rot, mildew and mold resistant

5. Enhances value

Earthquake resistant

Fire resistant

Sound dampening

6. Low maintenance

In warm and dry climates, little or no maintenance, except occasional washing to remove spots or stains

In hot and humid climates, little maintenance

In cold and wet climates, little maintenance provided

  • snow is cleared away from walls
  • eavestroughs direct water away from walls (that’s a Canadian word for gutters)

7. Reduced house insurance premiums (in North America)

8. Many options

Textural

  • Coarse
  • Pebbled
  • Raked
  • Smooth
  • Swirled

Colour

  • Pigment mixed directly into the mix
  • Can be repainted

Stucco

My childhood home was clad in rockdash stucco. There are no rocks in it, only 3 – 6 mm pieces of broken coloured glass. It is a technique not favoured today, in part because it is extremely difficult to repair.

314+Ash+Street+New+Westminster+BC
Pi House, 314 Ash Street, New Westminster, British Columbia, Canada. I last lived there in 1972. It looks as if the new owners have had to repair the stucco to the left of the entrance. Repairs are what makes rockdash stucco houses so problematic to own.

My wife’s childhood home was also clad is stucco, but in a form of roughcast, which is slightly less of a problem to repair because it adds stones to the mix, whereas rockdash puts them on top.

Despite the fact that there are numerous ugly stucco buildings, I still find it the most appealing method of cladding. It has only taken me forty years to come around to this view. OK, sixty five years plus. Wood rots. I’m not in a social class that uses stone – being neither a laird nor a crofter. I’m not brutal enough to appreciate massive concrete. Nor am I English, so brick doesn’t have much appeal either. I am stuck with stucco.

I had considered manufacturing cement fiber sheeting, but in order to make the sheets thin enough (4 – 8 mm), the process requires the use of expensive silica sand and even more expensive special purpose chemicals.

Wikipedia states that stucco is the predominant exterior wall material in both residential and commercial construction in five states: California, Nevada, New Mexico, Arizona and Florida. https://en.wikipedia.org/wiki/Stucco

While many stucco houses use a subdued pallet, this does not apply in all cases. Personally, I would like to have our house continue to be bright yellow.

Bright-Yellow
My preferred colour of stucco, here combined with stone and wood, in a climate warmer than Norway’s. (Photo: http://thestuccoguy.com/stucco-colors-which-one-to-choose/)

There are many other colours available, some even less subtle:

Another-Pink-Theme
Another attractive colour for a stucco building. I grew up with pink inside the common rooms, as well as outside our house. My bedroom was blue. (Photo: http://thestuccoguy.com/stucco-colors-which-one-to-choose/)

There is not an excessive amount of information about DIY stuccoing on the net. Here are three important sources:

  1. For restoration work: https://www.nps.gov/tps/how-to-preserve/briefs/22-stucco.htm
  2. Text materials about contemporary methods: http://thestuccoguy.com/
  3. Videos about contemporary methods: https://www.youtube.com/user/StuccoPlastering

My plan for the spring of 2018 is to use stucco as part of Project Pumpkin, the construction of a ca. 15 m3 gardening shed, to replace one expropriated.

Paving Stone Robotics

A not-yet-famous historian reminds me that history is not a series of inter-related anecdotes. I am not going to let this or any other fact interfere in the telling of this vision of the future.

Anecdote #1

The story begins at the dawn of the current millennium, when three students taking their teaching qualifications had to find a project. The project selected resulted in the construction of a presentation program that systematically showed the process of making ciabattas using pictures, a few words and audio tracks. It should be noted that the baker for whom this presentation was made, had some learning issues.

Before the existence of the presentation program, the baker would be helped by one of a group of teachers (for lack of a better word) who could remind the baker of the steps to be followed. Unfortunately, there could be some procedural inconsistencies between the different teachers, that the baker found disconcerting.

Using the presentation program, inconsistencies were eliminated in the mind of the baker. More importantly, after three months the presentation program itself could be eliminated, because the baker had managed to implement the procedures into her brain.

For some consistency is a more important attribute than for others. It is an extremely desirable characteristic in robots.

Anecdote #2

Building a shelving unit for the gardener, I am trying to follow the spirit of the accompanying instructions. The instructions are more literary than most novels, relying on descriptive paragraphs, rather than bullet points, to inform. The next sentence gives a possible explanation for this approach. It reads, “Remember the mid-shelf braces.”

This instruction does not tell me, with any precision, what I am supposed to do with these braces. The braces have tabs at both ends, each has to be bent and inserted mid-shelf into the two shelf supports at the front and back of the unit, respectively.

Perhaps the most important skill computer programming has taught me, is to analyse what has to be done, and to implement it using code.

Anecdote #3

Billi Sodd is lazy, inconsistent and easily distracted. As a robot, Billi is a complete failure! However, since Billi is just about the only person who can actually make paving stones in our neighbourhood, I have to put up with his weaknesses.

I am considering giving Billi a new role. Rather than just using his labour, I want to use his knowledge of making paving stones to automate the production process. So, Billi has become not just head janitor, but paving stone informant.

Anecdote #4

The official chronology of Local Motors https://localmotors.com/heritage/ is interesting, not so much in terms of what is presented, but what is missing. Back in 2012, LM was interested in two types of production facilities – Minifactories, such as one built in Phoenix, Arizona, and Microfactories, in the form of 40 foot long containers that could be shipped anywhere, used to produce one or more vehicles, then moved on again. These microfactories have entered Local Motor’s “forgetting book” (Yes, that’s a Norwegian expression, Glemmebøken, which is where all forgotten lore ends up).

Reboot

A potential micro paving stone factory.

bottombox4
10 foot high cube container, Something like this could become home to a micro paving stone factory. (Photo: containertraders.com.au)

Why would anyone want to house a paving stone factory in a container? The main reason is that each residence only needs a limited number of paving stones. So, after x square meters have been made, the equipment can be given or sold to others.

The inside of the container would contain hoppers filled regularly with cement, sand and water. The content would be transported inside the container at even more frequently intervals, to a mixing area, where 30 kg batches would be prepared, mixed then poured into forms.

I envisage the production facility of consisting of a 1800 x 1800 mm surface, divided into nine 600 x 600 mm work areas, as shown in the following diagram. As before, station 1 is used to prepare the forms using a release agent, potentially Pam or vaseline. Station 2 is for the filling of the forms, with concrete as well as rebar, along with vibration. At stations 3, 4, 6 and 7 nothing happens. Waiting is a virtue. At station 5 the surface of the paving stones are textured. At station 8, the paving stones are removed from the forms. They must still be stored and allowed to cure, for up to several days.

7

8

1

6

Mixer

2

5

4

3

Sand hopper

Water hopper

Cement hopper

Here are some specifications for a 10 foot (3 meter) container:

Length External/ Internal 3000/ 2840 mm
Width External/ Internal 2438/ 2352 mm
Height External/ Internal 2896/ 2698 mm
Weight Tare/ Gross 1300/ 10160 kg
Volume External/ Internal/ Useful 21.18/ 18.02/ 16 m3


Concrete Paving Stones

This spring we added more gravel to improve the driveway. It cost about NOK 4000. As expected, it required a lot of work to move (position, is the polite technical term), Yet, it effortlessly produces potholes, and in general doesn’t work perfectly.

What is needed is a driveway surface that would still allow grass to grow, and cars to drive.

gressarmering 2
No. This is not what our driveway looks like. This is an ad for Grassarmering. It shows what Asak Miljøstein wants us to buy, at a cost of NOK 75 000 (plus labour). Sorry, Asak. It just isn’t going to happen. Photo: Asak Miljøstein.


Gressarmering
Asak Miljøstein produces a large variety of paving stones, including this model, “Gressarmering”. Photo: Asak Miljøstein.

This is “Gressarmering” from Asak Miljøstein. It is 400 x 400 x 100 mm and weights 22 kg. There are 6.25 stones per square meter. I’m not sure that one needs this quality of product for a driveway, and I would consider using stones with only half the height. Many other paving stones only have a height of 40 mm. Regardless of the size, paving stones need rebar. One approach is to make smaller and lighter stones, for example a 3 x 3 arrangement of exactly 9 stones per m2, with an aim of reducing each stone’s weight to about 7 kg, and the square meter weight to 60 – 65 kg. for a total weight of 12 – 13 000 kg, for an estimated 200 m2 (or 1800) paving stones on the driveway.

The retail price of Gressarmering stones is NOK 60 each, or NOK 375 per square meter, or NOK 75 000 for the driveway, labour excluded. Cement can be purchased for about NOK 1 a kilo, and sand for even less. Thus, the raw material costs should be considerably under NOK 60 per square meter, or about NOK 12 000 for the driveway, for an alternative product. This is consistent with other information presented in some Youtube videos, that state that the material costs of building one’s own paving stones are about 20% of buying them.

Youtube videos

The first step for many DIYers is the inspiration phase, known more correctly by spouses as the procrastination phase. This is where countless Youtube videos are consumed. To begin with all of the ones I found about making concrete paving stones used rubber molds.

https://www.youtube.com/watch?v=2ctNaoUrfYM

The process of making a rubber mold from an existing concrete paving stone is described. It was interesting, but I decided that it was not my job to keep the plastic industry profitable. The one part of the video that was important was the use of a vibrating table to ensure that the concrete occupied all of the mold, and didn’t leave air gaps.

https://www.youtube.com/watch?v=DTGLuBzADuo

Professional Communications – Week 7 Presentation, is an unusual title for a DIY video. It was also labled, Making your own concrete pavers. This is obviously some sort of student video. Technically, it has a lot of issues, including low quality sound and not much better video. Yet, it is the most important video that I watched today.

The mold used was made out of scrap lumber and plywood. Pam, the non-stick spray found in every American food store, was used as a release agent. They provided information on mixing concrete, putting it into the mold and adding rebar. One waits 30 minutes, then gently uses a brush to give texture to the surface. One waits yet another 30 minutes, and the stone can be removed from the mold.

https://www.youtube.com/watch?v=GWImU7CCU8g

This video shows a simple vibrating table made out of a sheet of plywood. The plywood is attached to an old car tire, as well as an electric motor with an eccentric shaft. This system creates a lot of vibration, however improvements could be made so that paving stones in their molds don’t simply vibrate off the table.

https://www.youtube.com/watch?v=Vh3m_SKtJrc

This vibrating table is interesting, but the mechanics of it are too complex. The table top does do a great job of keeping the paving stone forms in place.

Workflow

One of the challenges is that neither a single paving brick nor a square meter of them, may be the ideal manufacturing unit. Sheet material is most often 1200 x 2400 mm. This makes 600 x 600 a useful size that could allow 2 x 2 = 4 paving stones to be manufactured simultaneously, with a material handling weight of somewhere around 30 kg. One sheet of MDF or plywood would make 8 separate units (for 32 paving stones).

Station Start Stop Activity Tools and materials; comments
1 0 10 Prepare forms Release agent
2 10 20 Pour concrete Vibrator, concrete mixer; cement, sand, water, rebar
3 20 30 Wait No work needed in this position.
4 30 40 Wait No work needed in this position.
5 40 50 Roughen surface Brush; Brush surface to create rough texture.
6 50 60 Wait No work needed in this position.
7 60 70 Wait No work needed in this position.
8 70 80 Remove Trolly; Remove, move and store paving stones.

This looks like too much work for one person, about right for two, ideal with three (probably with the third person only working at intervals) if breaks can be staggered. This allows the production of 24 paving stones an hour. Given a 7.5 hour working day, only the first six hours can be used to initiate stone production. The last 1.5 hours goes to clean up, and waiting for the last stones to cure sufficiently to be removed from their molds. That results in 144 paving stones a day. The total production of 1800 paving stones would require 12.5 working days.

Another approach is to binge produce with shifts of workers. The production of 1800 paving stones would require 76.5 hours of continuous activity, 3 days 4.5 hours.

bdr
Driveway with fresh layer of gravel. The trailer can legally carry 1600 kg of paving stones (or anything else). It can easily hold 5 x 9 = 45 paving stones per layer, weighing 315 kg. This would allow 5 layers (225 paving stones) to be carried. Photo: Billi Sodd

One of the fun things about DIY is finding cost effective solutions. Anyone can buy an expensive release agent. When Billi Sodd repeated the suggestion of using Pam, this crossed some inbuilt environmentalist barrier in Precious Dollar, who was then challenged to find other solutions that don’t involve sprays. Moral: Make offensive comments, and someone will be motivated to find a better solution!