Time. It passes so quickly. I estimate that we have had one particular painting now for about 30 years. It measures 605 x 950 mm. The stretchers are approximately 12 x 40 mm with mitre cuts. The artist attached drawings with the painting, so it could be framed, but that was not done.
Product Design
The artist suggested using 1 x 3 lumber. Rough sawn, it is 25 x 75 mm; dressed 4 sides, it becomes 19 x 65 mm. I will be using 21 x 70 Nordic pine, pre-painted in white. This colour was specified.
The frame will be made from 8 pieces of wood, four pieces are on edge, forming a perimeter protecting the painting. The other four inside will provide a flat surface for the attachment of the artwork. There are at least four ways to put these pieces together, as shown below. I believe the artist suggested design 2. This is what I will be making.
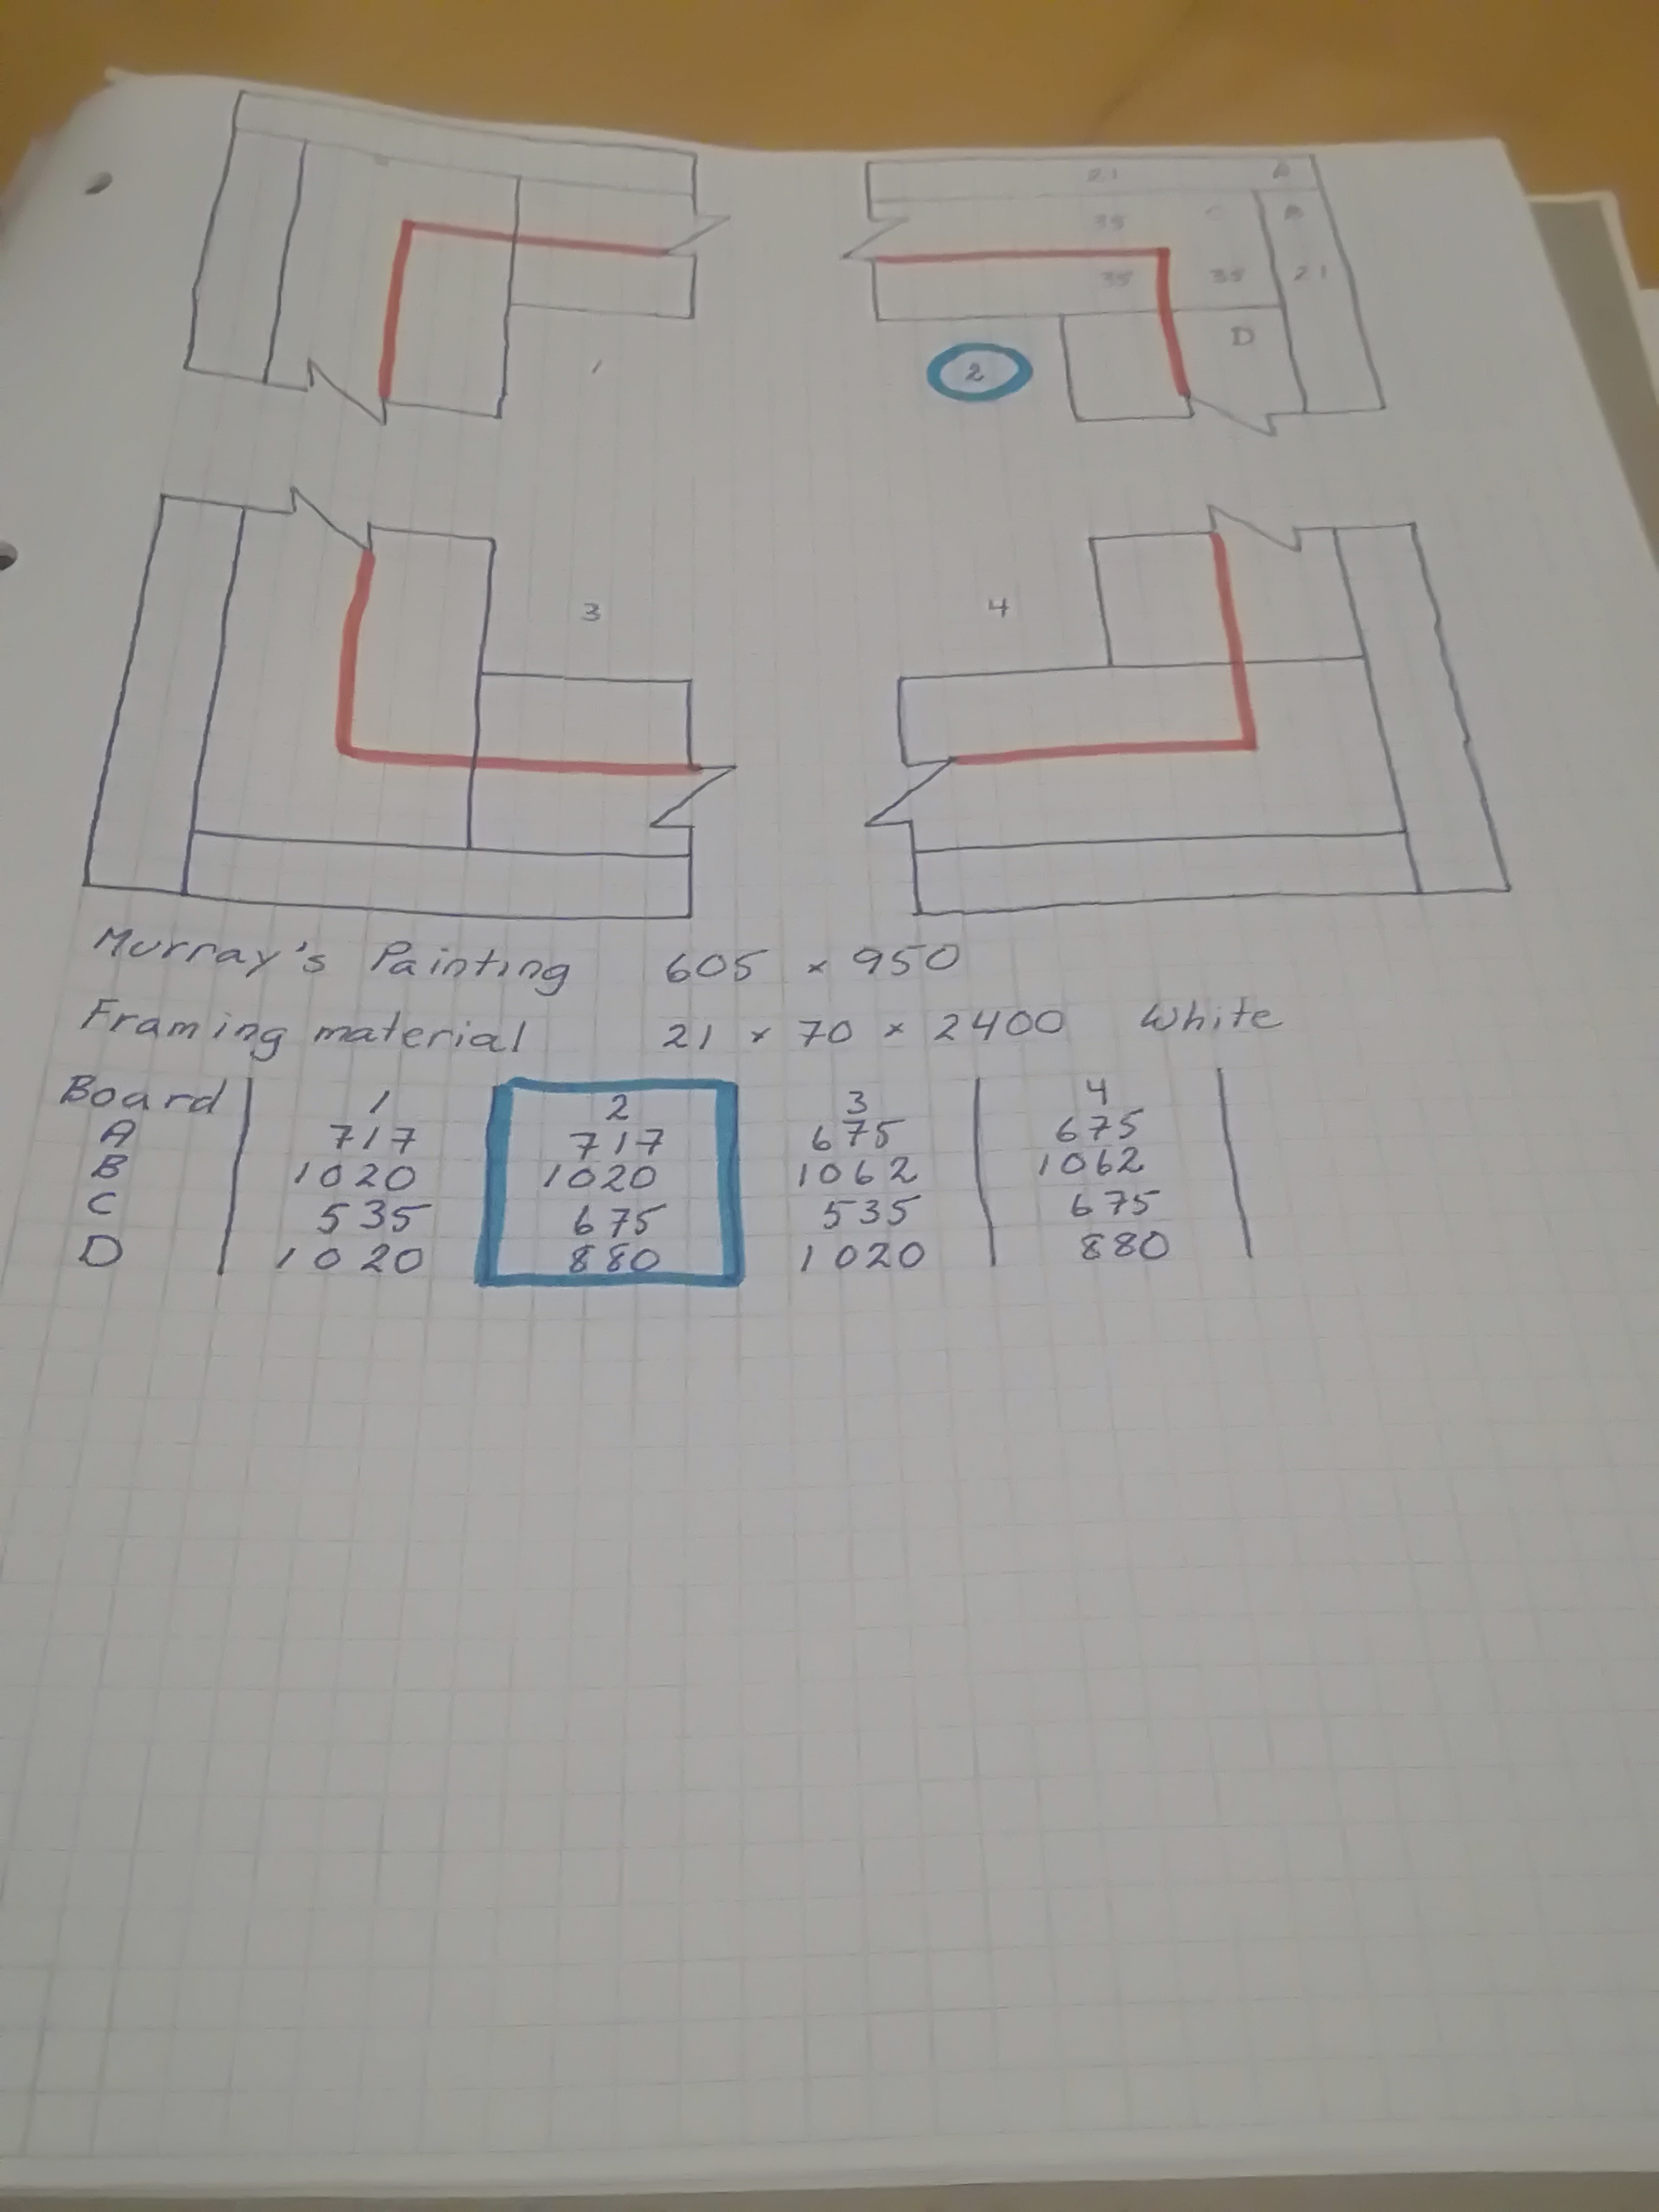
At the moment, the design distance between the painting and the frame is 35 mm. Reflecting on this, it seems too generous. Excessive. Before anything permanent is done, I will make a jig, and invite comment. I suspect that the gap will be changed to somewhere between 30 and 10 mm. I suspect it will look best if the distance is the same as the thickness of the frame on edge, 21 mm.
If any change is made in this dimension, then the cutting list becomes invalid. A new one will have to be produced. It is good that design activities like this are actually fun! Have I considered using a spread-sheet? Yes, but my brain needs the opportunity to calculate more than I need instant gratification.
Production Design
Materials
- 3 each 21 x 70 x 2400 Nordic pine lumber, pre-painted in white.
- masking tape
- wood glue
- 1.2 x 40mm brads
- white paint
- 4 each spacers Ø = 15mm x 10 mm
- screws 4,0 x 40 mm
Equipment
- cross-cut saw
- brad nail gun
- 90° assembly jig
- Torq T20 screwdriver
Process
Using a cut list that details the cuts to be made on each board, place masking take on the board where it is to be cross-cut. Measure the length and cut. Remove masking tape.
Assemble the pieces one corner at a time in the assembly jig, fasten with glue and brads. When all four corners are complete measure diagonals to ensure the frame is square. Adjust as necessary. Clamps should not be necessary.
There should be 4 ends, each 21 x 70 mm, that require painting. Paint.
The stretcher of the painting will be attached to the frame using stainless steel wood screws to prevent damage to the painting. The painting will only be attached at four points. Two screws will be attached onto the top stretcher, and two onto the bottom, 60 mm in from the side and 20 mm in from the top/ bottom. Between the frame and the stretcher there will be a 10 mm thick spacer.
I’m looking forward to seeing the painting framed.
Yes, I am planning on picking up all the necessary materials this coming Wednesday.