
This weblog post is the ninth of a series of about optics and optical equipment. It is about hand lenses, stereo microscopes, compound microscopes and digital microscopes, in that order!

In my childhood, my father, Edgar, called Mac (1906 – 1991), would regularly take my sister and I for long walks out in the woods. A favourite location was Buntzen Lake. It is 4.8 km long occupying an area of 182 hectares. Located north of Port Moody about 24 km from our house in New Westminster. These walks were the main source of my continued enjoyment of nature.
We usually circumnavigated most of the lake. Today, after the construction of a suspension bridge, the usual walk is about 8 km long, with which would take 4 – 5 hours, and an elevation change of 100 m. Before the suspension bridge was built, a shorter walk around most the lake took about 3 hours, with limited elevation change, possibly 20 m. The lake has provided hydroelectric power since 1904.
Both of my parents were hunters and fishers. One of my mother, Jennie’s (1916 – 2021) only regrets, was her failure to buy a particular rifle when she had the opportunity. Yet, she travelled the world, visiting in excess of 100 countries. As a parent to an adopted child, I think she was somewhat surprised that I had so little interest in her pastimes. In my childhood I had an interest in birds from pigeons to loons to falcons.
In my early teenage years, I developed an interest in marine biology, especially plankton, but also marine invertebrates. Several books led me in this direction. One of the first was, Rachel Carson’s (1907 – 1964) The Edge of the Sea (1955). This was actually the third of her Sea trilogy, and looked at three edges: rocky, sandy and coral. The focus was on the east coast of North America. The rocky shores were typical of the Cape Ann region of Massachusetts, the sandy shores were of the intermediate coast off the Carolinas, while the corals were part of the Florida Keys.
I also wanted to read something related to the Pacific Coast, where I lived. This was found in Ed Ricketts’ (1896 – 1948) Between Pacific Tides (1939). I am sure I read a later edition than this. Currently, I own a copy of the 5th edition, from 1985.
The third work that inspired me was Ralph Buchsbalm’s (1907-2002) Animals Without Backbones (1938). Originally, I owned a Pelican edition in two volumes from 1957. My current reference copy is from 1987, in a single volume.
I acquired a compound microscope in 1962, for my 14th birthday, As explained in Optics 6, I used this with a camera to take photomicrographs of plankton and other organisms. In high school use of a compound microscope was part of the biology course. When, I studied biology at college, we were required to use hand lenses, stereo microscopes and compound microscopes, in that order.
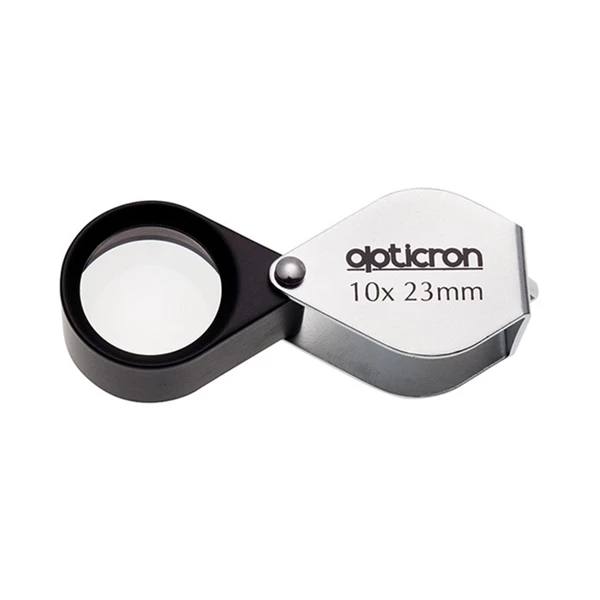
The college biology program I undertook emphasized field trips to various ecological areas, and in all seasons. In addition to other equipment such as skis, we were required to have a pocket lens = inspection magnifier with us that could magnify up to 10 ×, for field trips. The lens can be made of glass or plastic, with plastic being cheaper and lighter but of lower optical quality and more difficult to clean. I prefer glass lenses.
An element is an individual piece of glass within a lens. Hand lenses can be constructed with one (singlet), two (doublet) or three (triplet) lens elements. Each element is specially shaped to correct for a particular type of optical distortion so the more elements, the higher quality the image. A singlet is gudenuf.
A 10 × magnification hand lens is adequate for most purposes. Higher magnification lenses are harder to use. Large diameter lenses provide a wider field of view = they are easier to use but, but are more expensive. I have always used a hand lens 20 – 30 mm in diameter. The description of a hand lens often follows the same convention as binoculars, with lens magnification followed by the lens diameter in mm. Sometimes, the order is reversed.
Some people comment that the use of a hand lens can be challenging. People often start holding the lens close to their eye then a) move the subject closer to your eye (if the object is moveable) or b) move their head with the hand lens, closer to the subject until it comes into focus (is the object isn’t moveable).
Some lenses come with multiple LED-lights for effective illumination in weak light. Some are further optimized with UV lights, so that it is possible to see fluorescence, not just in plants, animals and minerals, but also postage stamps and paper currency.
A lanyard should be fitted to the hand lens. I use braided mason’s twine. It is durable and comes in a variety of bright colors. Mine comes packaged will three 80 m bunts, in red, blue and yellow. Braiding adds strength and reduces tangling. Bonded twine means that it is coated to make it stiffer and more resistant to wear and moisture. Blue is a useful colour, since it is not often found in nature. The lanyard should be put around the person’s neck, so that the lens won’t be lost.
Stereo Microscope
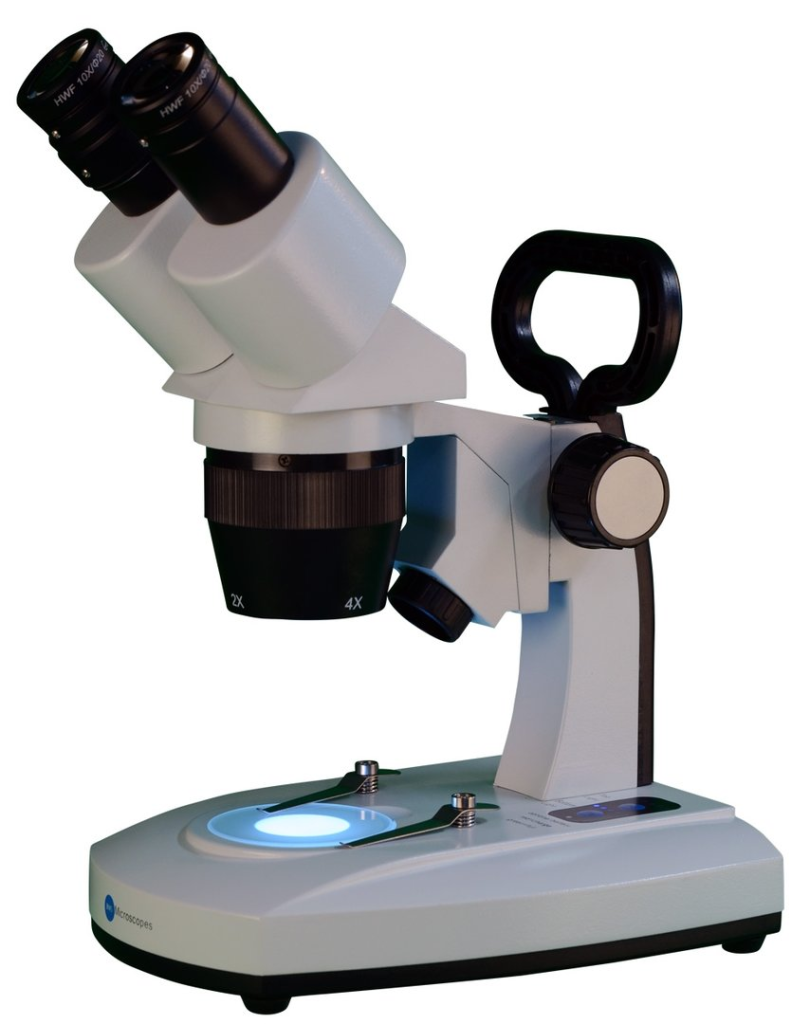
When we returned to our classroom from a field trip, we would re-examine specimens using a stereo microscope. My current Dutch BMS stereo microscope has 10 × eyepieces, with a 2 × and 4 × combined objective, giving a magnification of either 20 × or 40 ×.
This Galilean optical system used here is an arrangement of fixed-focus convex lenses is used to provide a fixed magnification, but with the crucial distinction that the same optical components in the same spacing will, if physically inverted, result in a different, though still fixed, magnification. This allows one set of lenses to provide two different magnifications. Yes, it is important to know what magnification one is using, so that sizes in the microscope can be converted into real world sizes.
In my student days, stereo microscopes were commonly used as an aid for dissection. The major problem with this microscope is that it is not designed to take photomicrographs.
Modern stereo microscopes are often coated with anti-bacterial paint. It is thanks to Charles Wheatstone ( 1802 – 1875) that stereo microscopes have two eyepieces. He discovered stereopsis = the fundamentals of depth perception, in 1840, allowing people to see objects in three dimensions. Eyepieces are typically inclined 45º with at least one tube being adjustable ±5 diopter, so that users can adjust the microscope to their eyes once. There should be no need to use eyeglasses while viewing through a microscope. There is a focussing knob, sometimes two for coarse and fine adjustments.
Illumination in a stereo microscope is most often incident = reflected from the surface of an object, rather than diascopic = transmitted through an object. In the new millennium, LED lights have been used for both incident and transmitted illumination. LED lights have a life of about 50 k hours. Usually, they work from mains electricity, 230 and 110 V through a transformer. Many stereoscopes include a rechargeable battery, so they can work offline, for up to about ten hours, with three hour charging times. This means stereo microscopes can now be taken out into the field, something that was not possible in my student years. Today it is common withDouble Pole Double Throw (DPDT) switches offer full separation from the mains power. The claim is safety, but I think part of the reason is related to prevention of battery drain. Power cords are typically detachable, and can be fitted with a C13 connector to the microscope and an appropriate power socket connector. For the model shown in the photograph, length x width x height = 150 x 133 x 358 mm, mass = 2.3 kg
In addition to its uses in biology, I also use my stereo microscope to inspect soldering and to examine electronic circuits.
Compound Microscopes
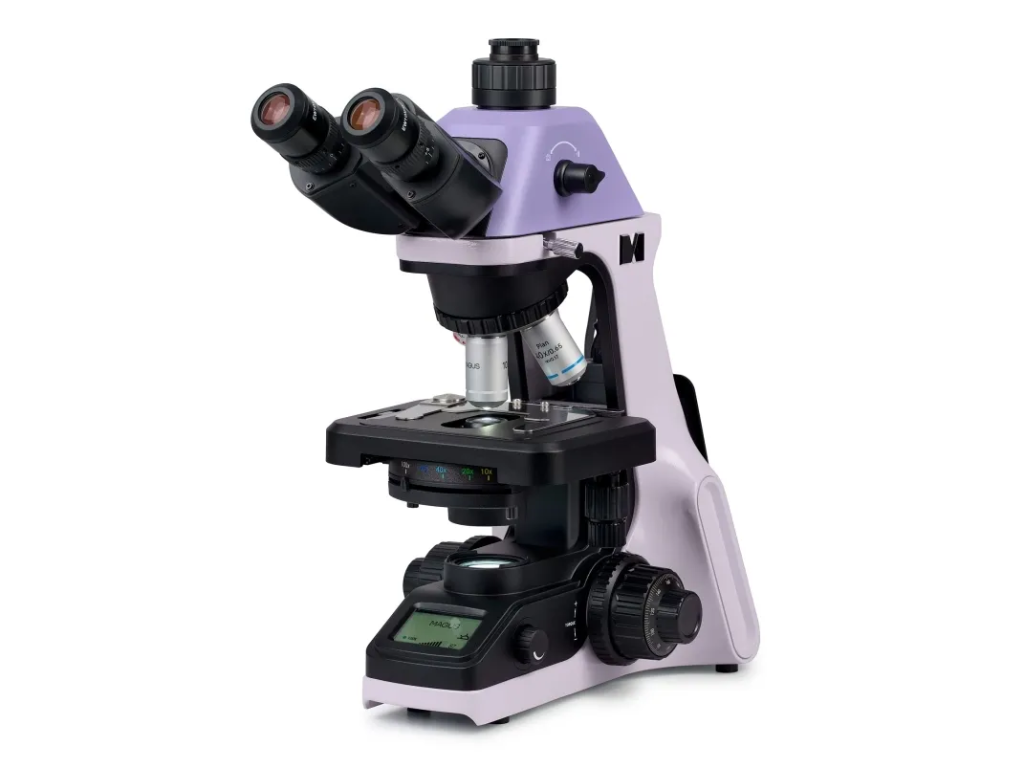
The compound microscope shown above is a MAGUS Bio 240T, a biological microscope, mainly used for education. It is designed for work with transparent and translucent biological specimens using brightfield illumination. The microscope has a revolving nosepiece suitable for four plan achromatic objectives . The 3W LED illuminator, has an intelligent control system to remember and maintain a different light intensity for each objective. There is an LCD screen, which displays operating parameters. The operational life of the illuminator is 50 k hours = 30 work years = almost a lifetime of work! Color temperature can be changed within the range of 3000 to 7000 Kelvin.
Magnification is from 40 – 1000 ×. The trinocular head has a vertical tube for mounting a digital video camera. There are two eyepiece tubes, both equipped with diopter adjustment rings, The head revolves and can make a full rotation. There are 2 standard 10 × /20mm eyepieces, fitted with rubber eyecups.
The microscope is equipped with coarse (left side) and fine (right side) focusing knobs. The coarse focus lock knob is located on the left side. It is used for adjustment after switching objectives.
The specimen stage is equipped with a belt drive mechanism that gently moves the specimen along the stage. The specimen holder is mounted with two screws. If necessary, it can be removed.
An Abbe condenser is centered along the optical axis. It is fixed, preventing the condenser from being moved accidentally, an important consideration in an educational microscope. The condenser has a numerical aperture of 1.25. Markings indicate objective magnifications. The iris diaphragm is adjusted by a knob. This can be used to increase image contrast, improving specimen visibility.
Selected settings are displayed on the LCD screen. Using a pair of knobs, you can adjust the light, set the sleep mode, or set the auto-off time.
After installing the microscope on the work area, the power supply and power cord can be hidden. The side openings in the stand act as handles allowing the microscope to be carried. or moved around.
Infinity plan achromatic objectives: 4×/0.10; 10×/0.25; 40×/0.65 (spring-loaded); 100×/1.25 oil (spring-loaded); Eyepieces 2 each 10×/20mm with long eye relief; 2 each eyepiece eyecups; C-mount camera adapter; light filter; bottle of immersion oil; power adapter = transformer, and power cord; dust cover; user manual. Additional equipment: Digital camera; calibration slide; monitor. Size (LxWxH) 450 x 300 x650 mm; mass = 9.8 kg; Mass = 9.8 kg
Digital Microscopes
Is a digital microscope a real microscope? This is a question I regularly ask myself, with the prepared answer being no. Unfortunately, for my prejudiced view of the world, digital microscopes are becoming better. Yet, my mindset, formed in the 1950s, still has difficulties accepting these as anything more than a slightly different digital camera, inferior to an optical microscope. The good news is that my world view is slowly changing. I have avoided purchasing a new compound microscope, in the hope that a digital microscope will make that investment unnecessary.
Part of the reason for my initial skepticism was that the first digital microscope I met was being sold as a toy. It was low-powered with a plastic lenses, and used a USB interface to connect to a computer monitor. It was incapable of working like a real compound microscope. A real digital microscope has to be more than a webcam attached to a macro lens.
An acceptable digital microscope should be computer controlled and automated, allowing advanced image analysis. At a minimum, it should be able to find/ calculate distance and area measurements. In a Wikipedia article about this topic, quantitation of a fluorescent or histological stain are mentioned.
What at one time was called USB 3.2, released in 2017, with two lanes of 10 Gbps simultaneously, with a maximum transfer rate of 20 Gbps over a USB-C connector. This is now called 3.2 Gen 2×2 = SuperSpeed USB 20 Gbps = USB 20 Gbps. Whatever its name, this allows a video resolution of up to 4k = 4096 × 2160 pixels, at a frequency of 60 Hz. Variable illumination should be provided with an LED source close to the camera lens. Modern, modestly priced digital microscopes offer magnification from about 20 × to 400 ×, sometimes more.
The real challenge with digital microscopes is obtaining software with device support. μManager provides professional microscopy software able to connect to a large number of devices. Some types of hardware are automatically supported, others not so much. μManager’s open device interface lets anyone write code to control microscope-related equipment, resulting a large and growing list of supported equipment. A scripting interface makes it possible to accomplish tasks that can not be executed within a graphical user interface (GUI).
The advantage of a digital microscope should not just be its low cost, and eyepiece elimination. It should also eliminate the mess and work of staining and preparing slides. With the use of sensitive photon-counting digital cameras, digital microscopy should be able to avoid damaging vulnerable biological samples.
The more advanced digital microscope units have stands that hold the microscope and allow it to be racked up and down, similarly to standard optical microscopes. Calibrated movement in all three dimensions are available through the use of a step motor and automated stage. The resolution, image quality, and dynamic range vary with price. Systems with a lower number of pixels have a higher frame rate (30fps to 100fps) and faster processing. The faster processing can be seen when using functions like HDR (high dynamic range). In addition to general-purpose microscopes, instruments specialized for specific applications are produced. These units can have a magnification range up to 0–10,000×, are either all-in-one systems (computer built-in) or connect to a desktop computer. They also differ from the cheaper USB microscopes in not only the quality of the image, but also in capability, and the quality of the system’s construction giving these types of systems a longer lifetime.
Conclusion. When people think of optical devices for biology, they think that they will get the most value for their money be acquiring a compound microscope. For me, the most value comes from a hand lens. After this, a stereo microscope is the most practical. It is only if one is interested in cellular biology that a compound microscope is needed. In my old age, I have lost interest in preparing slides, so that I can view samples with a compound microscope. Appropriate preparation takes time. Samples have to be cut very thinly. Most often they have to be stained, so that contrasting parts in a cell can be seen. When pressed for advice, buy a good quality hand lens. Use it for a year before even considering anything else. Except for people with an interest in cellular biology, that something else should be a stereo microscope. Use it for at least a year before investing in a compound microscope.
This post was originally written on Friday 2024-03-22 as Optics 2. It was saved, for the first time at 18:10. On 2024-04-09 at 20:06 it was scheduled to be published on 2024-06-29 as Optics 6. Later on 2024-04-25, it was rescheduled for 2024-07-06 at 12:00. On 2024-04-27, it was it was reconstituted as Optics 9, and rescheduled for 2025-01-25
On 2025-03-01, Optics 10 will be published. It is about digital cameras. On 2025-03-08, Optics 11 will be published. It is about photographic collections.